How to Prefix a banner to inbound emails
![]() Updated 2 years ago
by
admin
Updated 2 years ago
by
admin
It may be a requirement within EMS that all external emails are stamped with a banner notifying recipients that the email was received from outside of the business. This is particularly useful to help users decide if they are internal emails or not.
To stamp the top of your inbound email with the following message:
WARNING! This message originated outside of
%MailFrom%. This is case sensitive.- Navigate to Products ⟶ E-mail Security ⟶ Message Rules
- Click the + button to create a new Rule
- Enter a sensible name for the rule, like "Prefix Banner", and click the Add + button
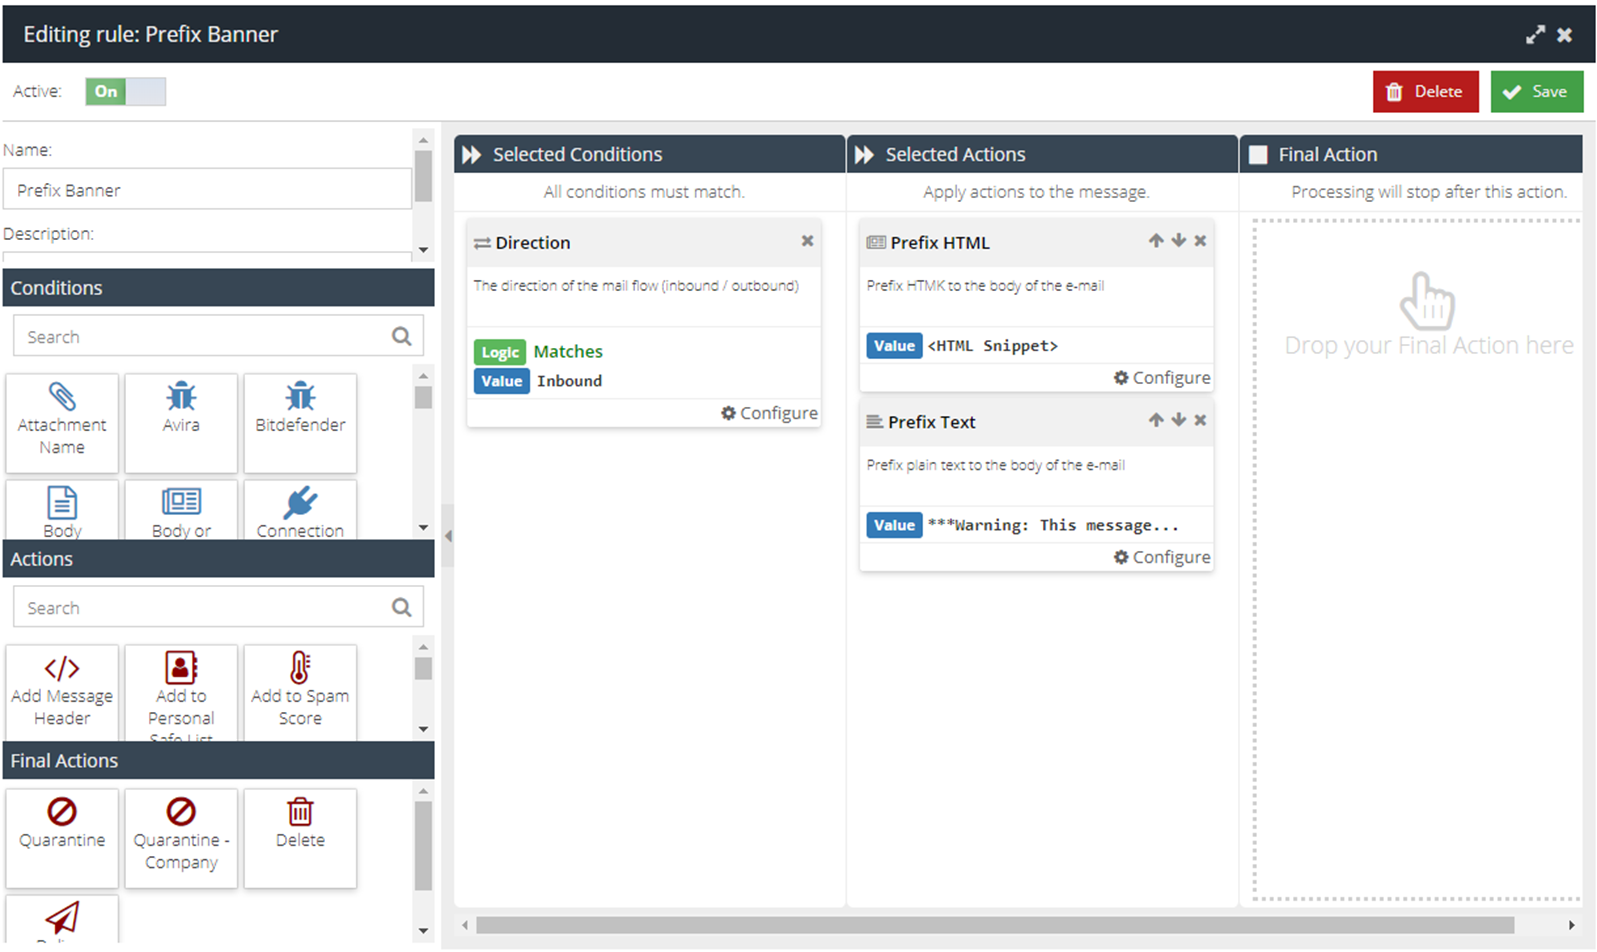
- Add or drag the Direction tile into the Conditions column and configure it with Matches set to Inbound
- Add or drag the Prefix HTML tile into the Actions column and configure this with the message you require
The above example can be created with the following HTML:
<p><span style="color: #ff0000;"><strong>WARNING!</strong></span><strong> This message originated outside of <Your Company Name>. Do not click on links or open attachments unless you recognize the sender and KNOW the content is safe.</strong></p>
- Add or drag the Prefix Text tile (for non-HTML email clients) into the Actions column and configure this with the message you require (e.g. a text version of the HTML message)
- Do not add a Final Action
- Make sure the rule is active by switching the Active toggle to On
- Click Save
- Drag the new rule to a sensible place in your Message Rules list. If your Service Provider has configured a set of sensible default Rules, placing this new rule above the Confirmed Phishing Rule is a good choice
The completed rule should look like this: