Configuring Microsoft Azure as an Identity Provider
![]() Updated 6 months ago
by
admin
Updated 6 months ago
by
admin
- Navigate to Products -> IDaaS -> Identity Providers and click the + button.
- Select Microsoft Azure from the list of available providers:

- Click Download Metadata to download an XML file that can be used to automatically configure your Identity Provider:
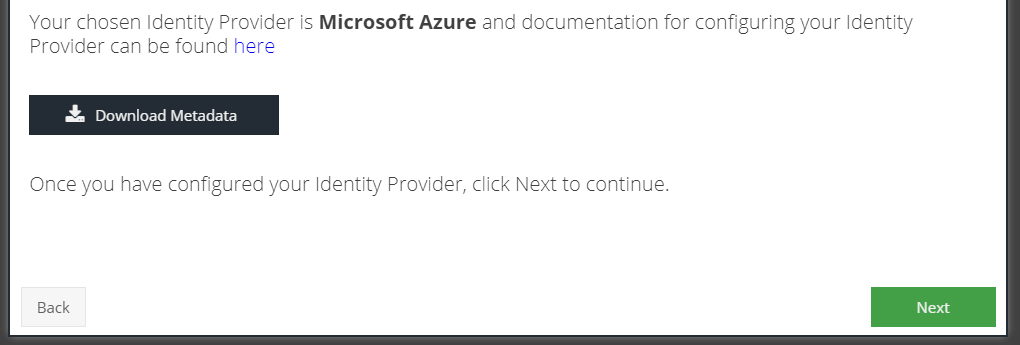
- Click Next.
- Log in to the Microsoft Azure portal and navigate to Enterprise Applications and click New Application followed by clicking Create your own application
At this moment in time the IDaaS product is not yet available in the Azure AD Gallery however it is coming soon
- Enter a name for the app e.g. IDaaS and ensure that Integrate any other application you don't find in the gallery (Non-gallery) is ticked
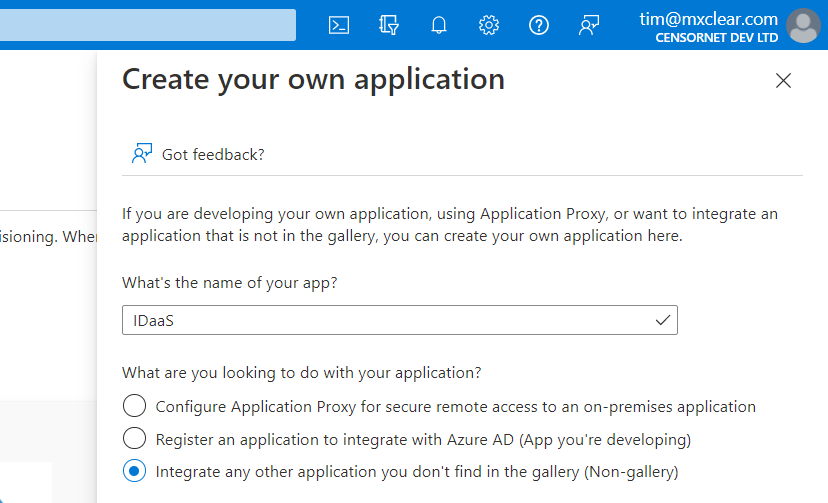
- Click Create and wait for the application to be created and opened.
- Click the Manage -> Single sign-on menu option on the left and then the SAML tile.
- Click Upload metadata file and select the XML file downloaded in step 3 above.
- The SAML configuration will be pre-loaded. Click Save.
- Scroll down to section 3 and click Download next to Federation Metadata XML
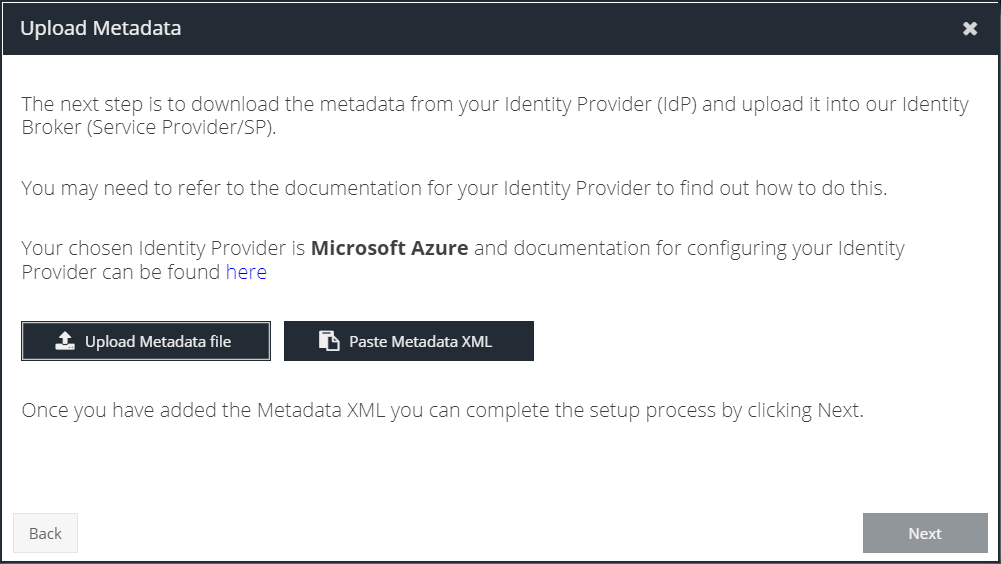
- Return to the Identity Provider wizard and upload the XML file
- Continue to connect at least one app to verify the configuration is working as expected