Installing the Outlook Add-in for CEA
![]() Updated 2 years ago
by
admin
Updated 2 years ago
by
admin
- Outlook Add-in
- Local Add-in Install
- 1. Login to your Archive.
- 2. Click on the Profile Menu.
- 3. Click on "Download Office Add in"
- 4. Click on Download
- 5. Open Outlook. Click "Get Add-ins" within the Ribbon Bar.
- 5. Click "My Add-ins" on the Left Menu
- 6. Scroll Down and Click "Add a custom add-in"
- 7. Browse and Select the .xml file downloaded previously.
- 8. Finished
- Making the “Add-In” (that uses OAuth SSO) available to Office applications.
Outlook Add-in
Installing & Using the Compliant Email Archive (CEA) Outlook Add-in.
CEA provides customers with a helpful Outlook add-in. The Outlook add-in allows users to browse their CEA without leaving the Outlook interface.
There are two options of install for the CEA Outlook Add-in, these are:
1. Local Deployment
Manually install the CEA Outlook add-in across your organisation for each computer. Preferable for smaller organisations.
Go to Local Deployment Install
2. Centralised Deployment
Centralized Deployment is the recommended way for an Office 365 admin to deploy Office Add-ins (Word, Excel, PowerPoint, and Outlook) to users and groups within an organization, provided the organization meets all requirements for using Centralized Deployment as outlined in this article.
Local Add-in Install
Installing the CEA Add-in Locally.
Installing the CEA add-in locally (1 computer) is an easy process and only takes a few minutes.
1. Login to your Archive.
Login to your archive using the credentials you have been given.
2. Click on the Profile Menu.
Login to your interface. Once you have logged in successfully, proceed to click the profile menu in the top right of the interface.

3. Click on "Download Office Add in"
When the profile menu opens, proceed to click on the "Download Office Add in" link.
4. Click on Download
After clicking on "Download Office Add in" a modal should appear. Proceed to click on "Download". This will download start the download of the add-in.
5. Open Outlook. Click "Get Add-ins" within the Ribbon Bar.
When Outlook has opened, click "Get Add-ins" within Outlook's Ribbon bar.

5. Click "My Add-ins" on the Left Menu
When the modal opens, proceed to click the "My Add-ins" button within the left hand side menu.
6. Scroll Down and Click "Add a custom add-in"
At the bottom of this window, you should see a link titled "Add a custom add-in"
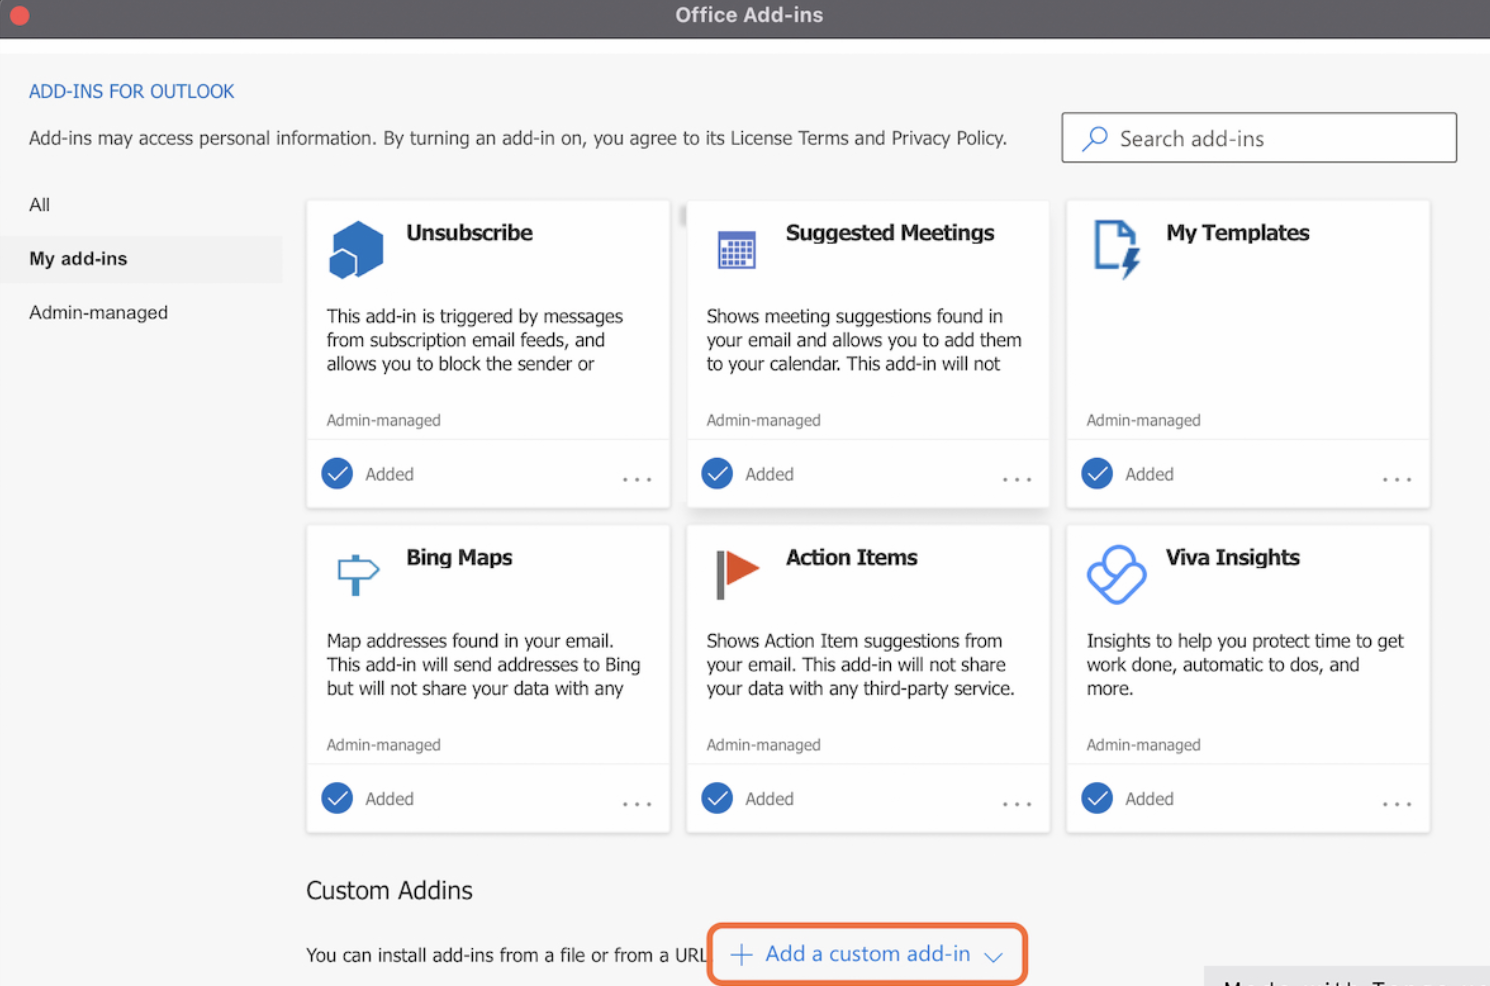
7. Browse and Select the .xml file downloaded previously.
In the file picker, browse to the .xml file downloaded at the start of the tutorial. Once uploaded, your add-in will now be available within Outlook's Ribbon Bar.
8. Finished
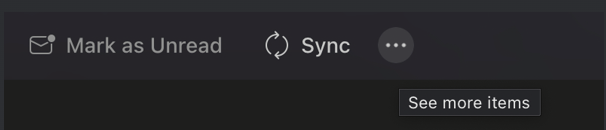
You have now installed the Outlook add-in. To access, please click the logo either within the Ribbon bar or within the more menu if using the new Outlook interface.
Making the “Add-In” (that uses OAuth SSO) available to Office applications.
- Obtain the Solar Archive Add-In “manifest” (an XML file) from the appropriate React UI.
- Open the React UI
- Click in the top right profile icon.
- Click "Download Office Add-in"
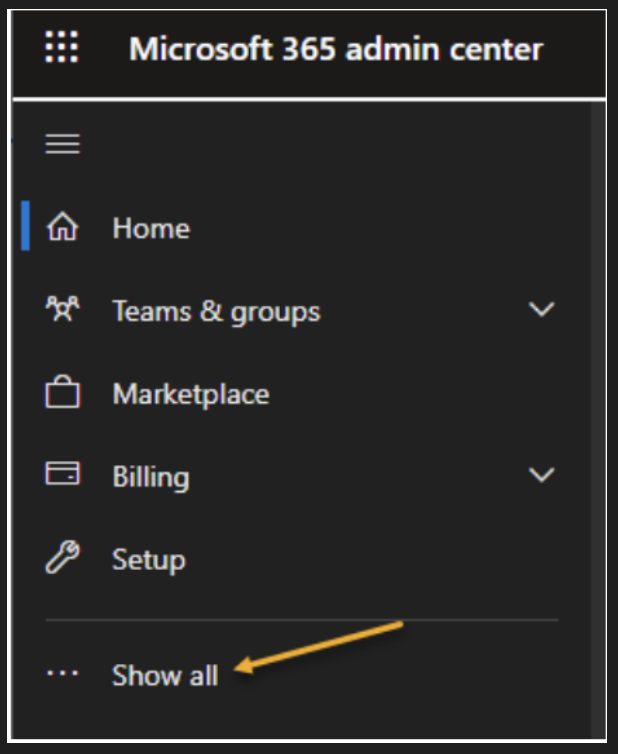
- Access the Microsoft 365 Admin center, and expand the menus so that the “Settings” menu shows.
- Open the Settings menu, and click the Integrated Apps menu. From here, click the “Upload custom apps”
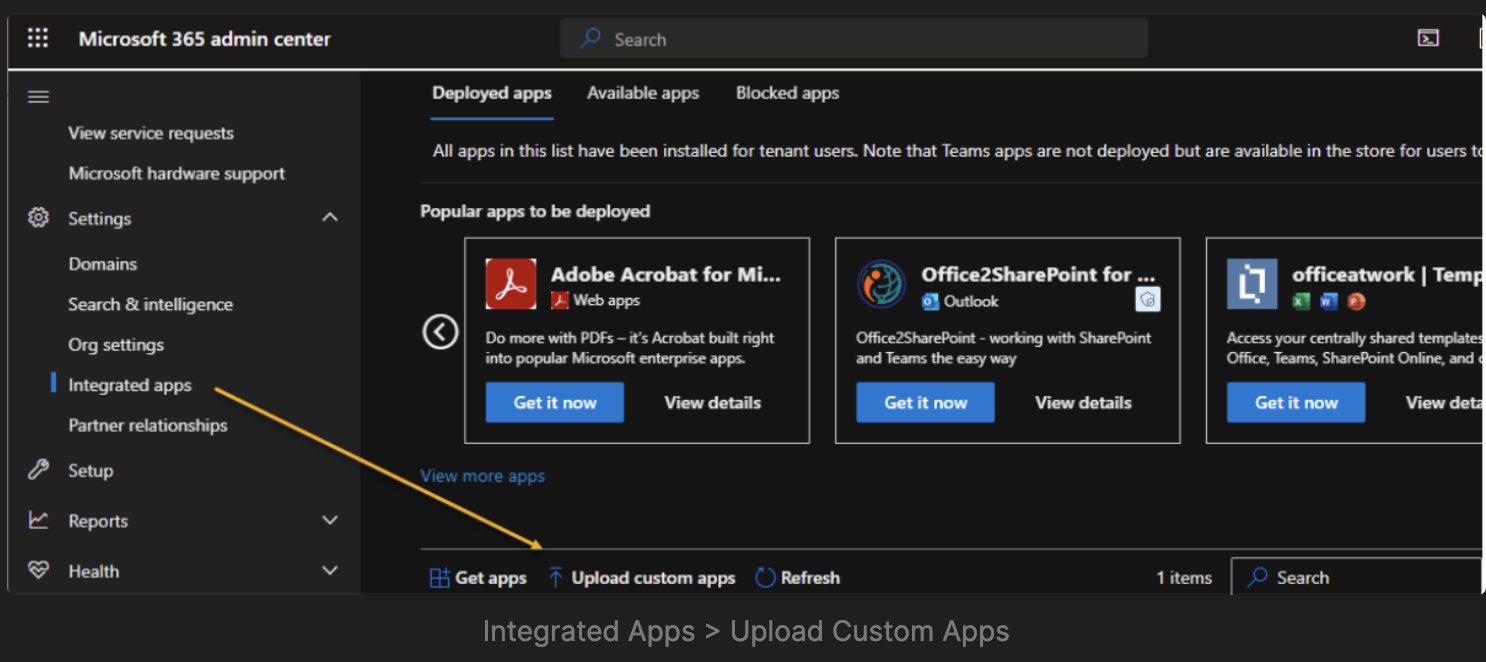
- From the Custom Apps panel, select the App Type of “Office Add-in”:
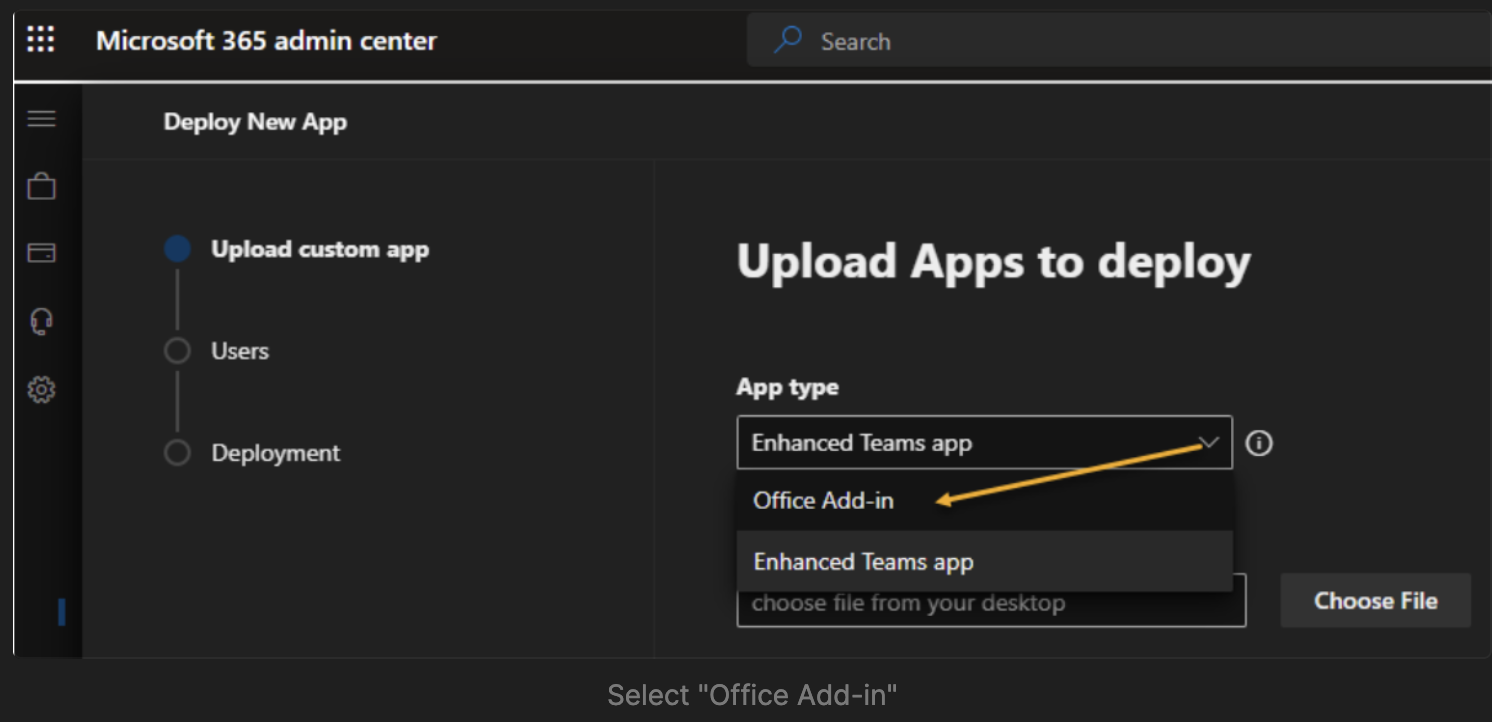
- Then select the Add-Id manifest file that you previously downloaded from the React-UI in Step 1.
- You can then select WHO this Add-In will be applied to.
- It displays in the Ribbon Bar (but only if an email is selected) or in the header section of the currently selected email.
- After a few minutes, the Add-in will become available in Outlook and OWA (all version).