CEA User Guide
![]() Updated 2 years ago
by
admin
Updated 2 years ago
by
admin
The Compliant Email Archive's (CEA) advanced search builder allows users to construct sophisticated queries in a streamlined and efficient manner. One can easily target specific channels such as Email or Microsoft Teams, as well as include or exclude certain keywords, recipients, and date ranges. Furthermore, when dealing with large sets of results, CEA filter options provide an additional layer of specificity, allowing users to fine-tune their results and retrieve only the most relevant entries.
Searching your Archive
How to search across your archive using CEA.
Conducting a basic search on your archive is straight-forward, and it should take no time at all to find what you're looking for. CEA can perform anything from extremely complex searches to basic one-word searches.
We class "Basic" searching as a simple query which could involve a keyword and/or recipients. In the instructions below, we will be adding a keyword and a recipient to a search.
After logging in to your archive, click the search bar in the top right of your interface. Once clicked, you should now see a search box where you can enter your search query.
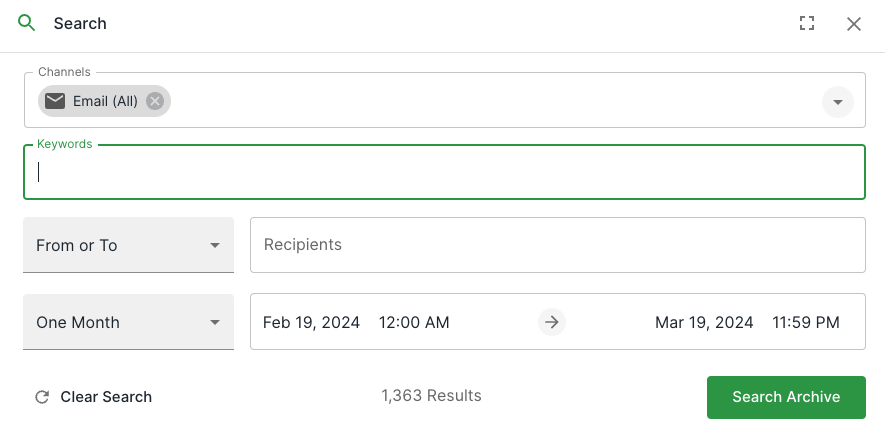
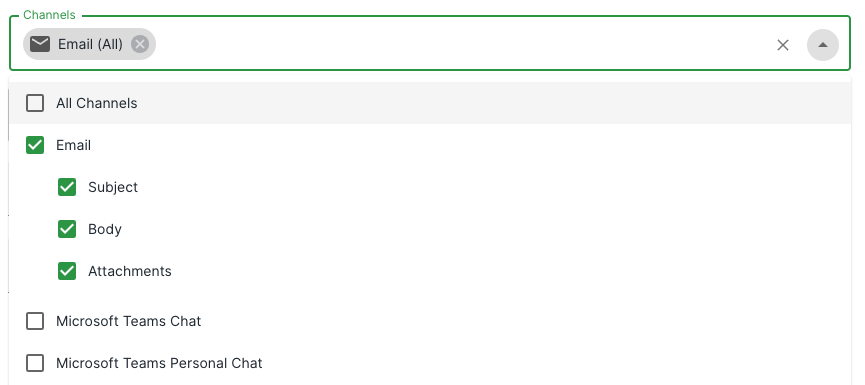
Channels
Channels are the various sources that have been set up for searching in your archive. These channels can be Emails, Microsoft Teams, Slack etc. You can individually choose which channel to search or you can search across all channels by default. To select individual channels, click the dropdown to open the menu, and toggle which channels you would like to search.
Keywords
Start by typing the keyword you would like to search for into the "Keyword" box. While typing, you will notice a dropdown appear underneath, which will allow you to "Include" all results with this keyword or "Exclude" any results that contain this keyword - for these instructions select "Include" or simply, press enter to add the keyword. We can search for multiple keywords at a time by continuing to type after pressing enter on each keyword we would like.
Recipients
After we've chosen keywords, we can add any recipients we'd like to include in the search. First, we can decide whether we'd like to show emails "From" or "To" this person - or - we can choose both if we don't know if we sent the email or they did.
To add a recipient, start by typing the recipient's email address you'd like to include within this search. Similarly to the keyword box, we will see a dropdown menu appear below the recipient box while we are typing, which will allow us "Include" all emails from this person, or "Exclude" all emails from this person. This dropdown menu will also show suggestions from what you have typed - making it convenient for you to find the correct person. To include a recipient, select an Include/Exclude option or press enter to add this recipient.
Date Range
Now that we have added the Keywords and Recipients we would like to search for, we can now choose the date range we'd like to include in our search. We default to 1 month as this is the most popular query. We can easily change the date range by clicking one of our quick choices in the dropdown, that will allow you to choose from 1 day to All-Time.
If you would like a specific date, you can select this by clicking the corresponding from and to dates in the field. After clicking this, you should see a calendar that will assist you in adding your specific dates.
To choose a time-frame for your search, click on the time options within this field. After clicking, you should see the time options pop-up appear to assist you in adding your specific times.
Saving your Search
How to save a search to your archive.
Once you've found the emails you've been searching for, you may want to save this specific search query for later or share this search with your colleagues. CEA makes saving a search query easy.
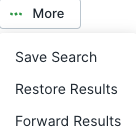
To save a search, first, you must have searched. On the search results page, you will have noticed a sub-navigation bar appear.
In the sub-navigation bar, you will see a button named "Saved Search". Clicking this button will open up the "Save Search" dialog window.
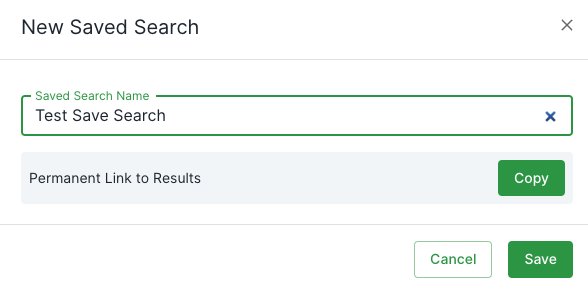
Once the "Save Search" dialog window is open you will be able to enter your desired name for this search in the "Saved Search Name" field. When you are ready, you can now click "Save Search". The search will have now been saved and easily accessible by visiting the "History" page under the "Saved Searches" tab.
If you need to quickly share your search, you can do this by clicking the "Copy" button within the "Permanent Link to Results" area of the "Save Search" dialog. Clicking this button will copy a URL to your clipboard that will allow others to access these results given they have the correct permissions.
Sharing your Search
How to share an archive search across your organisation.
Once you have searched, there are two ways you can now share your search with colleagues.
Sharing Unique URL
To share a unique URL of your search results, click the "Save Search" button on the sub-navigation. Once the "Save Search" dialog has appeared, you will see an option to "Copy" a permanent link to your search results. Once you have clicked the "Copy" button, the unique URL will be saved to your clipboard. You can now paste this URL to your colleagues.
Sharing Space
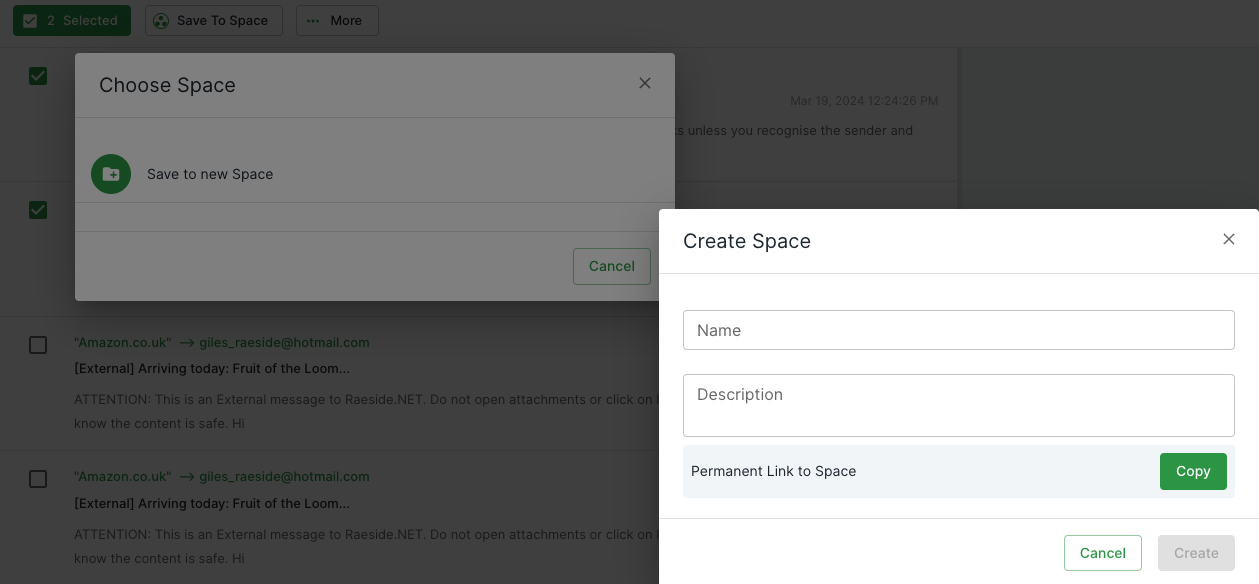
CEA makes sharing a specific set of results with others easy. To start sharing a set of results, you first need to search. Once you have found the set of results you would like to share, select certain results to save to space by checking their checkboxes. Once you have chosen specific results, you will now see a button named "Save to Space" in your sub-navigation bar.
On clicking the "Save to Space" button you will be presented with the "Save to Space" dialog which will allow you to save to an already created space or create a new one if you have not already.
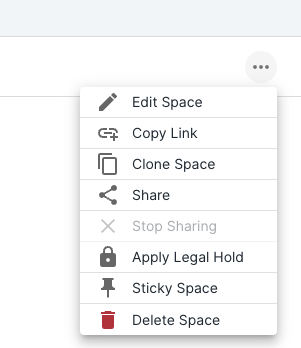
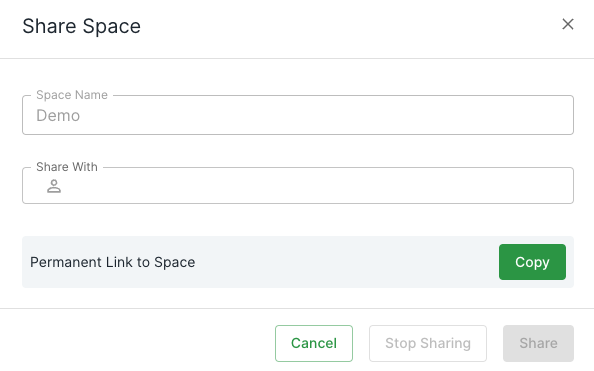
Once you have created a space and saved results to it, you can now browse the the "Spaces" page, once there you can now go into your space and click the "Share" button in the top right of the page.
Filtering Search Results
How to filter search results in your Archive
Filter by Recipients
Filtering by recipient count can be especially useful if you know an email had a large amount of CC's and BCC's, it's also a great way to find company-wide communications.
If you have a large result set that you need to reduce, filtering is a great way to do this. To filter results, click on the button called "Filter Results", this will open up the filter menu containing the available options you can filter.
Once the filter menu is open, click the option "Recipient Count", this will now open the recipient count filter options. You can filter by recipient brackets (e.g. 1-5), each dropdown is bespoke to your current search result set.
Filter by Attachment Count
Once you've conducted a search and found a lot of results you may want to refine the results and whittle it down to just the results with attachments. CEA attachment filters allow you to easily filter for emails that contain a specific attachment count or the size of the attachments.
Attachment Count
If you know an email contained a certain amount of attachments e.g. over 3 you can filter by this easily by first clicking the "Filter Results" button which will open the filter menu. On the filter menu, you will see an "Attachment Count" option, clicking this option will open the available attachment count filters.
You can choose:
- With Attachments
- Choosing this will filter emails, only showing those which have an attachment.
- No Attachments
- Choosing this will only show emails that have no attachments.
Attachment Size
You can filter as well by attachment size, this is particularly useful if you know someone has sent a large attachment to you previously such as a design file or a large PDF. Firstly, open the filter menu by clicking the "Filter Results" button, when the filter menu has opened, you will see an option called "Attachment Size". Clicking this option will display the sizes that you can filter your results by, there are numerous options and each is bespoke to your results.