Configuring Google Workspace OAuth and Service Account
![]() Updated 2 years ago
by
admin
Updated 2 years ago
by
admin
- Configuring Google Workspace OAuth and Service Account
- Step 1: Creating a Google API Project
- Step 2: Configure Consent Screen for OAuth
- Step 3: Set up Google OAuth / CEA Archive SSO
- Setup Google OpenId Connect
- Step 4: Link the OAuth Client ID to your Workspace
- Step 5: Integrate CEA Login Page
- Step 6: Set up Google Service Account for IMAP / Mailbox Reader
- Service Account Key
- Step 7: Configure CEA Settings
- User Configuration
- Running and Checking Progress
Configuring Google Workspace OAuth and Service Account
In this KB, we will guide you through the process of setting up Compliant Email Archive (CEA) systems with Google Workspace. We'll cover two main features: Single Sign-On (SSO) with Two-Factor Authentication (2FA) support using OAuth and IMAP setup for Mailbox Reader/Folder Rep/Mail Restore, utilizing a Google Service Account to access user mailboxes.
Step 1: Creating a Google API Project
- Go to the Google API Console by clicking this link: Google API Console.
- Create a new project or add an existing one and associate it with your Workspace domain. This project will be used to manage the API settings and credentials for CEA.

- Once the project is created or selected, all subsequent configurations will be done within this project.
Step 2: Configure Consent Screen for OAuth
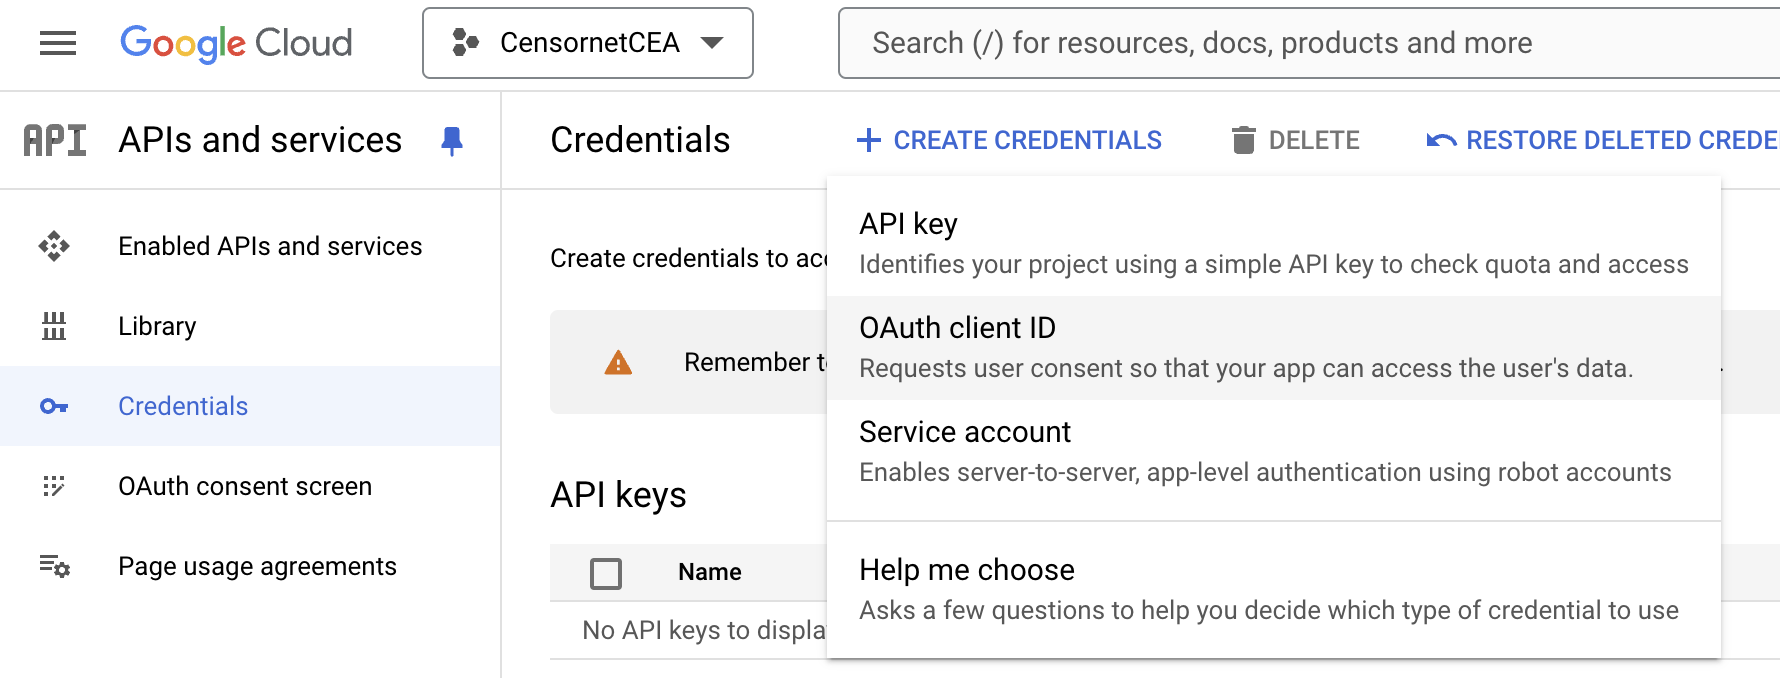
- In the Google API Console, navigate to the "Credentials" section.
- Click on "OAuth consent screen" from the left sidebar to configure the Consent Screen settings.
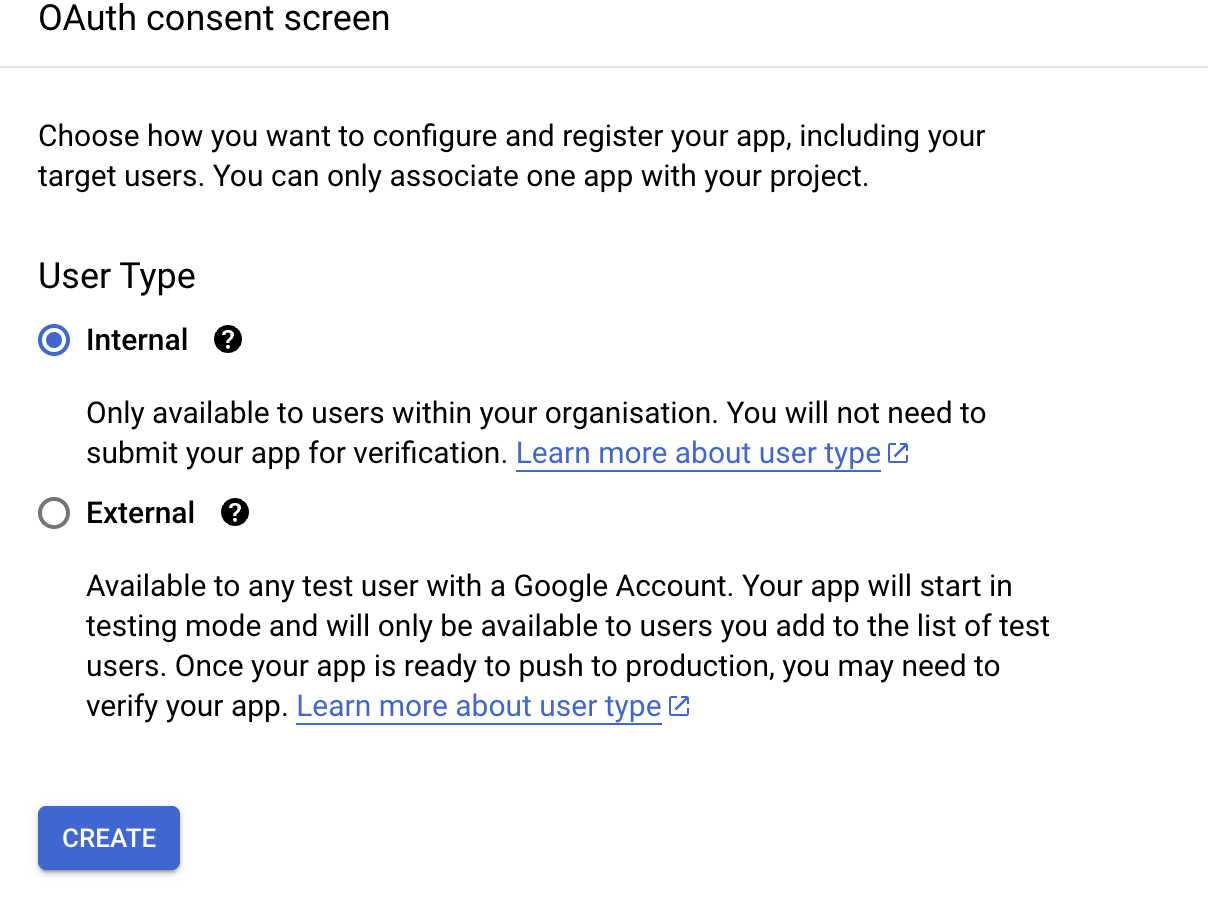
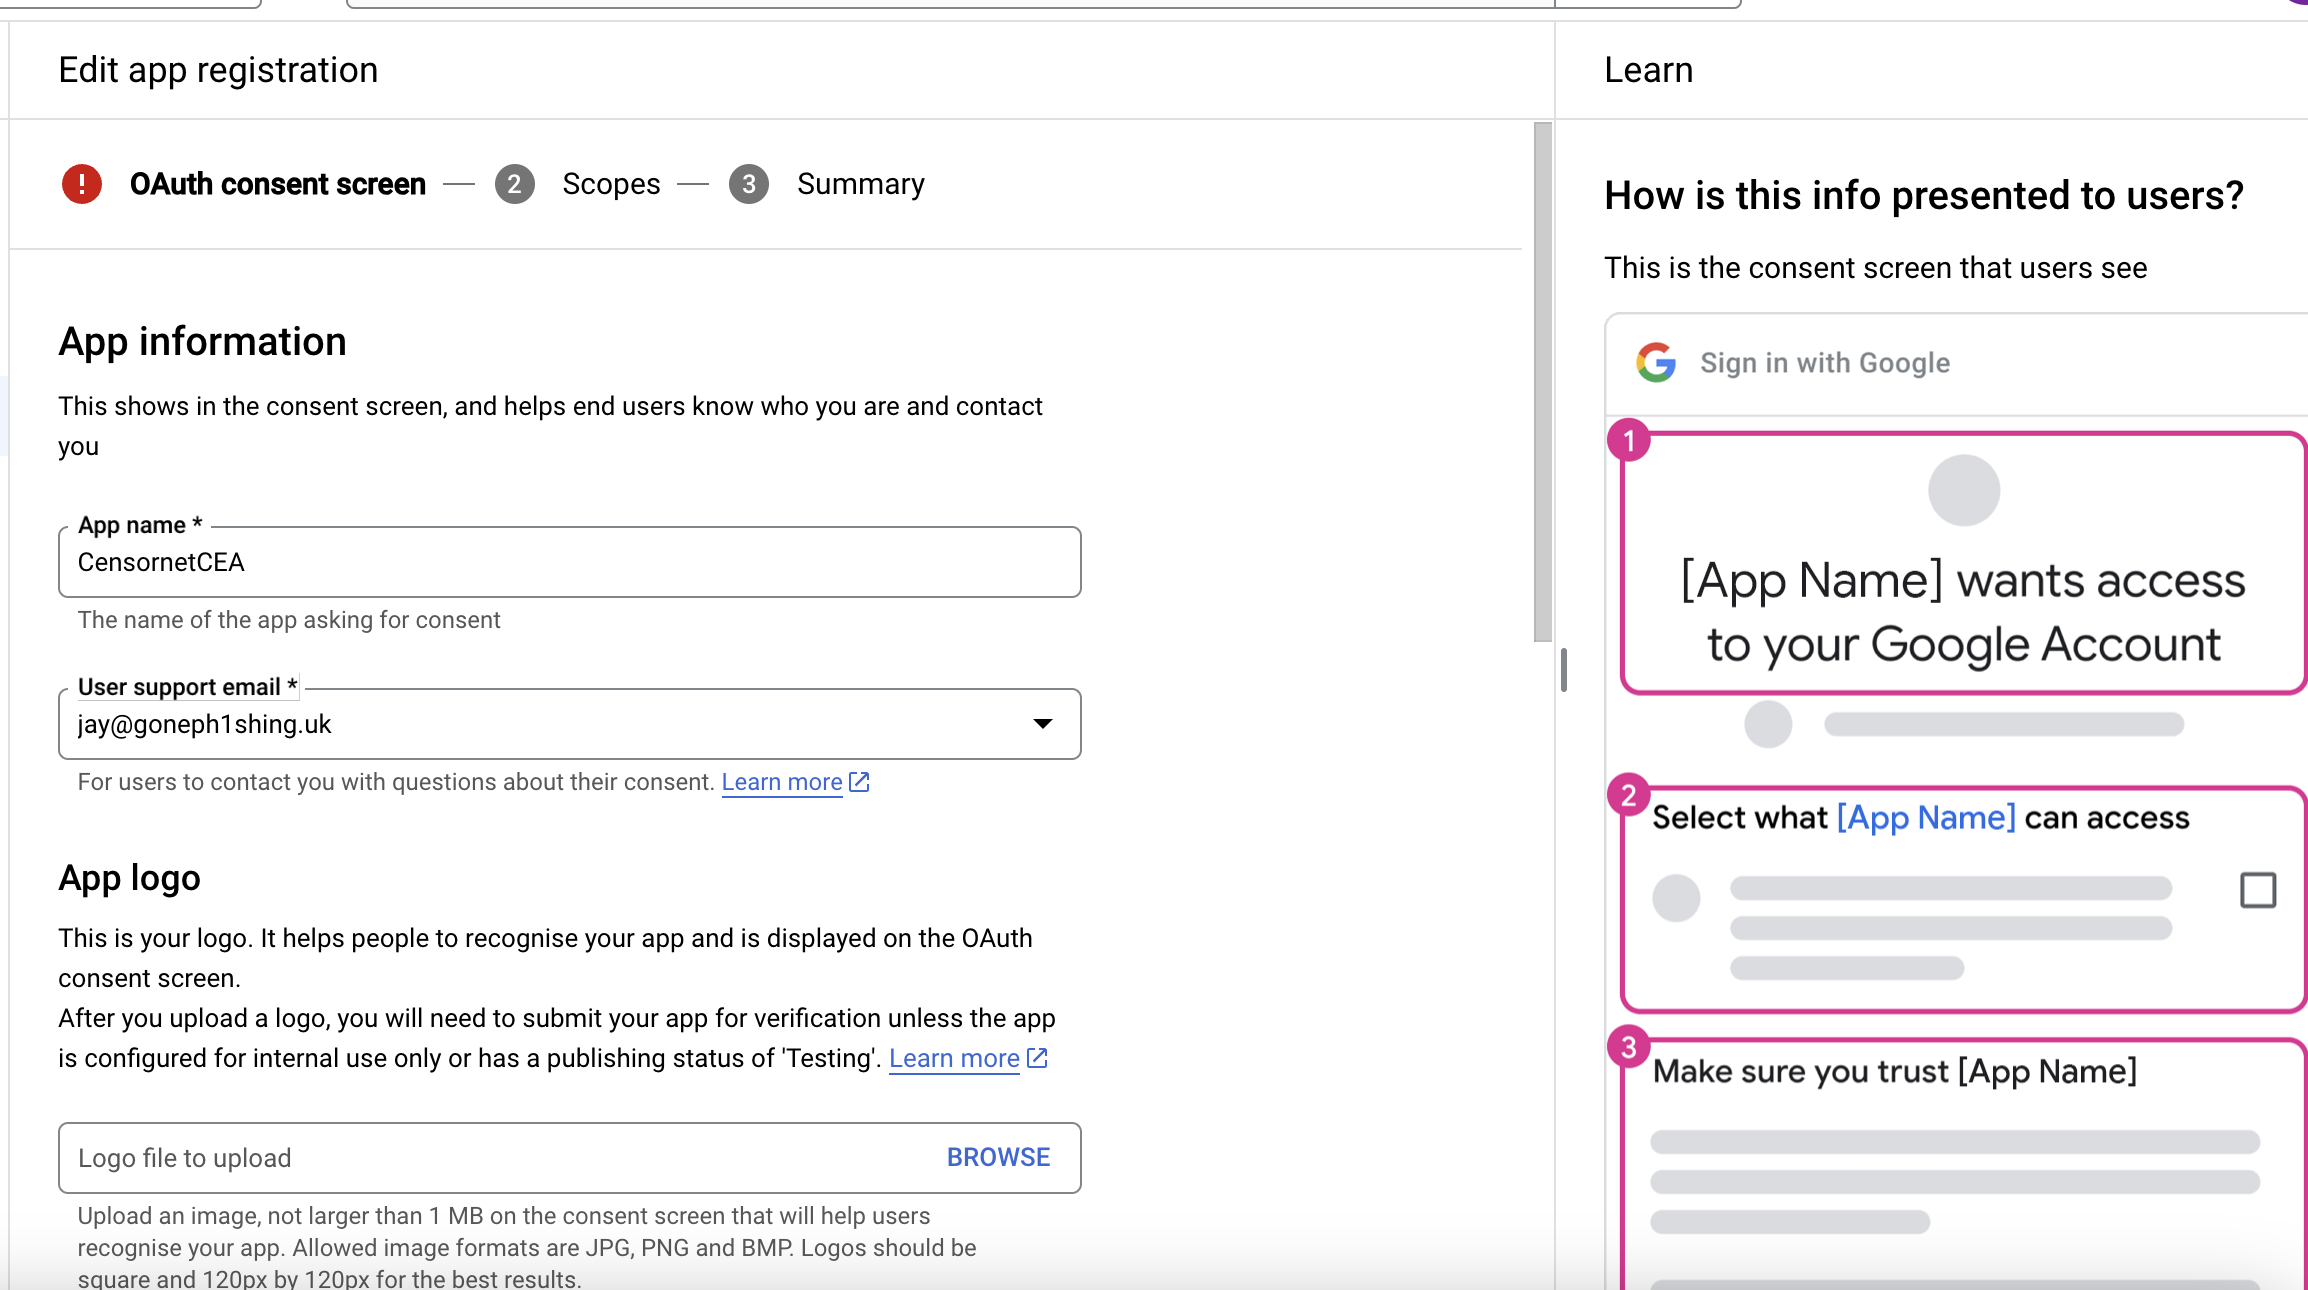
- Create a new Consent Screen and specify the necessary information, such as the App name, User support email, User Type (Use Internal) and Developer contact information. (It is just details to display on a consent screen - so enter any details that seem reasonable. It is non-binding, non-critical, display only information to displays when an end user tries to use the 'app'.)
- Customize the Consent Screen as needed to provide a clear and user-friendly experience for your users during the OAuth login process.
- Save the changes to the Consent Screen.
Step 3: Set up Google OAuth / CEA Archive SSO
- In the "Credentials" section of the Google API Console, click on "Create Credentials" and select "OAuth client ID".
You will be asked to "CONFIGURE CONSENT SCREEN"

Complete all the required sections and select "SAVE AND CONTINUE".
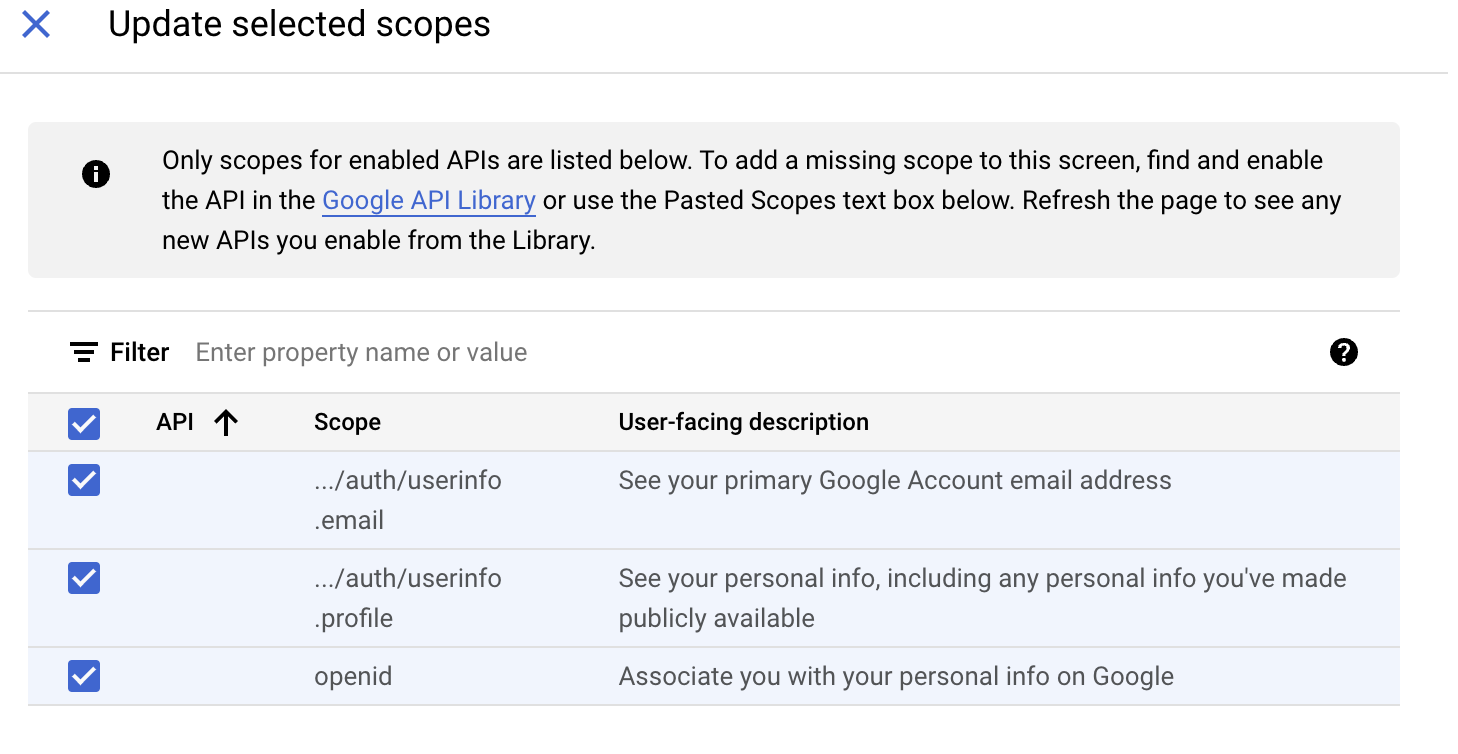
Scopes
Scopes can be left to default – the system should automatically select the first 3 entries – userinfo.email / userinfo.profile and openid. If not please add them, these would be required to support the Login phase.
Select "SAVE AND CONTINUE", then "BACK TO DASHBOARD"
Setup Google OpenId Connect
- Log in to the CEA system as an Administrator (if this role has not been enabled for your environment, please contact your service provider for assistance).
- Under the Adv. Configuration menu: select the SSO - OAuth menu option and create a new connection.

- Now, back on the Google side: On the “Create OAuth client ID” panel, start by selecting type “Web application”:

- Enter a name for your OAuth client, and in the "Authorized redirect URIs" field, specify the redirect URL provided by CEA. You can find this in (CEA “SSO OAuth” panel)
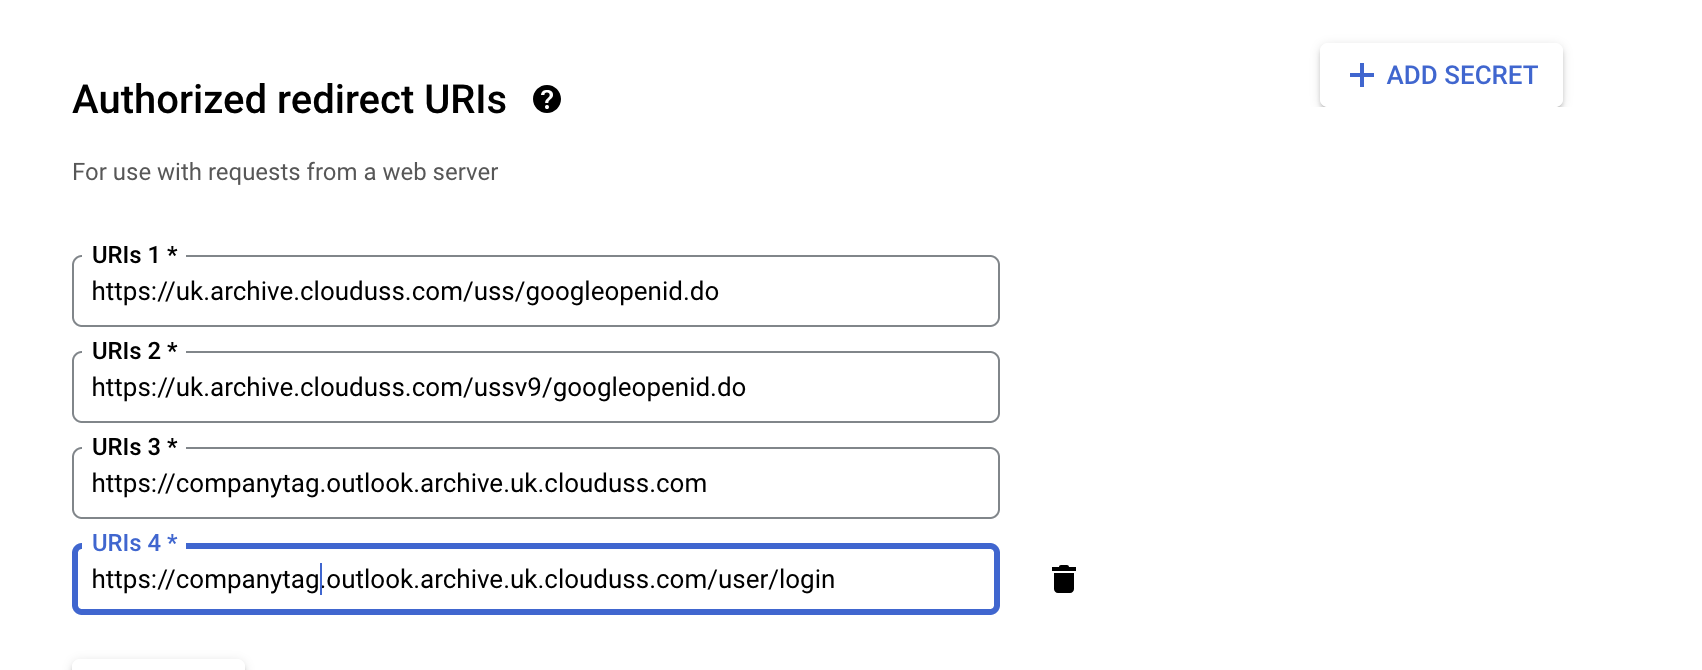
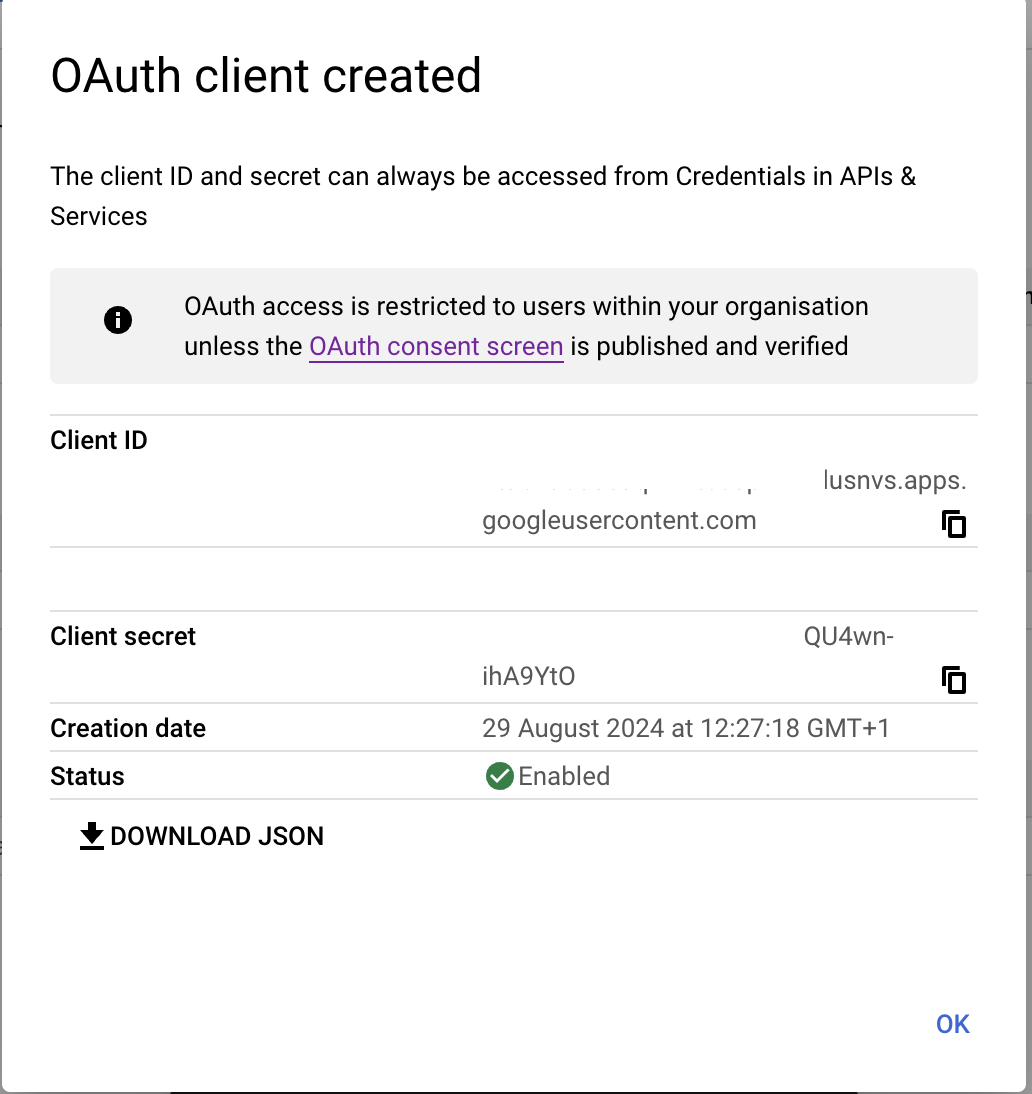
companytag@uk.archive.clouduss.com for the UK environment or companytag@archive.clouduss.com for the EU environment.- Click "Create" to generate the Client ID and secret values for the OAuth Client. This will open a screen popup with the Client ID and Client secret, which you will need to copy to the CEA Google OpenId connect configuration.
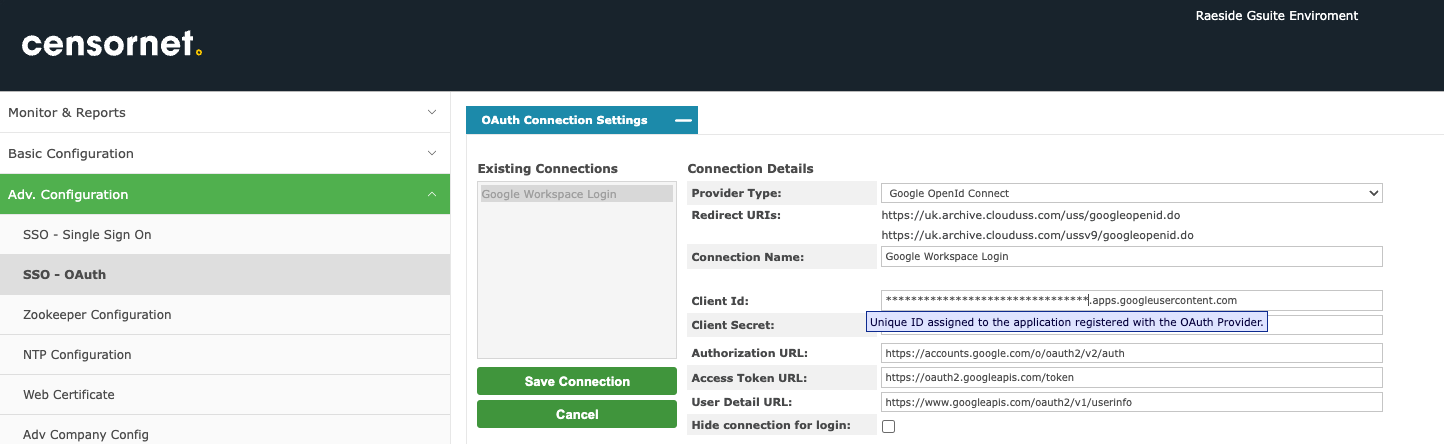
- We can now complete the CEA settings as follows:
Authorization URL:
https://accounts.google.com/o/oauth2/v2/auth
Access Token URL:
https://oauth2.googleapis.com/token
User Detail URL:
https://www.googleapis.com/oauth2/v1/userinfo
Username: | |
Mail: | |
Firstname: | given_name |
Lastname: | family_name |
Secondary Addresses: |
Step 4: Link the OAuth Client ID to your Workspace
- Access your Google Workspace administration area (admin.google.com) as an administrator.
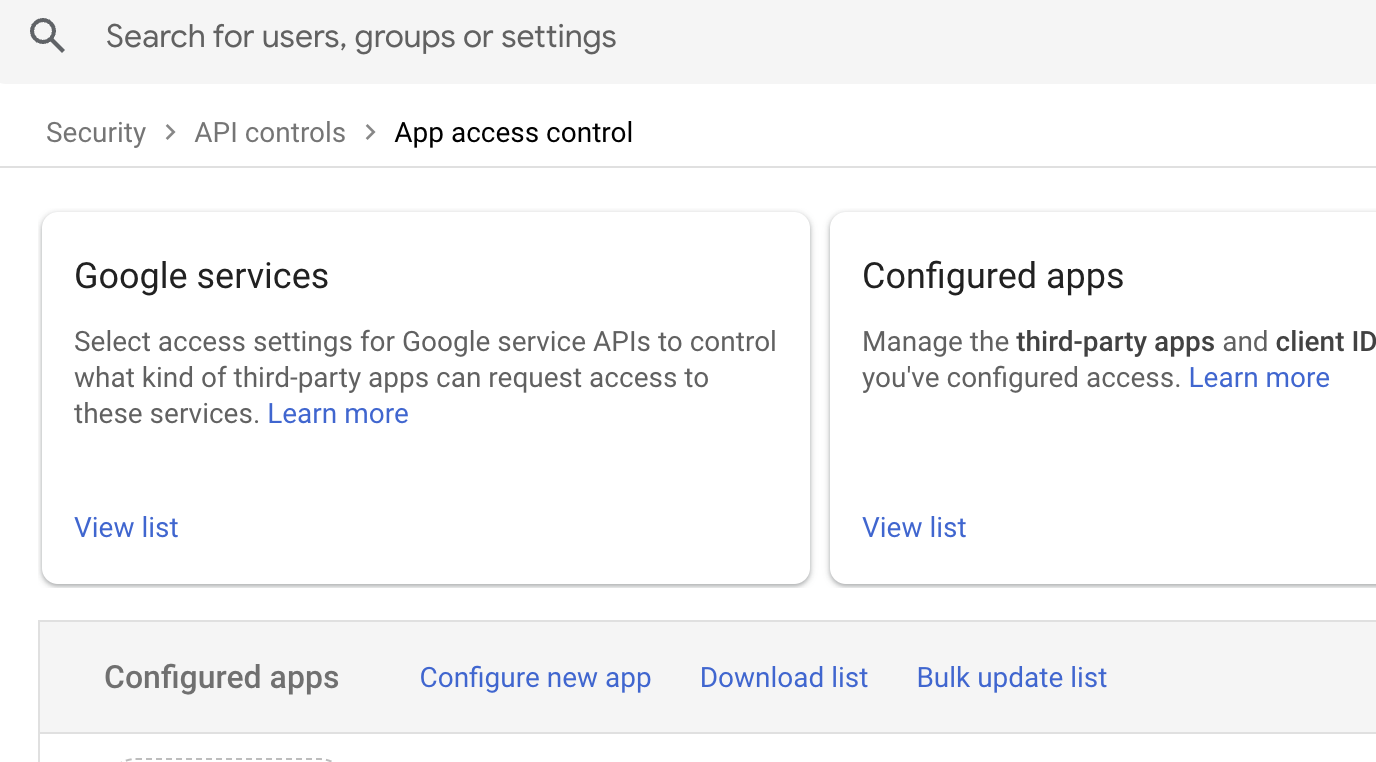
- In the admin console, navigate to "Security", "Access and data control" and then "API controls".
- Click on "Manage third-party app access" to add the OAuth Client ID to the list of allowed apps.
- Click "Configure new app". This will open up a new screen where you can search for the Client ID of the API Project we created in Step 3.
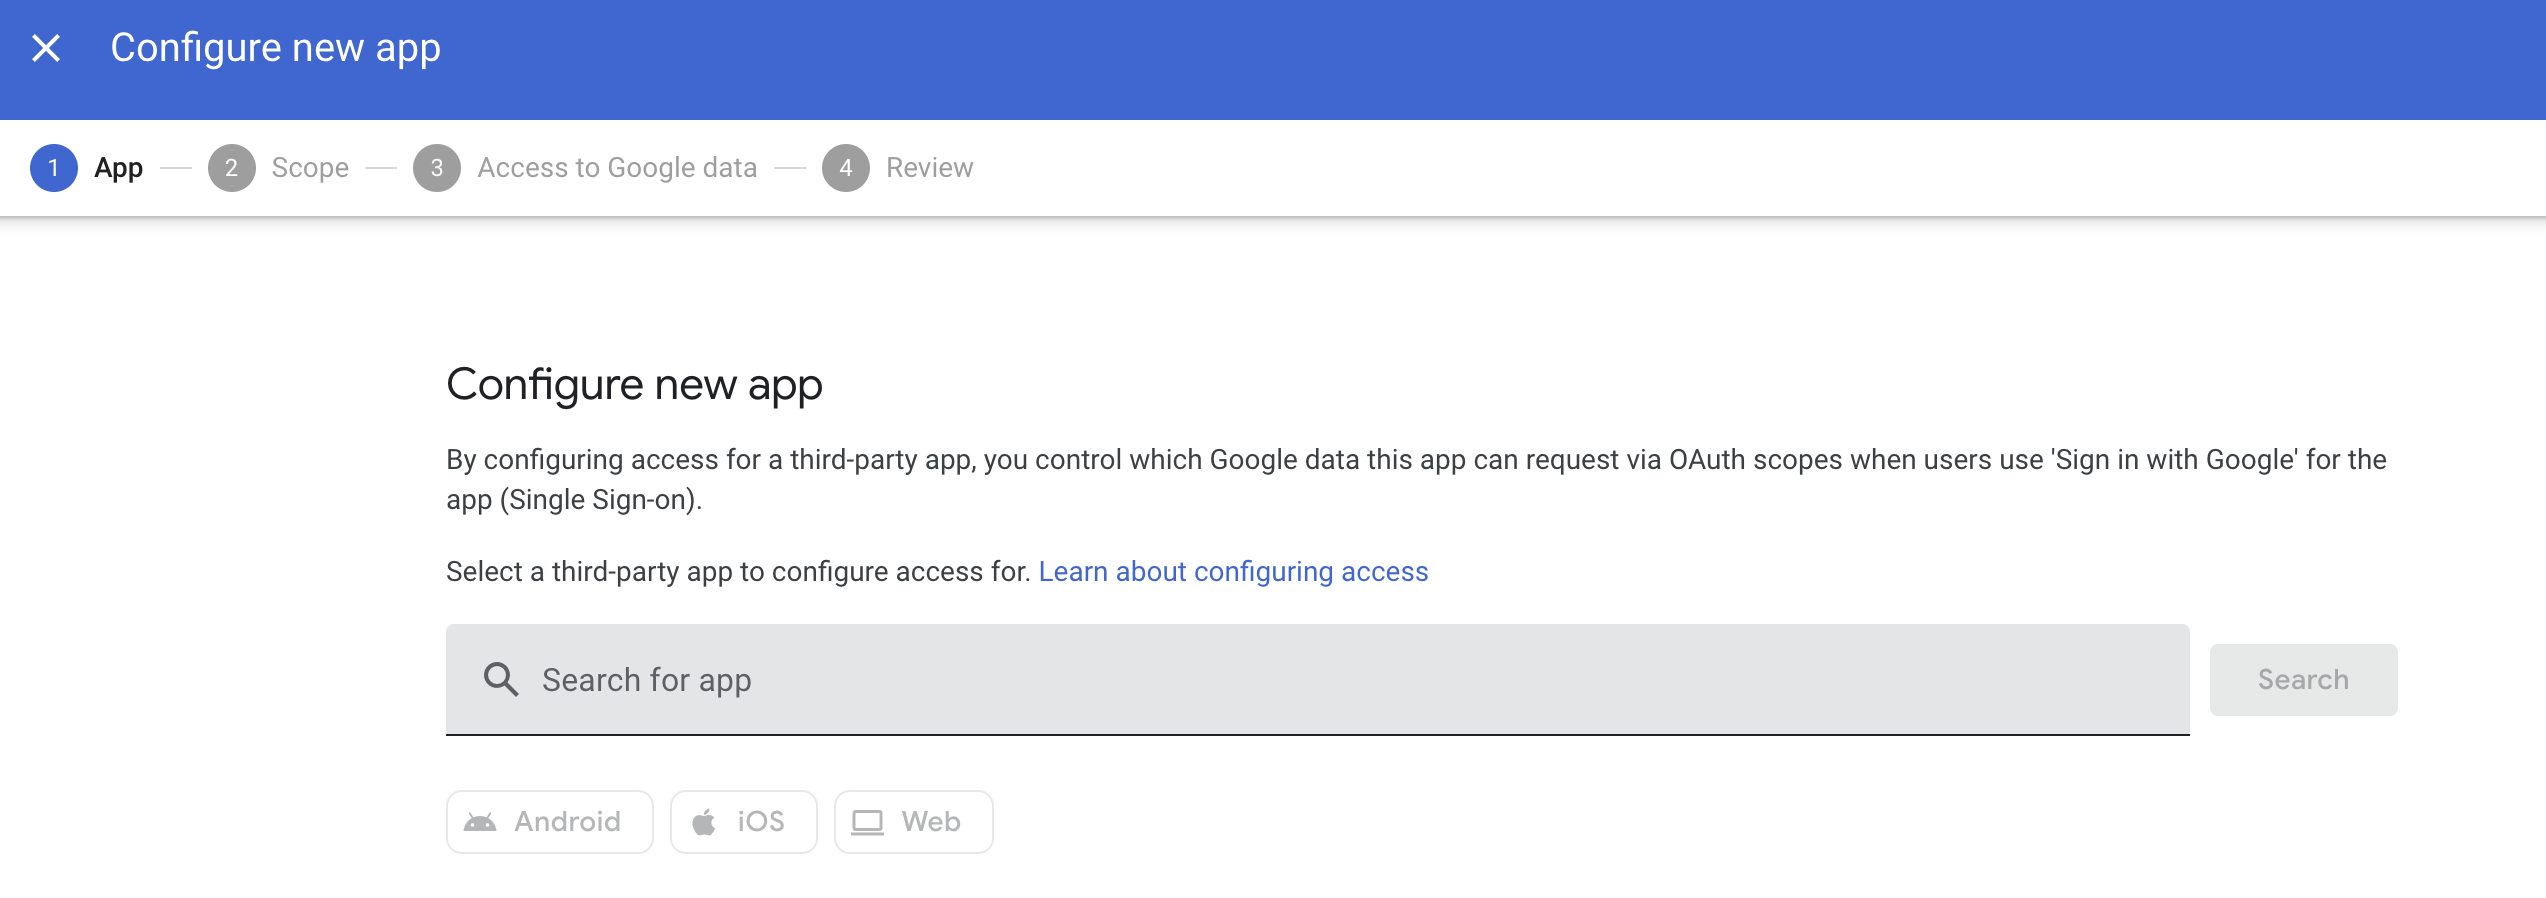
- Enter the Client ID obtained from the Google API Console and click "Select" to add the app.

Copy the Client ID and search in the Configure new app section.
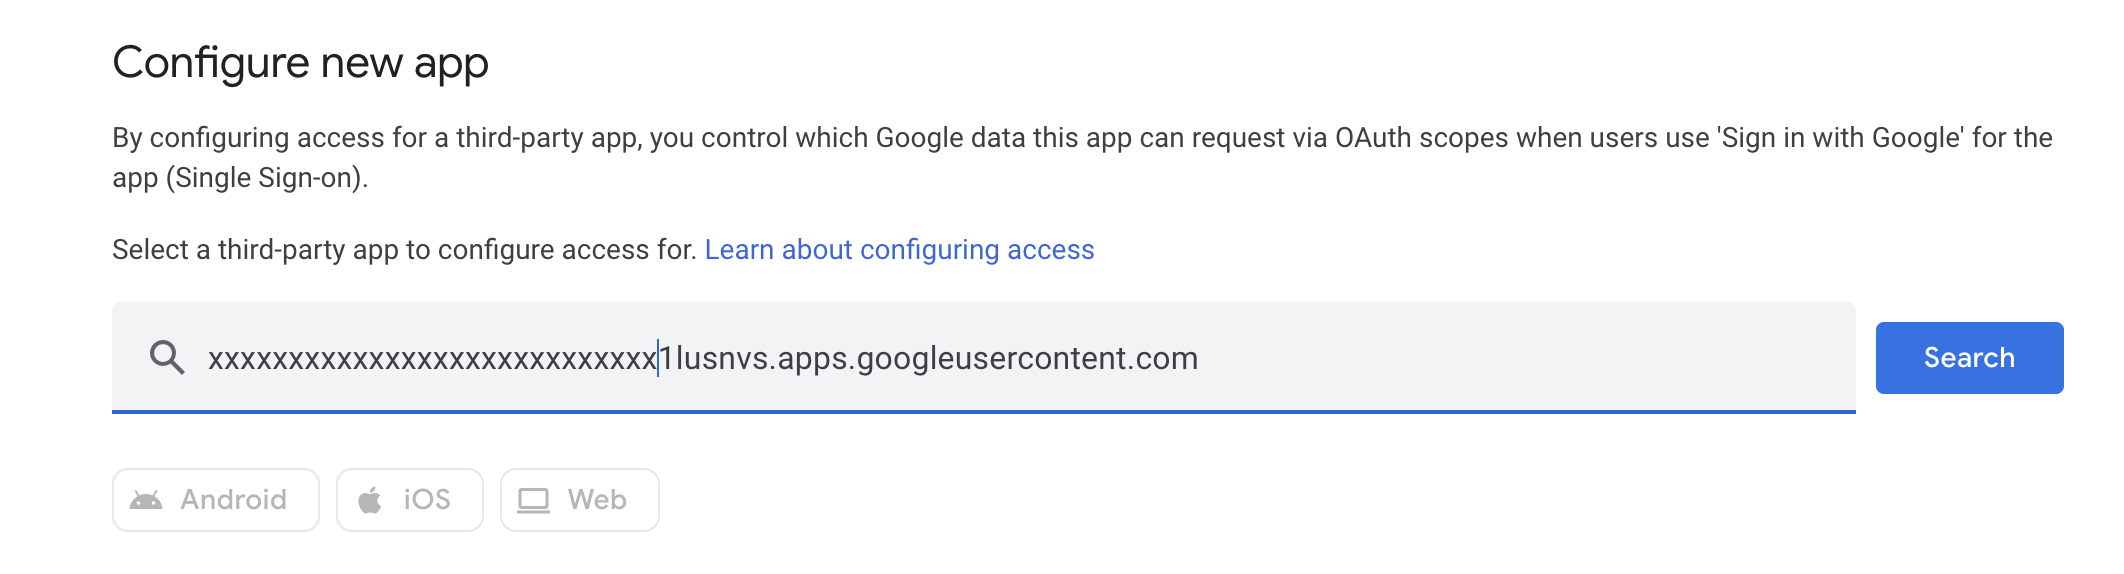
You should be able to find the Project you created.

- Review and confirm the authorisation to grant access to the CEA app with the specified Client ID.
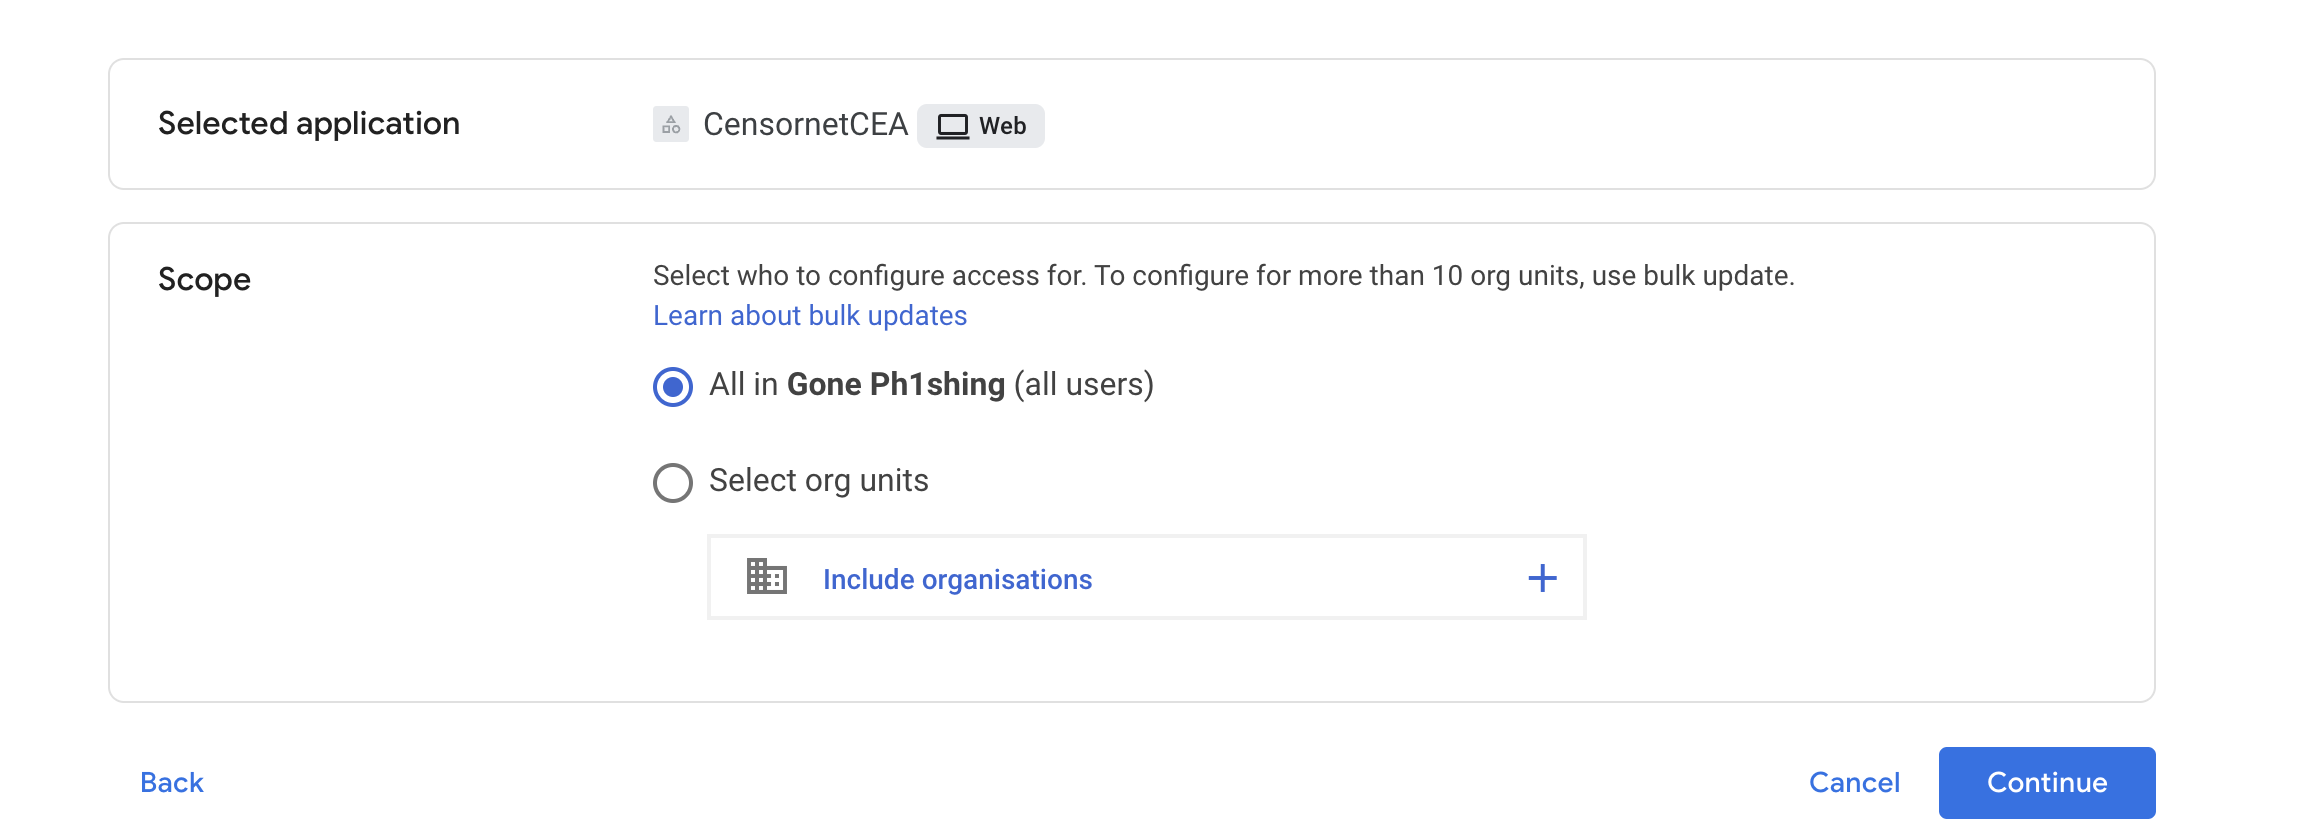
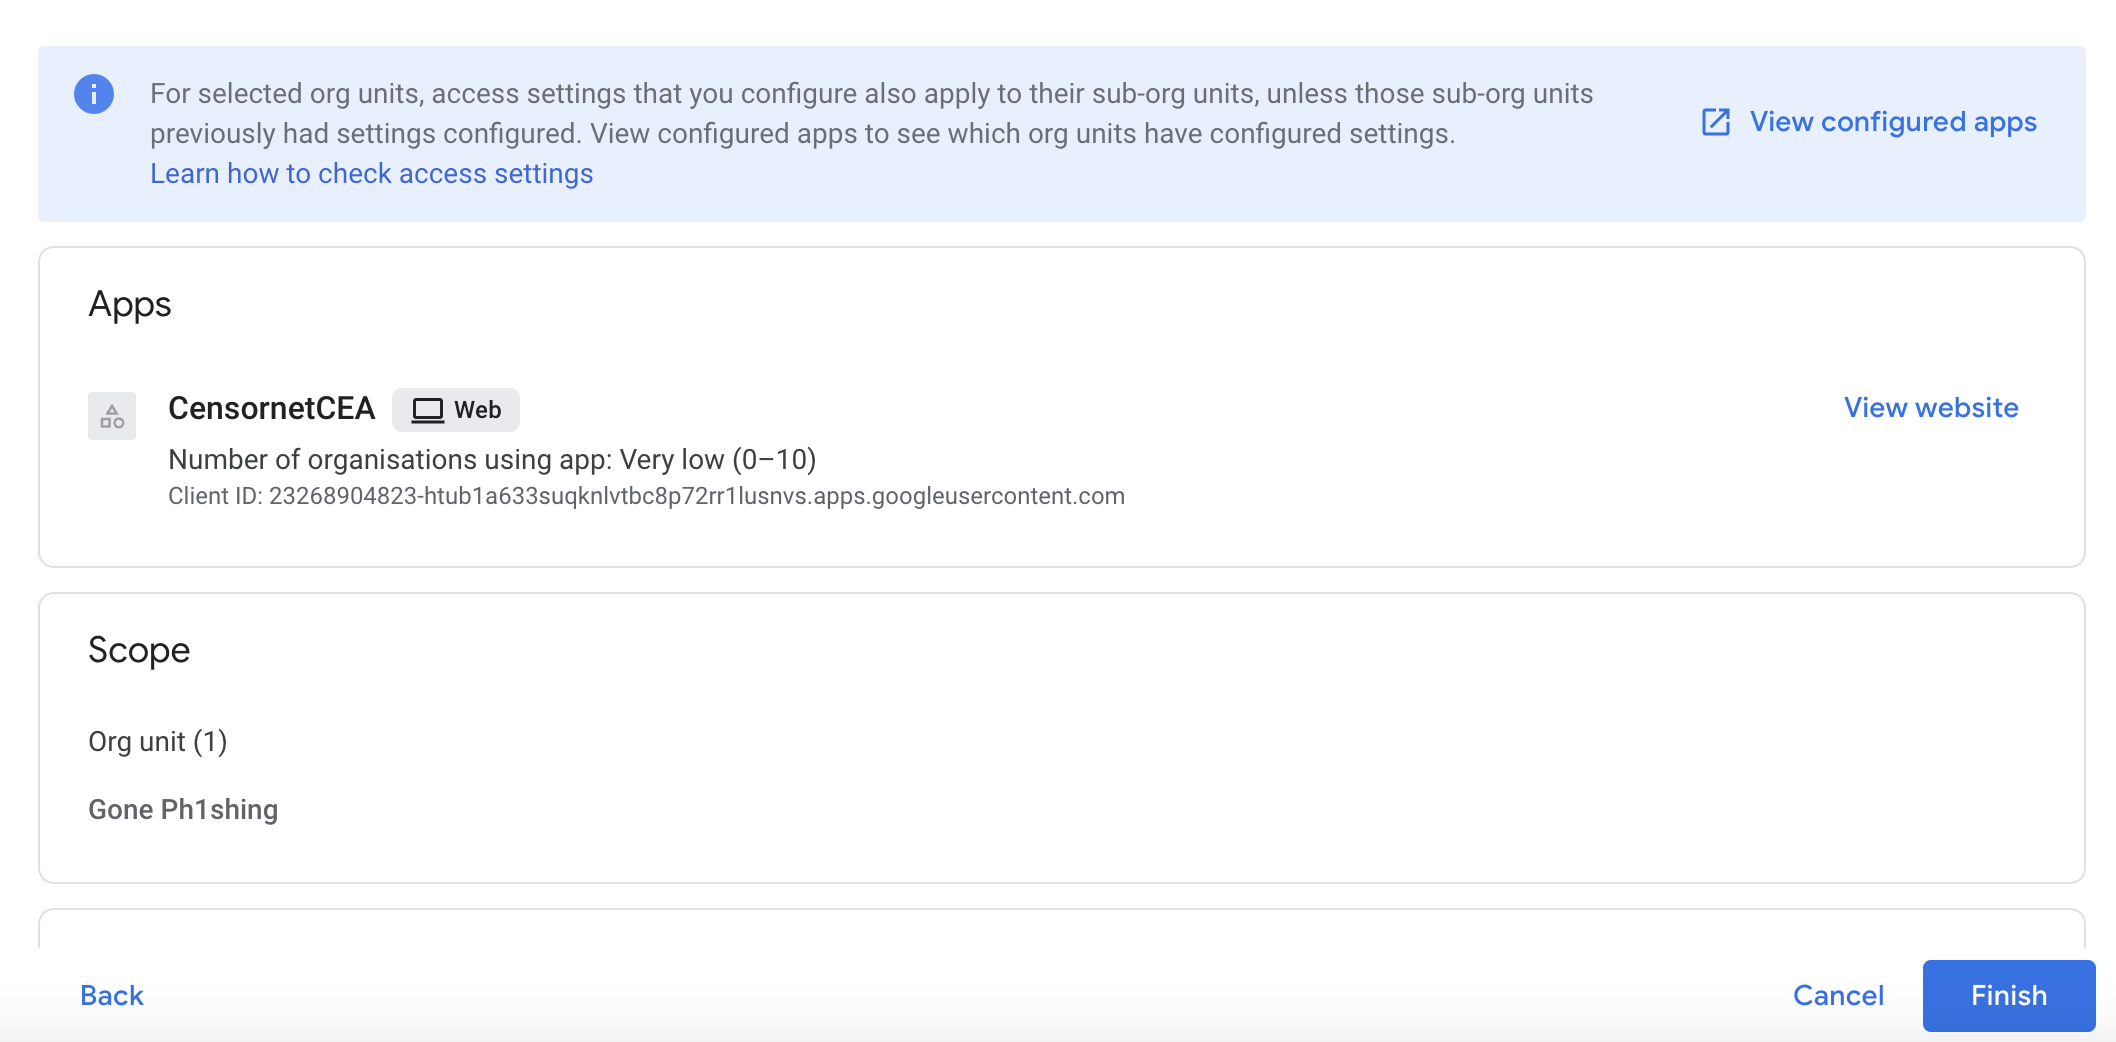
Next you must select the scope – the set of users who will be allowed to access this App [CensornetCEA] using OAuth. To allow all users of your Workspace to have access using this OAuth Api, then select the All in <your organisation> option. But you can set a more restrictive set if you require.
Select Trusted
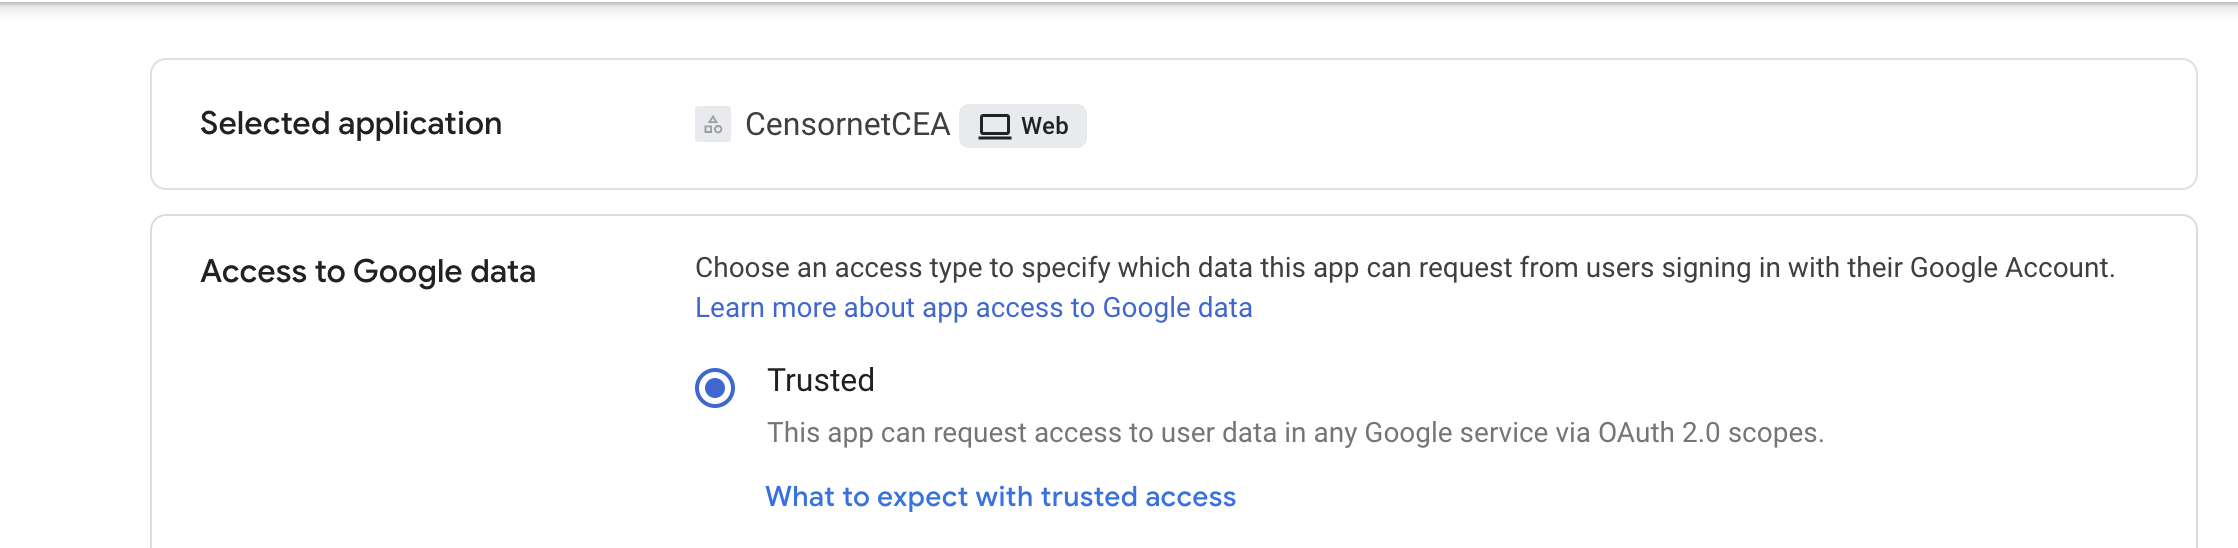
Select Finish.
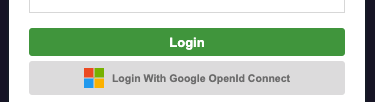
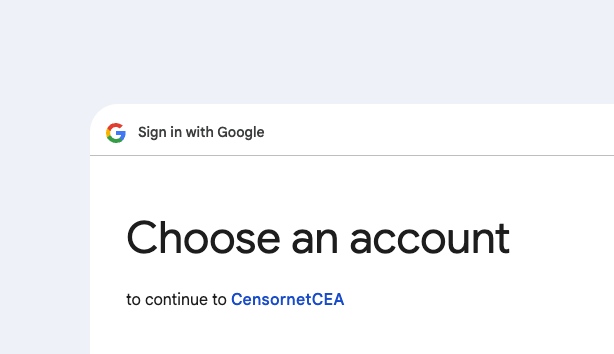
Step 5: Integrate CEA Login Page
After completing the previous steps, the CEA login page will automatically display an additional "Login With [OAuth connection name]" button, where the connection name corresponds to the OAuth Client name.
Step 6: Set up Google Service Account for IMAP / Mailbox Reader
If you need to access multiple user mailboxes via IMAP to backfill the email Archive via the “Mailbox Reader” service, you MUST set up a Google Service Account with the authority to do this. Otherwise, you will be required to enter the password for every user mailbox that you need to access.
A Service Account is not interactive and therefore cannot perform 2 Factor Authentication. So, it is configured to use OAuth with a special key file. In the future, a more dynamic access control method will be available – but for now an access key file will be used.
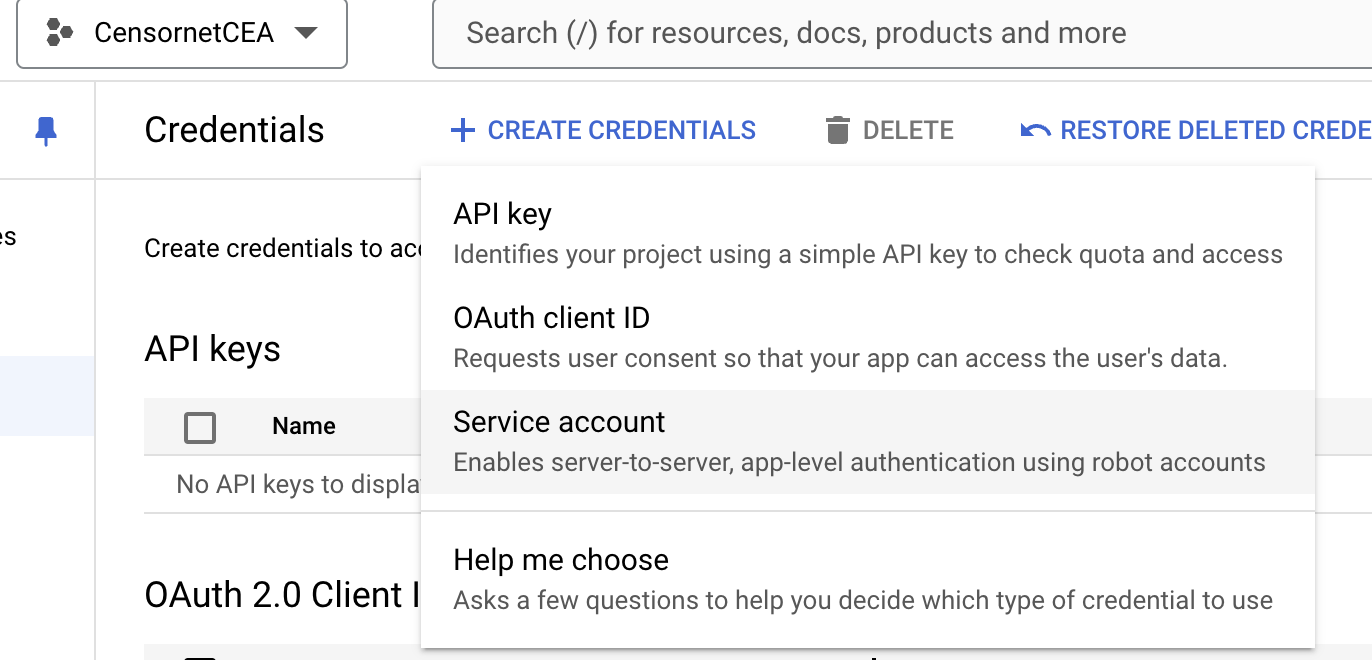
Return to your Google Cloud Project (see part 1 above), and access the APIs and services panel. Here we select the “Create Credentials” button again – like we did earlier to create the OAuth Client – but this time we will create a “Service Account”.
- Go back to the Google API Console and click on "Create Credentials".
- Select "Service Account" and provide a name for your Service Account.
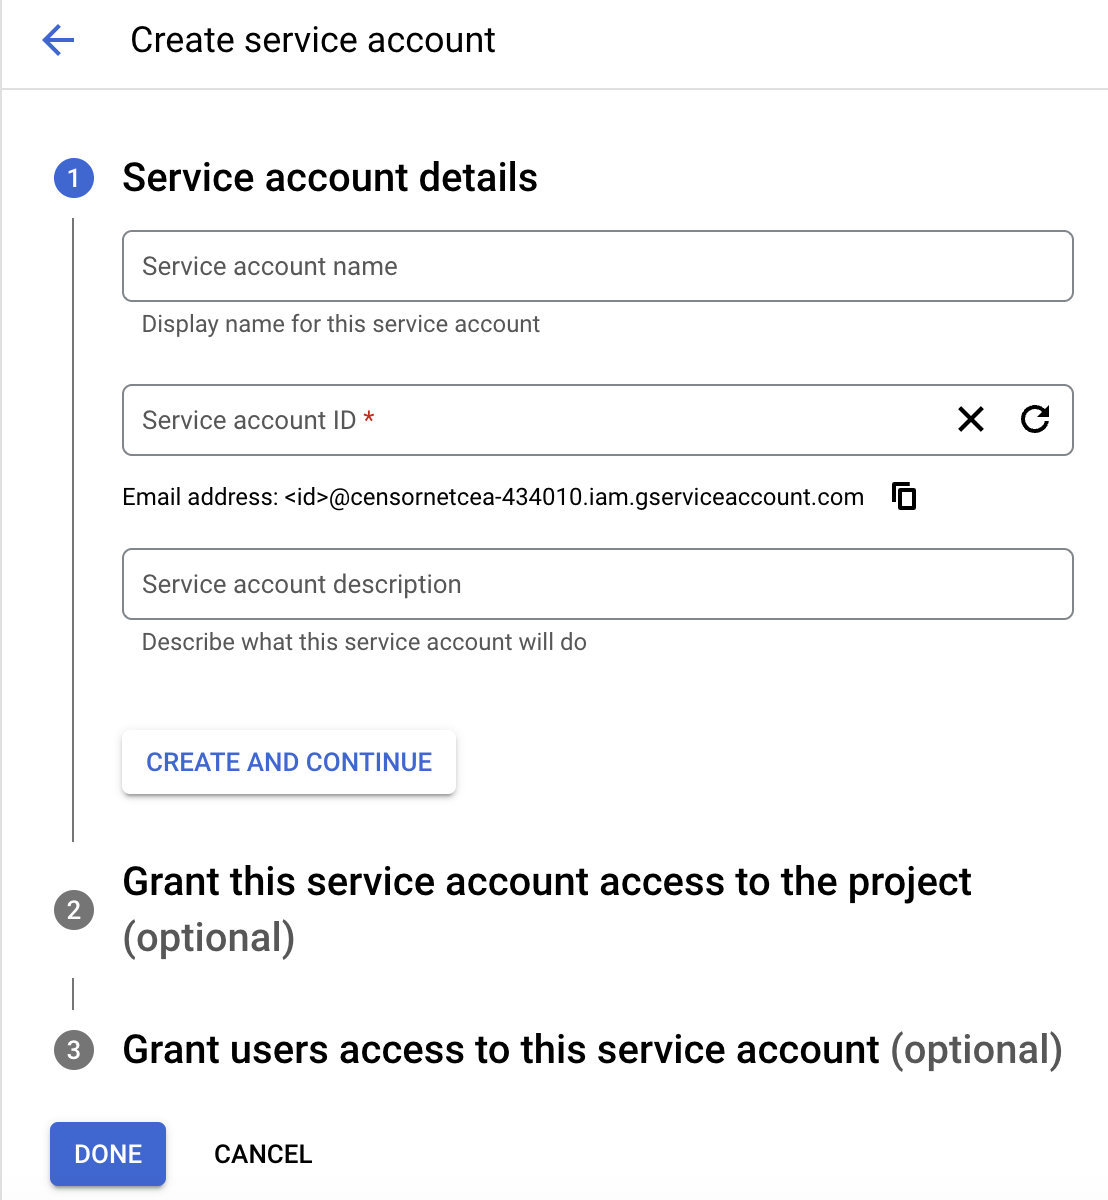
Select "CREATE AND CONTINUE" and then "DONE" The screen below should appear.

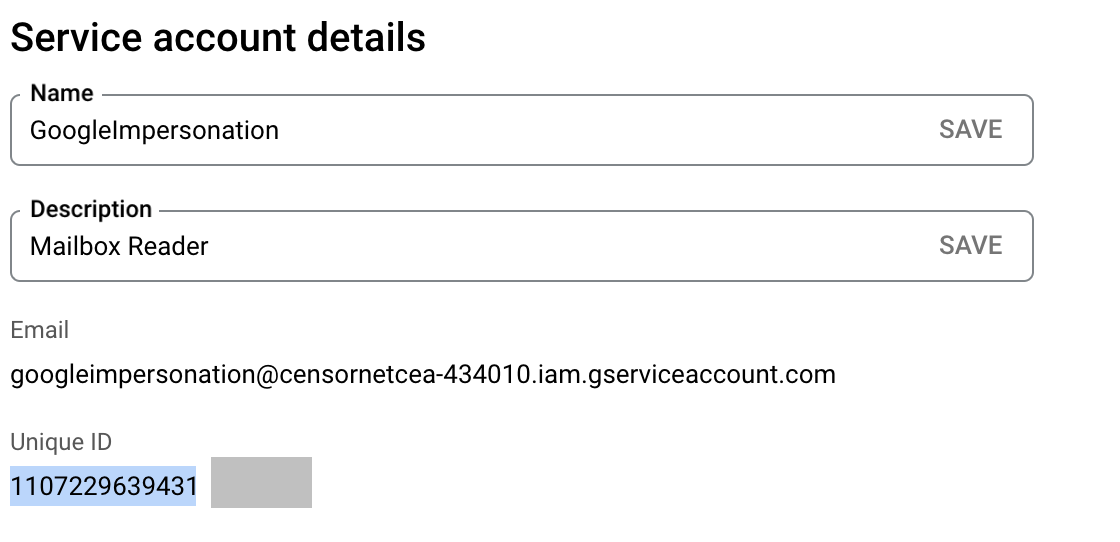
- Click on the Service account email address to open the settings and copy the Unique ID
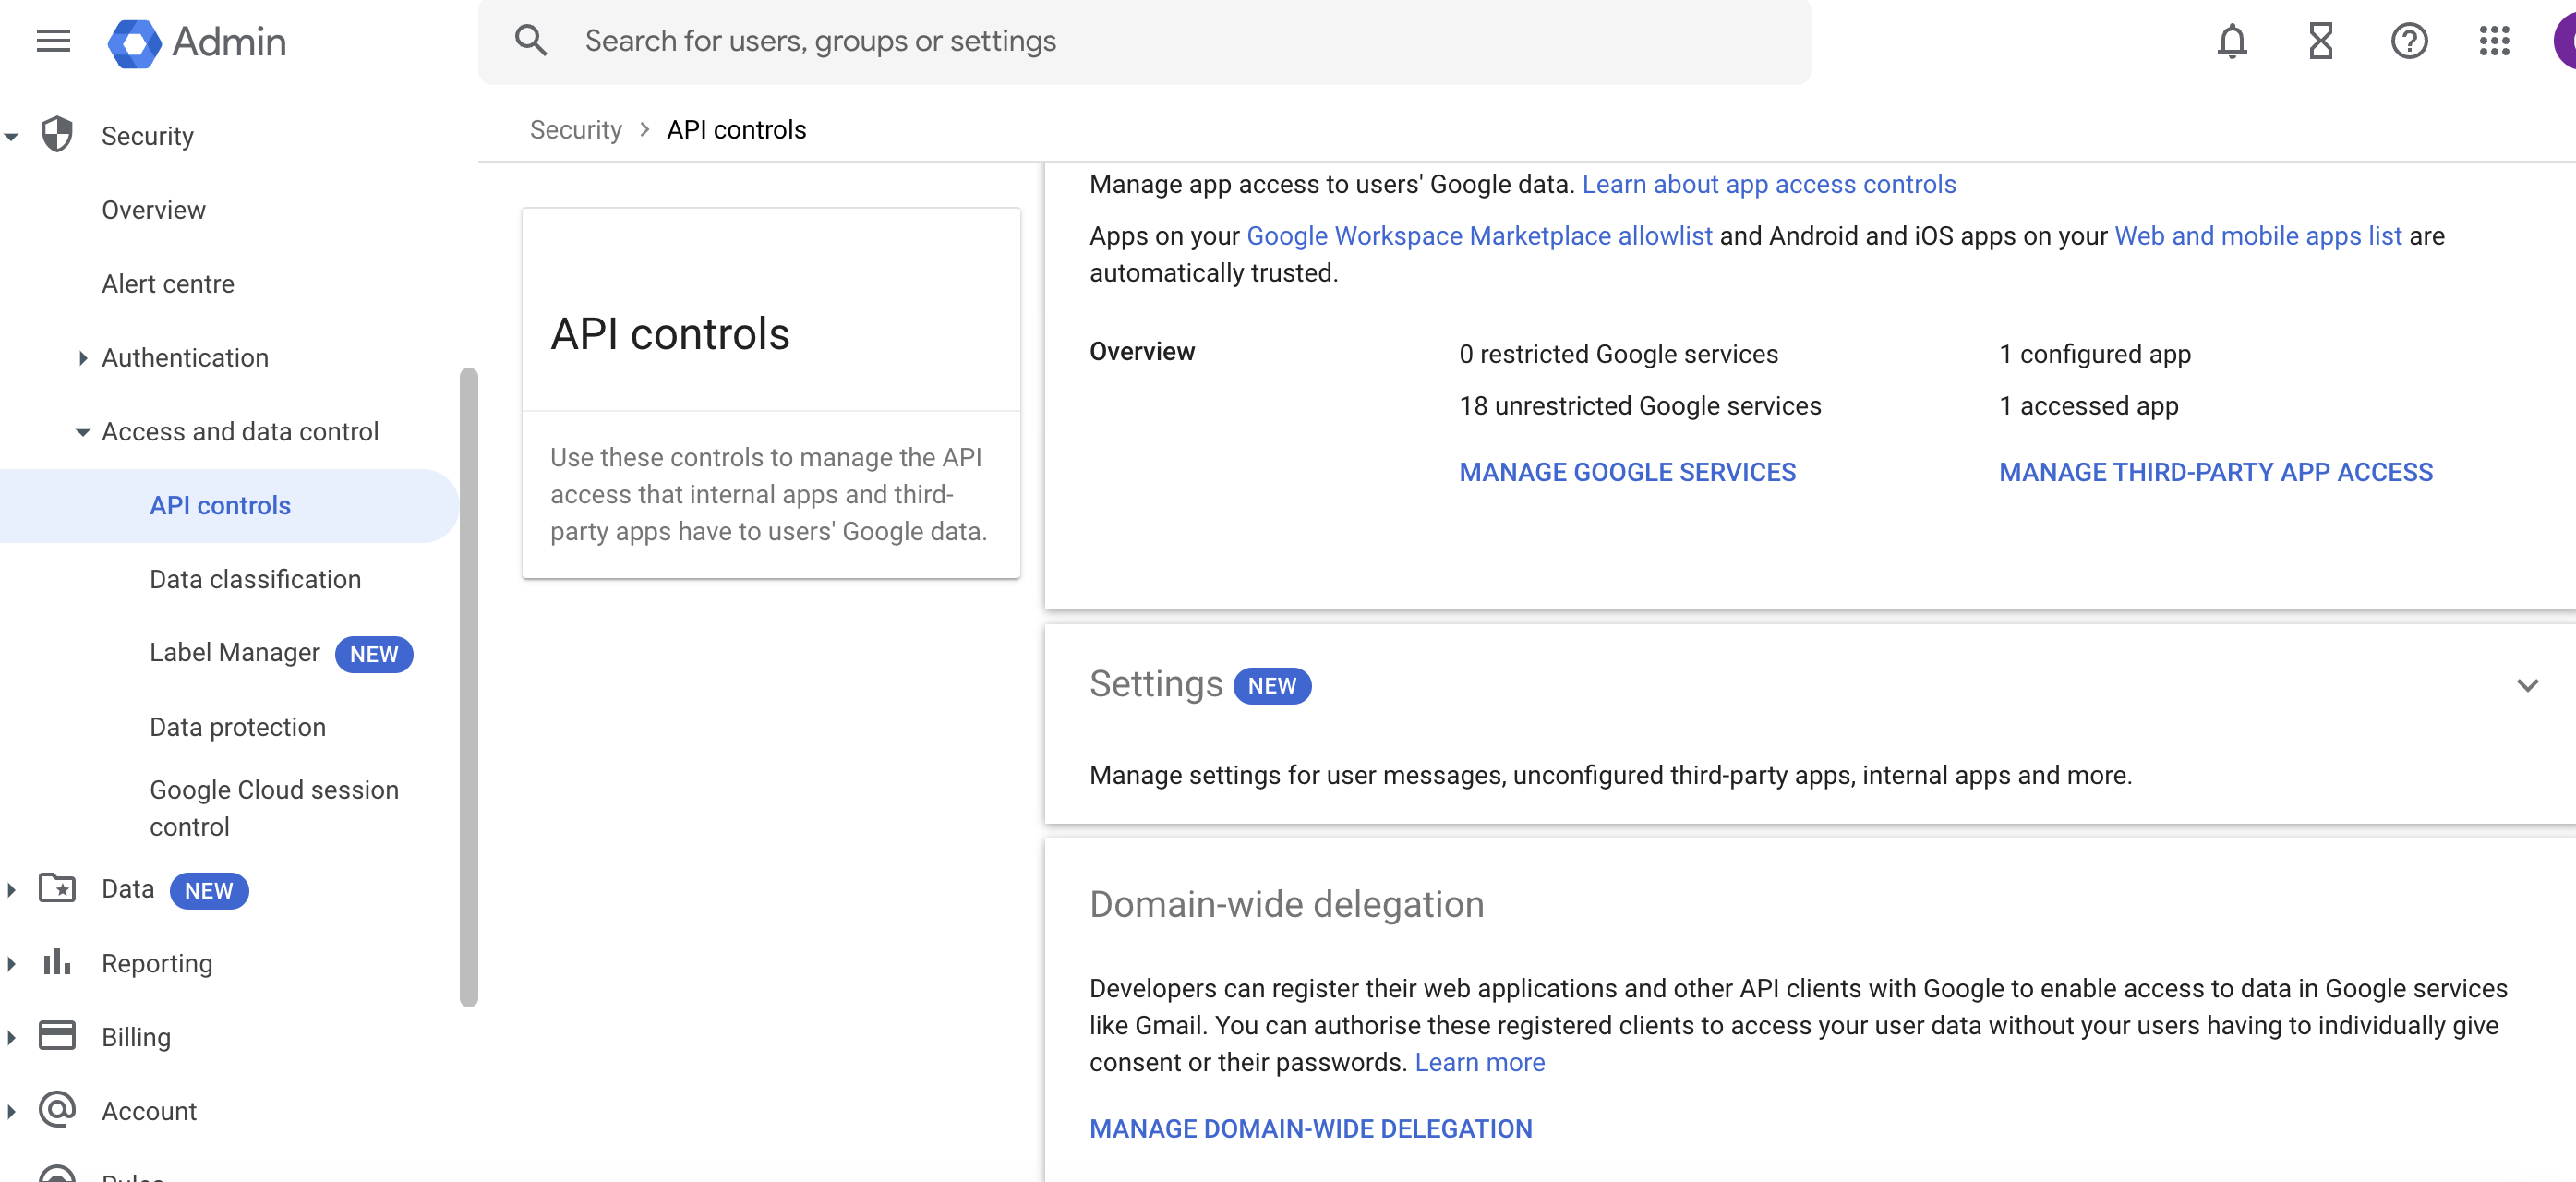
- In your Workspace Admin, navigate to Security > Access and data control > API controls > MANAGE DOMAIN-WIDE DELEGATION.
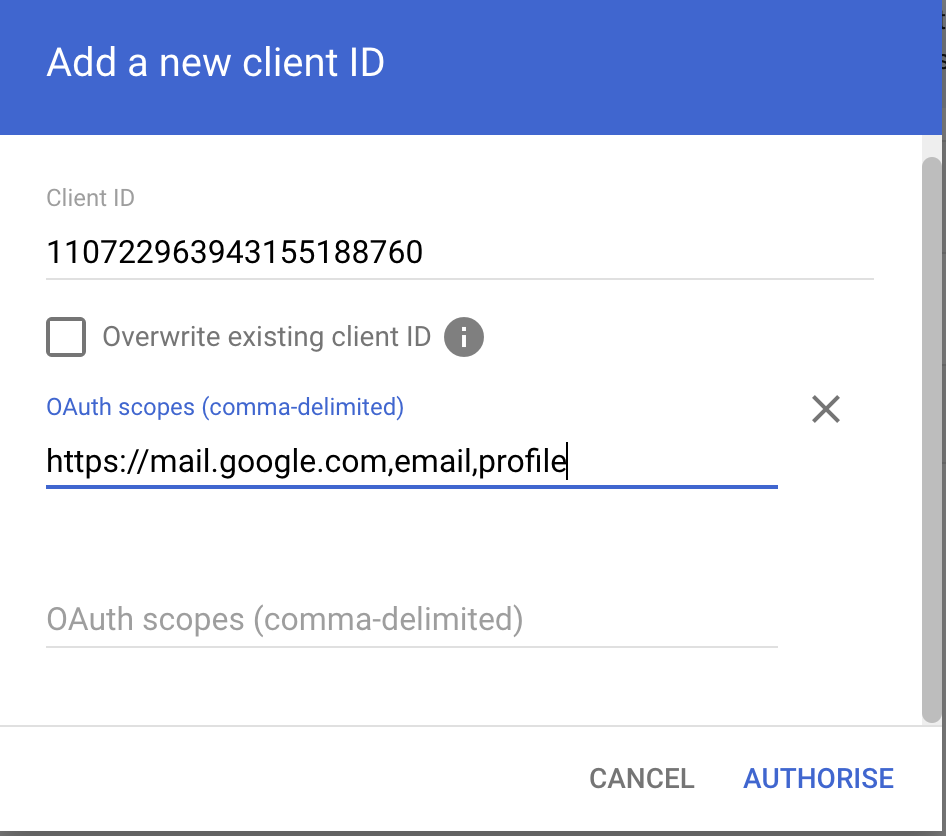
- Select "Add new" then on the “Add new client ID” panel, paste in that Unique ID of the Service Account (that you copied), then enter the OAuth scopes as https://mail.google.com,email,profile, then select "AUTHORISE".
Once these have been Authorised, then – and only then – will the Service Account be granted access to User Mailbox data.
Service Account Key
In order to use the Service Account in an application, you will need to obtain a Key File. The key holds details that allow the connecting application to authenticate without needing user interaction (no password or 2FA prompts). For our purposes, we create a Key file and register this key in the Archive so it can read the content of user mailboxes.
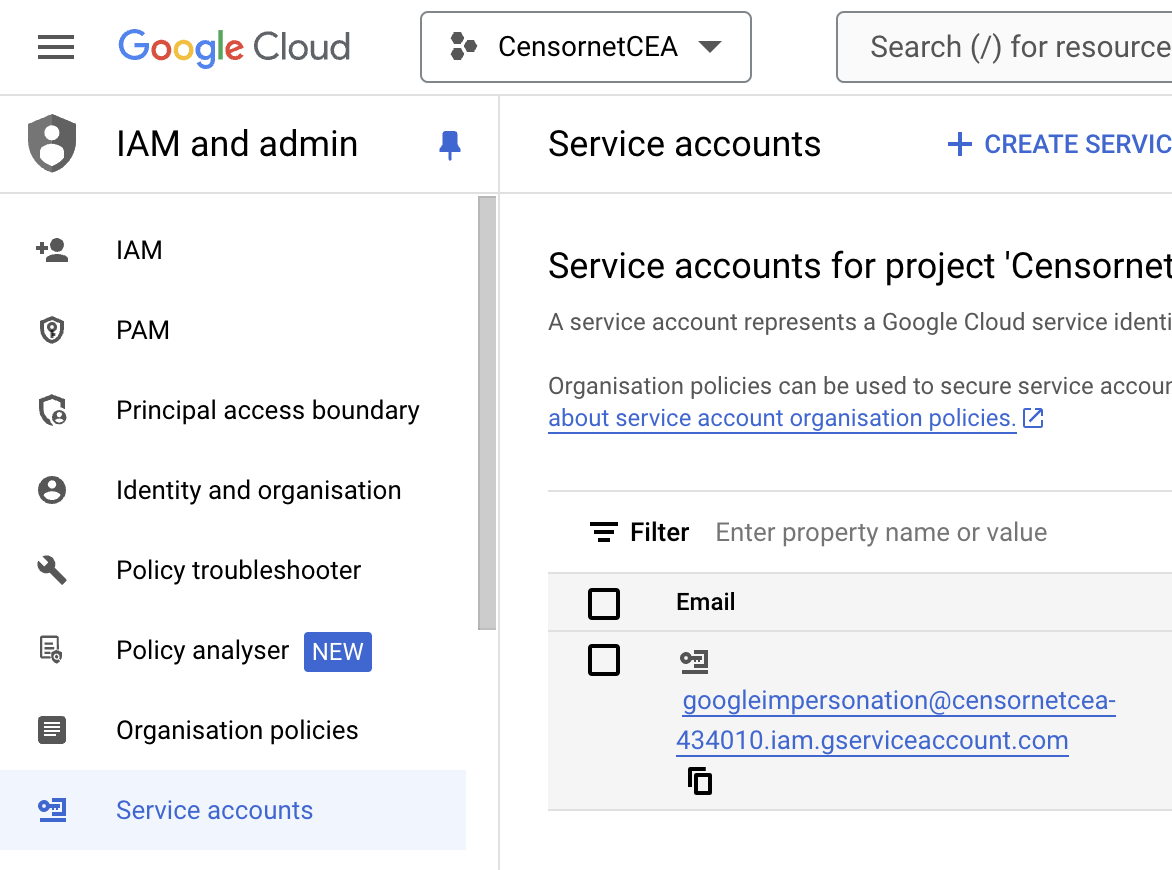
- Open the IAM and Admin section within console.cloud.google.com, navigate to Service accounts, and then open the account you created in the previous steps.
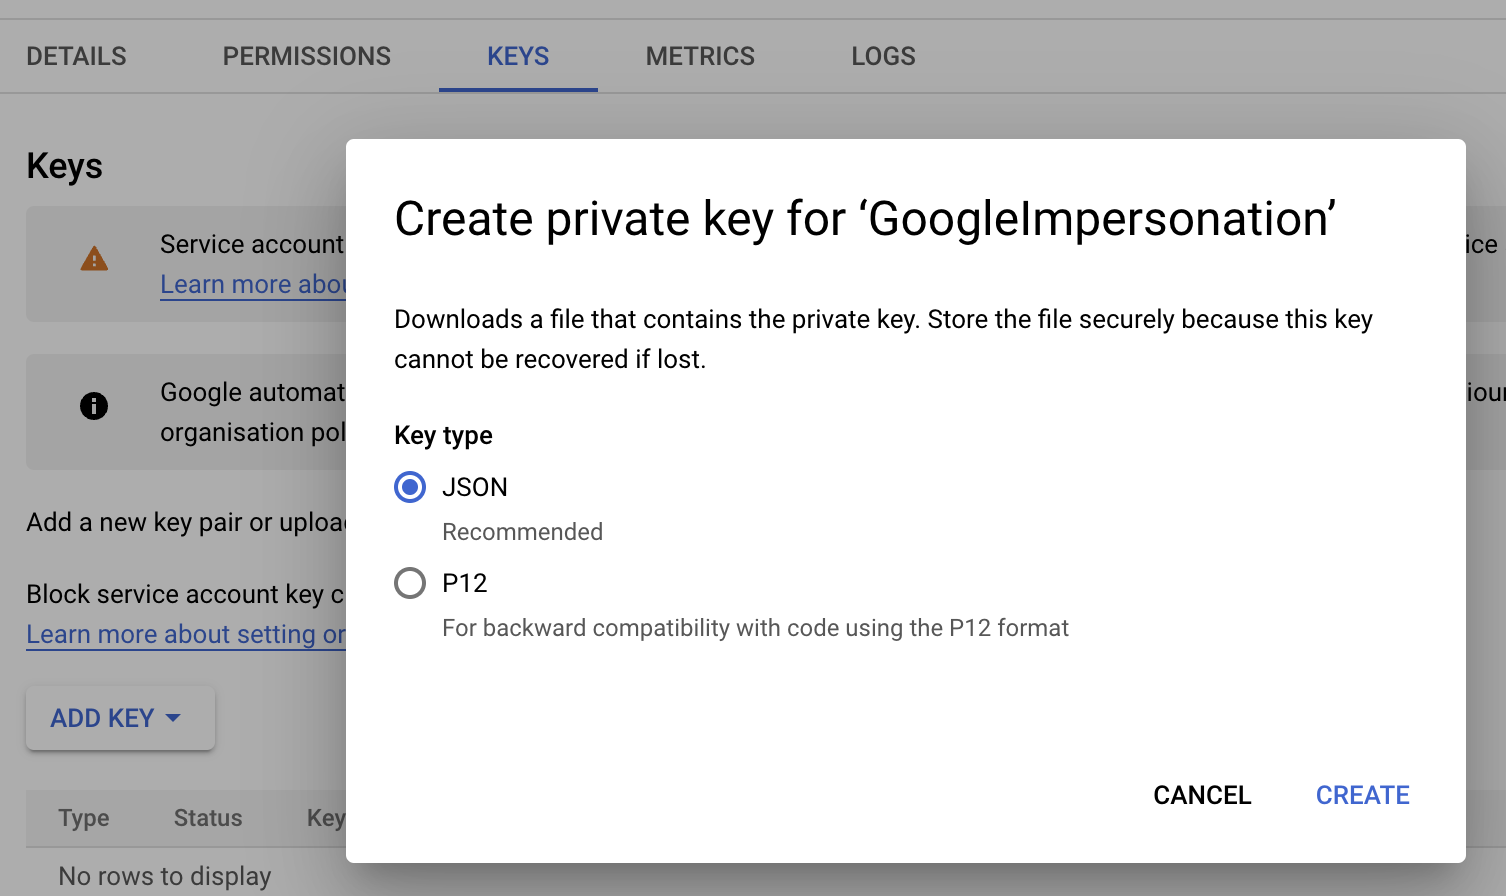
- Select the “Keys” tab and select "ADD KEY". On the Key type, select "JSON" and select "CREATE"
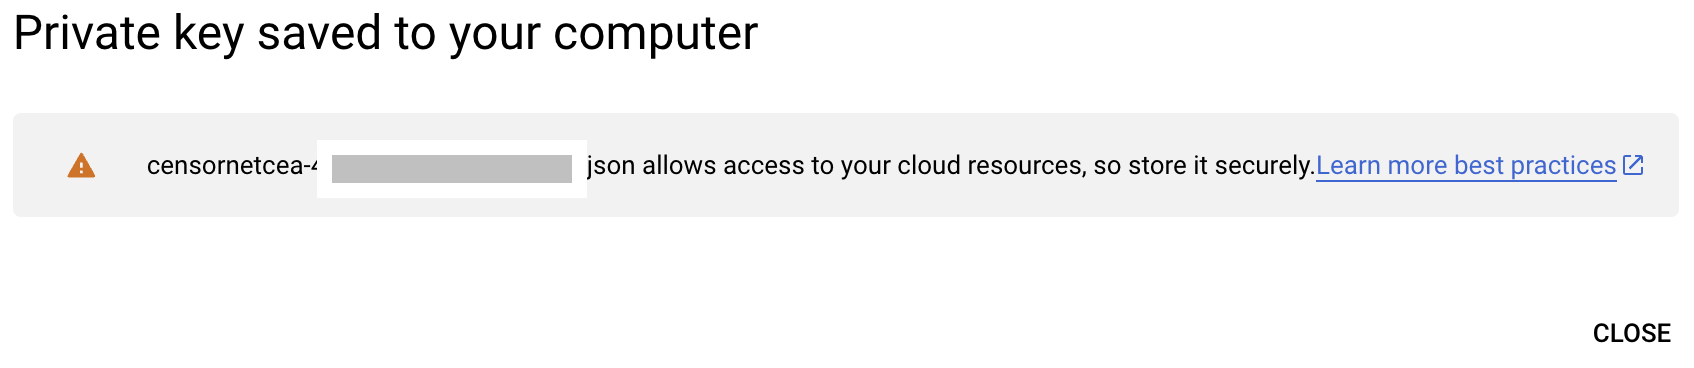
- Download the JSON file to your computer.
Step 7: Configure CEA Settings
- Login to your CEA tenant as an administrator, navigate to "Mailbox Reader", "Connection Settings" and select "Create Connection"
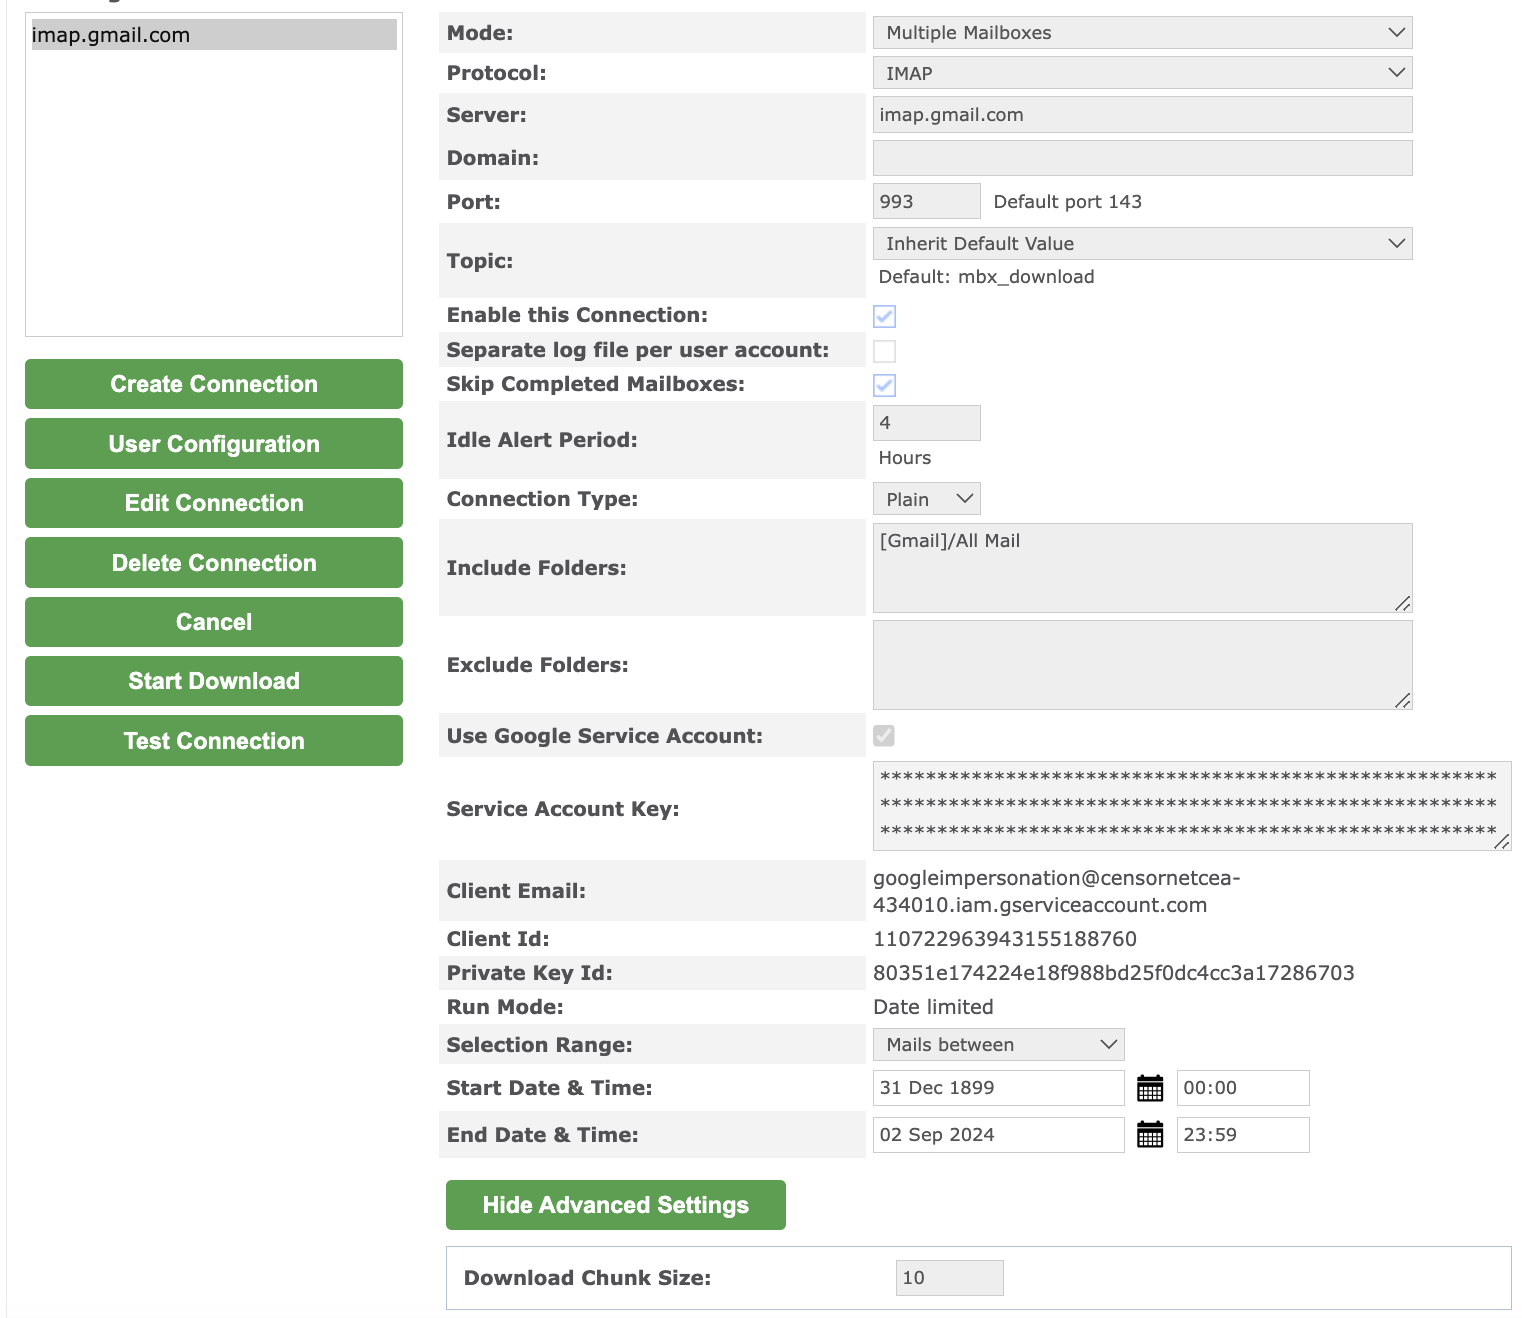
- Select "IMAP" as the Protocal
- Enter “imap.gmail.com” as the server
- Set the Port to “993” (this is an encrypted port).
- Unless you only require a specific set of mail from a known folder, Set the Include Folders to “[Gmail]/All Mail”.
- Blank out the Exclude Folders.
- Tick the User Google Service Account option
- Paste the complete text of the JSON key file. You can open the Key File in Notepad – it is just plain text.
- After this connection is Saved, the system will display the Client Email / Client ID and Private Key Id values extracted from the Key File json text. These details can be shared publicly – they are not the secret portions of this data.
- Set the required Date Range to collect. Typically this will be: “All Mail Up-To” and set the end date to the date/time that Google’s BCC/Journaling was enabled.
You are now ready to start importing mail from Google Workspace Mailboxes into your archive.
User Configuration
Now that we have the IMAP connection with that Service Account Key, we can specify the set of mailboxes to read. Click the User Configuration menu. Here you have 2 choices to add mailbox names:
- Manual Entry is used to add 1 mailbox at a time.
- Import a list of accounts from a CSV file.
Because we are using IMAP, the Username and the Email Address values will be the same. For each mailbox, simply enter the email address for both Username AND Email Address.
If you test by using the Manual entry – then you will see a “Test” link on the right of this account. Press this to see if the Mailbox Reader can successfully connect to this account. PLEASE use this Test link against a user’s account rather than the Test Connection on the Mailbox Reader Connections panel.
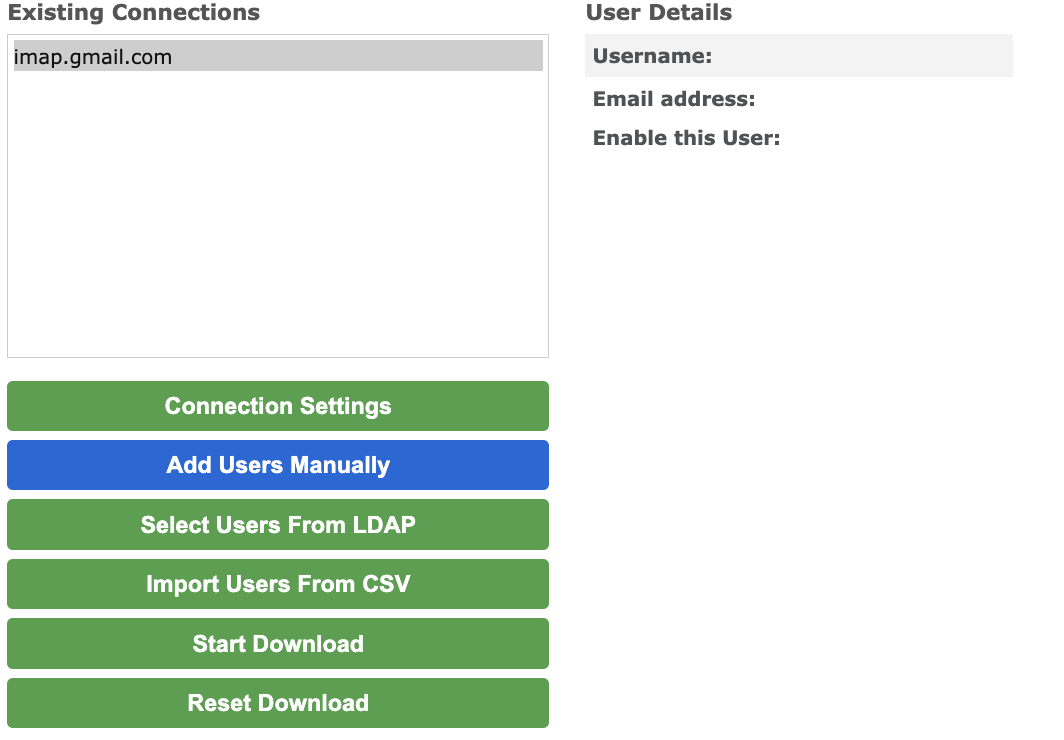
Once you have added the user, you can select the "Test" button.

If the test returns ok, you can then start the ingestion process by selecting the "Start Download" button and monitoring the activity on the user table.

Running and Checking Progress
After clicking the Start Download:
- Some accounts show “Waiting” or “Not Started”. Just wait for these to get queued.
- Some accounts show “Running”. These accounts are actively being read, and emails are being archived.
- Some accounts show “Completed”. These have finished downloading emails.
- Some may show “Exited” – though many emails may have been collected, if multiple attempts to download emails raise error responses from Google it will eventually stop with the Exited status.
- “Connection Failed” – this means that the system could not access that account for some reason.
- “Sleeping” – this means that the Connection Settings does not have an END DATE set – it is a “polling” connection. PLEASE USE JOURNALING instead of a polling mailbox reader.
For any account that shows Running, Completed, Sleeping or Exited, you can see the progress the mail reader made in that account by pressing the Probe or History link.