Configure outbound email for Exchange 2016
It is important that you configure your Exchange connectors to send outbound email out through the MailSafe service. This ensures that both your outbound traffic is scanned and your traffic is profiled to help improve spam filtering. This article explains how to configure your connectors correctly.
- Login to the Microsoft Exchange Server as an administrator.
- Open Exchange Admin Center by visiting
https://your-exchange-servers-hostname/ecp
- In the left Pane, select mail flow ⟶ Connectors.
- Select the “+” icon to create a new send connector.
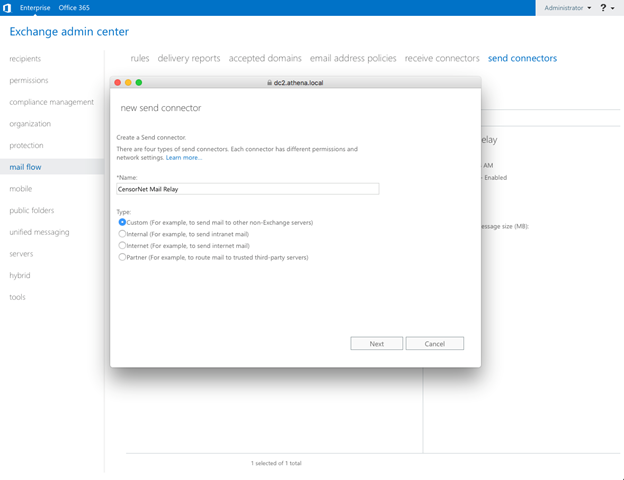
- Enter an identifiable name for your connector such as "CensorNet Mail Relay".
- Ensure the type is set to "Custom".
- Select Next.
- Specify the mail to be relayed by the option “Route mail through smart hosts”.
- Select the “+” icon to create a new smart host.
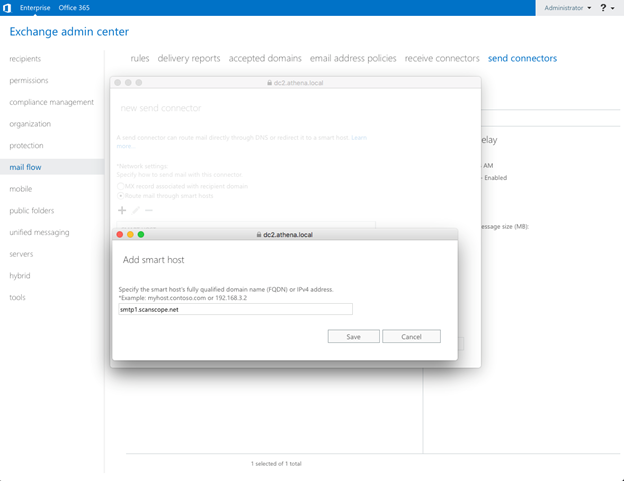
- Create connectors for each sending hosts in the appropriate cluster - either US or EU.
- Select Next.
- Ensure Smart Host Authentication is set to None.
- Select Next.
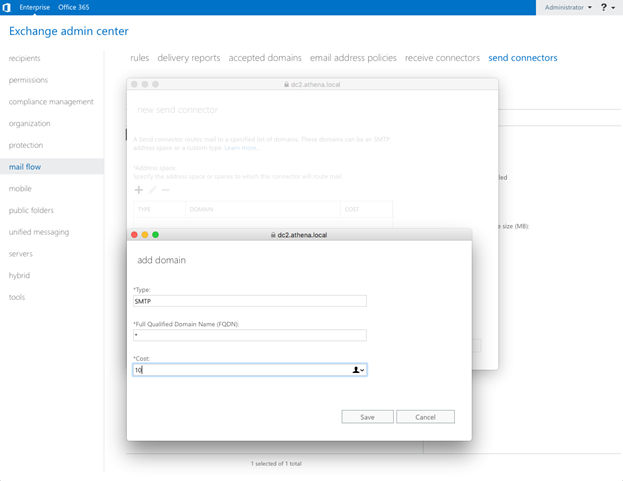
- For the Address space, select the + button to add a domain.
- Enter the FQDN as
*and change the cost to10. - Click Save.
- On the Source Server page, add any other Exchange Servers that should be able to send email to this connector by hitting the +. In most cases where there is only one server, the server will already be added. Click Next.
- Click Finish.