Role Builder
![]() Updated 1 year ago
by
admin
Updated 1 year ago
by
admin
The Role Builder allows you to define custom access to the dashboard using ACL-style permissions and share the defined roles with other accounts. This advanced section allows fine grained control to be delegated to administrators, however for a faster start you can use any of the pre-defined Roles instead.
To access the Role Builder, navigate to the Security Modules -> Role Builder option in the primary menu.
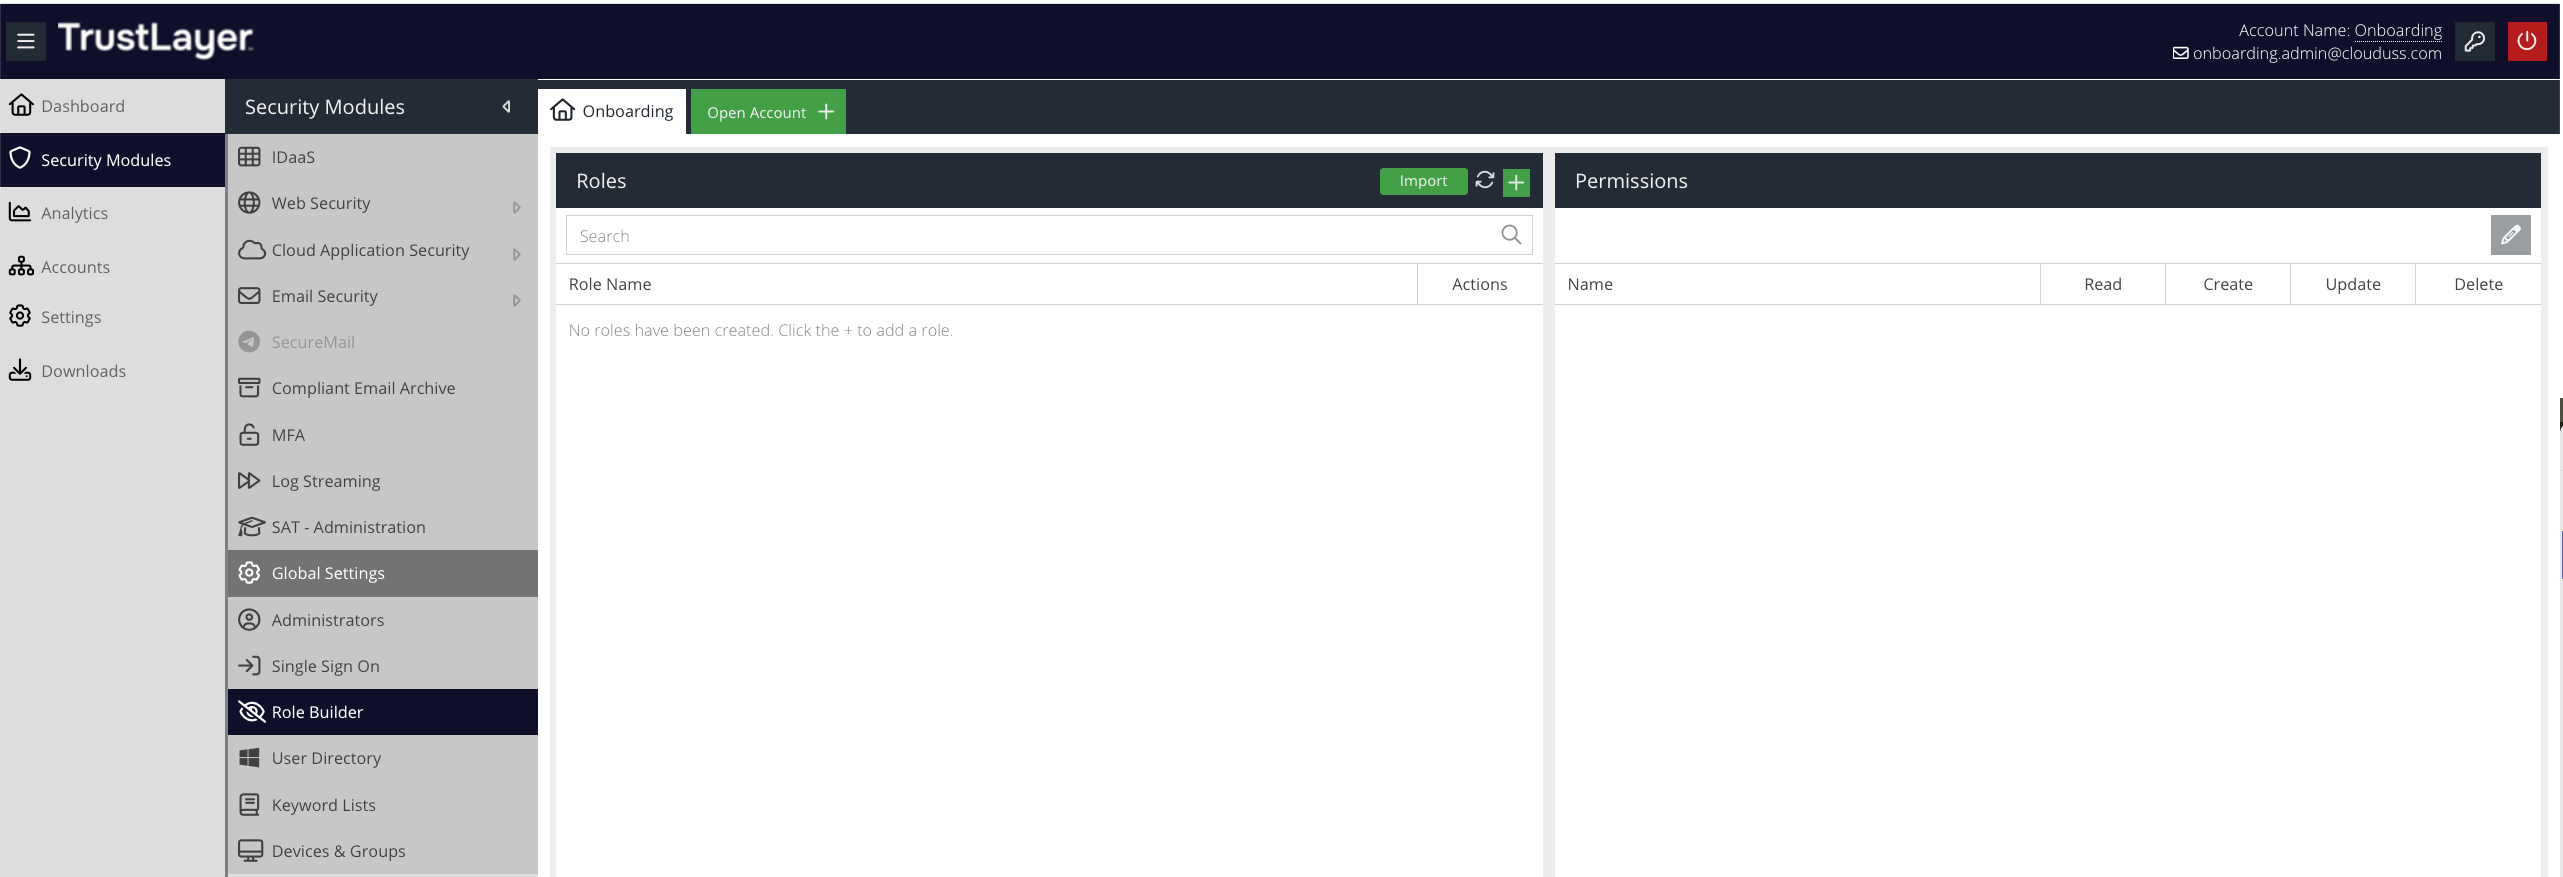
This will open the Roles and Permissions panels.
You can create a new role in one of two ways:
- By creating the role and its permissions manually
- By importing a previous exported role
Creating a new Role manually
To create a new role and add permissions manually, click the + button in the top right of the Roles panel and type the desired name for the new role in the text box.
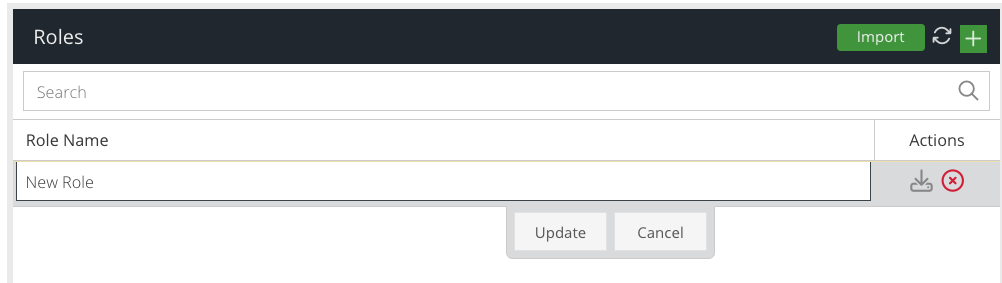
Click Update to add the role.
As this is a new role, it will contain no permissions.
Click the Edit (pencil) icon in the top right panel of the Permissions panel to start adding permissions to the role.

The dashboard has many different permissions (ACL's) and some permissions depend on others in order to make a section of the dashboard fully accessible. To try and simplify the complexity, permissions have been organised into logical ACL groups and dependencies will automatically be added if there are any. This means, often selecting a generic permission such as MFA Setup will add multiple permissions to enable activating MFA and verifying the token, so that you do not have to do this manually.

Permissions essentially map to API endpoints that the dashboard, a Single Page Application, calls when the user performs actions. Every permission can potentially support a Read (e.g. view), Create (e.g. add new), Update or Delete action. If the permission does not support a particular action then it will be disabled.
For example, if you wanted to allow another user to only view and update other Administrators, you would select the Read and Update actions of the Manage Administrators permission only.
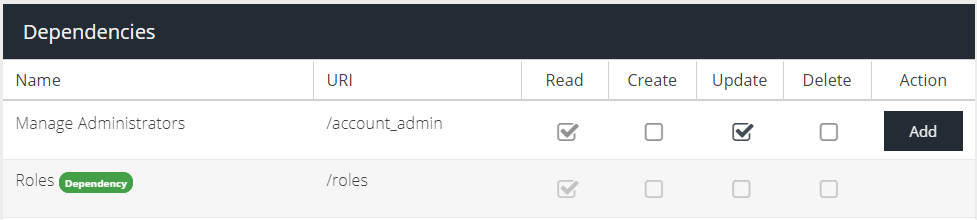
In the above example, in order to be able to view administrators the ability to view Roles is also required. This dependent permission will automatically be added.
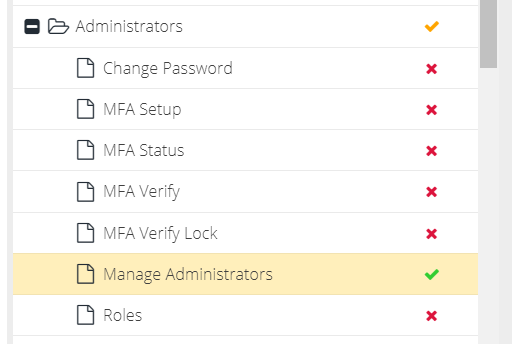
Once permissions have been added to the role, the Group that they belong to will indicate the permission is active with an orange tick and the permission itself will show a green tick.
If only some of the permissions in a group are active in the role, the group level indicator will show an orange tick. If all permissions in a group are active in the role, the group level indicator will change to a green tick. A red cross indicates the permission is not active in the role. If a group has no active permissions, the group level indicator will be a red cross. This lets you quickly identify which ACL groups are active in the role.
Follow this pattern to build the custom role that you require. For further information, see the Tips & Troubleshooting section at the end of this article
Once you have finished adding permissions, click the cross X icon in the top left of the Add/Remove Permissions panel to close the editor.
Importing or Exporting Role
Exporting
Once you have built a role, if you wish to export this for use in other accounts, you can click the Export icon next to the role name in the Roles panel. This will create a Role Data string which you can copy to the clipboard.
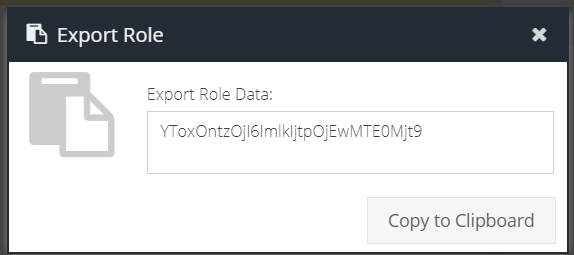
It is possible to use the export option to transfer roles to child accounts or create copies of existing roles. See the section on Importing for more information.
Importing
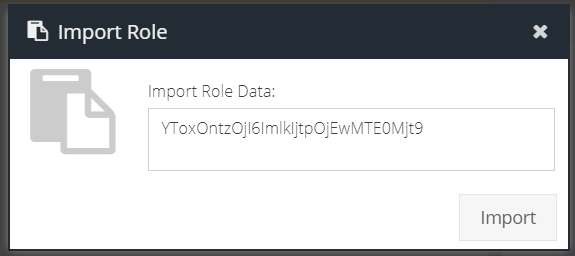
You will need to obtain a Role Data string by first exporting a role or being given the string by your Service Provider.
Click the Import button and paste the Role Data string into the Import Role dialog and then click Import.
If the role already exists in the current account, you will be prompted to select the preferred action:

- Rename - this will create a new version of the role with a different name, preserving the existing role
- Overwrite - this will simply overwrite the role with the imported role
Tips & Troubleshooting
Creating a Report Viewer role
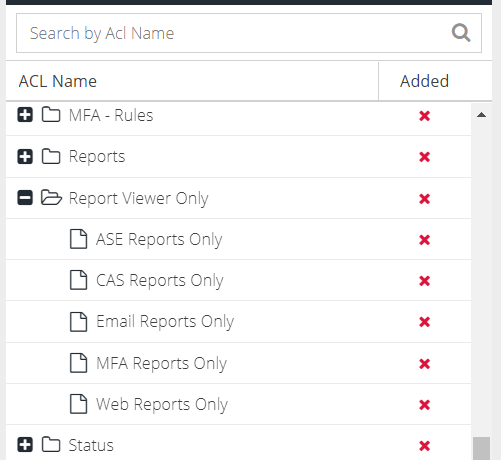
Reports, specifically the Activity reports, require read-only access to ACL's that are also used for Product configuration/management. For example, the ability to search the report by Device Group, requires the "read" permission for the Device Groups ACL. This will automatically provide read-only access to the Device Groups list in the dashboard unless you use special ACL's to force "Reports Only" access. To do this, after building the role, add one or more of the following special ACL's to the role:
This will ensure that the dependent ACL's do not generate options in the Products menu.
The menu option is available but nothing happens when it is clicked
This problem is most likely to manifest when a dependent ACL/permission is missing. Access has been granted to the UI section however it is calling an API endpoint that is missing a permission in the role.
To confirm this, press F12 to open the browser Development Tools (Chrome, Edge, Firefox) and then navigate to the Network sub-tab, then recreate the issue.
Search for any requests which are highlighted in red with a 403 error code, e.g.

View the request and make note of the URL, it will have the format:
https://apiv2.clouduss.com/[endpoint]

In the above example, the endpoint is /enduser/email-securemail/sso/generate_token
Search the ACL Groups for the human readable form of the endpoint, e.g. "Token" and then search for the corresponding permission. In this case, it is the SecureMail end-user token. Add this permission with Read access to the role in order to solve the problem.
