DLP Policies
![]() Updated 1 year ago
by
admin
Updated 1 year ago
by
admin
The Advanced DLP (Data Loss Prevention) feature enables enterprise-grade detection of sensitive and high-value entities inside documents that egress via the web, including through Cloud Storage and other SaaS applications, and via email messages. The DLP feature allows administrators to build policies that can be used across products in the platform such as Web Security and Email Security for consistency and ease of administration. With a collection of pre-built policies and grammars, administrators can quickly realise the value of DLP best practice by identifying areas of risk such as personal information sharing, PCI compliance issues and credential leakage.
This article describes how to create, update and publish a DLP policy.
Creating a DLP Policy
Navigate to the Products -> DLP Policies section.
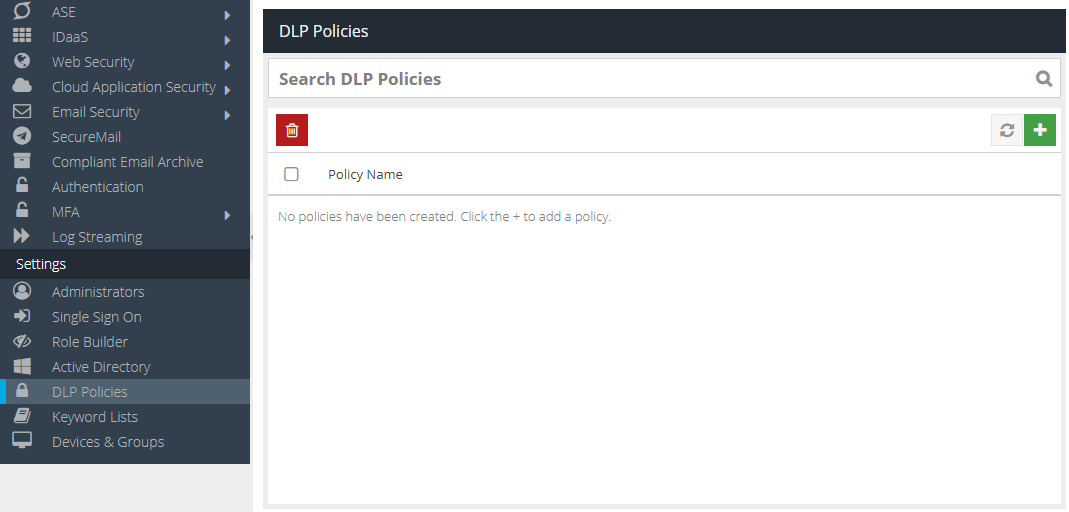
Click the + button to add a new policy.
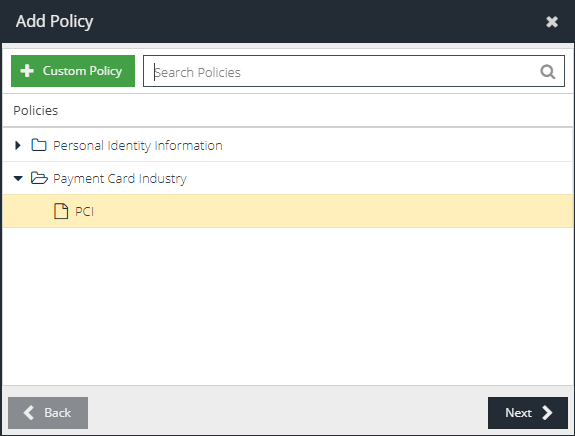
Select a pre-defined policy by expanding the categories and selecting a policy, e.g. PCI, to use as a starting point. If you prefer, you can click Custom Policy to create an empty policy and start from scratch.
The following table lists the available default policy categories. Each category contains policies for different geographies and languages.
Policy Category | Description |
Personally Identifiable Information | Personal Identity Information (UK) including Names, Email, Passport Numbers, National Insurance Numbers |
Personal Identity Information | Personal Identity Information (US) including Names, Email, Passport Numbers, Social Security Numbers |
Payment Card Industry | Includes credit card and bank account numbers |
Personal Health Information | Includes medical conditions, procedures and drugs |
API Credentials | API credential and key information for common web services |
Computer Addresses | Includes HTTP, FTP, file and MAC addresses |
Profanity | Includes racial, homophobic and sexual offensive terms |
Click Next
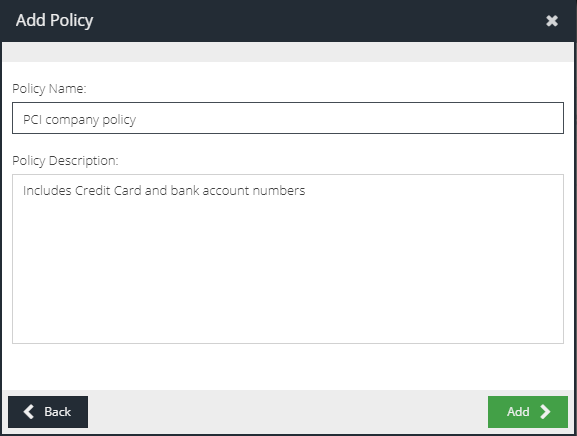
Optionally update the default policy name and description to better reflect your use-case.
Click Add
Select the newly created policy from the DLP Policies list to begin configuring it.
Managing a DLP Policy
Navigate to the Products -> DLP Policies section.
Select a policy from the list to open the Policy Editor which will allow you to make changes.
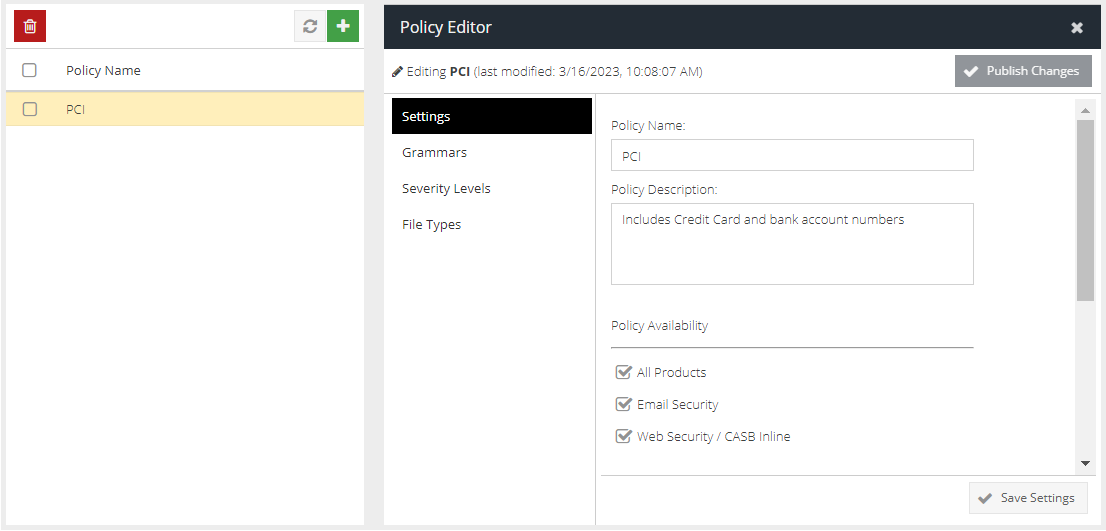
The Policy Editor is split up into a number of sections which are discussed below.
Settings
The Settings tab contains the base configuration for this policy.
- Policy Name - the name of the policy which is used to select the policy in a Rule Builder or to report on policy violations in Analytics.
- Policy Description - optional detail about the policy - recommended to explain the purpose and expected outcome.
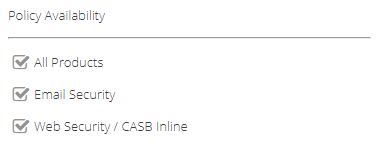
- Policy Availability - this option determines what products can use this policy. If you have multiple licensed products that support DLP they will be available to select. This allows you to create DLP policies that are specific to a product for ease of management. Unticking a product will remove the DLP policy from the associated Rule Builder where it can be enforced.
- Case Normalisation - case sensitive matching generally has better performance than case insensitive matching. If you require case insensitive matching, you can use case normalisation to give the same performance as case-sensitive matching i.e. you can force all text to lower or upper case before scanning.
- Locale - (advanced) enables tokenisation of Chinese, Japanese, Korean, and Thai languages. This is an advanced option and should only be used with grammars that have been optimised for tokenisation. Default ENG.
- Tangible Characters - (advanced) a list of punctuation characters to treat as part of the word, rather than as word boundaries. By default almost all punctuation characters are treated as word boundaries. To enable this, first select Match Whole Word.
- Match Case - force case insensitive matching. This increases the overhead and Case Normalisation is often a better compromise unless you have a specific requirement.
- Match Whole Word - when enabled this will match only terms in the text that begin and end on a whole word boundary, as specified by Tangible Characters. When disabled, this will match terms that start and end anywhere, including in the middle of a word in the text, using default boundaries.
Grammars
Grammars are define what types (entities) of information you are trying to detect and have been specially built and optimised to save you time building a DLP policy. Grammars are pre-defined but still have the flexibility to be customised should you need extra flexibility.
If you have selected a default policy, when you open the Grammars tab the list of associated grammars will be displayed. If you have created a Custom Policy, then press the + button to start adding grammars from the wide selection available.
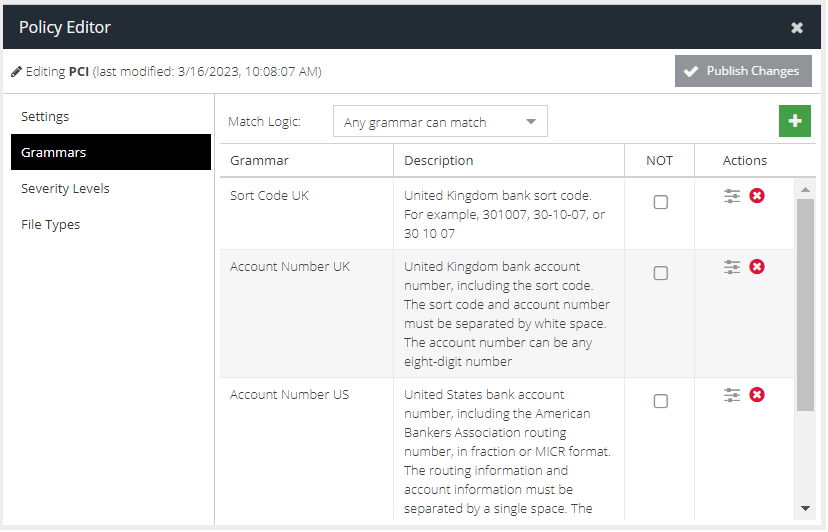
- Match Logic - this determines the overriding logic for all the listed grammars. "Any grammar can match" is the same as an "OR" logic, meaning only one out of all the grammars defined has to trigger a severity level for the policy to be considered in rule evaluation. Conversely, "All grammars must match" enforces "AND" logic which means every defined grammar must trigger a severity level to be considered in rule evaluation.
- NOT - this is a grammar level logic flag that effectively means the grammar entity must not be found in the content. The NOT operator is only available if "All grammars must match" Match Logic.
Click the Settings icon to customise the grammar further (see Customising Grammars below).
Click the Delete icon to remove the grammar from the policy.
The following table lists the available grammar categories. Each category has a number of entries based on geography and language.
Grammar Category | Description |
Address | Identifies physical addresses, such as home address, work address, military address, ZIP code, post code, in different regional formats |
API credentials | Identifies common API credentials such as for AWS, Facebook, Flickr, LinkedIn, Twitter, |
Car Licence Plate | Identifies vehicle registration numbers in different regional formats |
Companies | Identifies a significant company in different countries |
Computer | Identifies IPv4, IPv6, HTTP, FTP, MAC address and file addresses |
Date/Time | Identifies any time string in different regional formats |
Driver Licence | Identifies driving licence numbers in different regional formats |
Job Titles | Identifies corporate job titles including abbreviations, for example Chief Financial Officer or CFO. Also includes government and cabinet titles |
Medical | Identifies disease names, medical terms or medication, including trade and generic name for drugs |
Passport | Identifies passport numbers in different regional formats |
PCI | Identifies credit card numbers, bank account numbers, sort codes, IBAN, SWIFT for different countries |
Phone Numbers | Identifies any complete phone number pattern. This requires Tangible Characters to include |
PII | Identifies Personally Identifiable Information including age, nationality, ethnicity, email addresses, National Insurance/Social Security numbers, medical ID, person first and last names and salutations |
Places | Identifies settlements in different countries with the option of including population size e.g. Irish settlement with between 10,000 and 100,000 inhabitants |
Profanity | Identifies blasphemous, homophobic, racial derogatory, sexual, biological or censored words for different regions and countries |
Customising Grammars
In most cases customising grammars should not be required. However, if you want to edit a default policy to make it more specific, or add your own terms to a list of words to detect, then customising the appropriate grammar adds an extra level of flexibility.
Customising a Grammar Entity with a Word List
Click the slider settings icon next to the grammar you want to edit, for example to customise the Person Name (UK) grammar select the slider icon in the Actions column:

This will open the Grammar Editor which will list all of the entities that form part of the grammar:
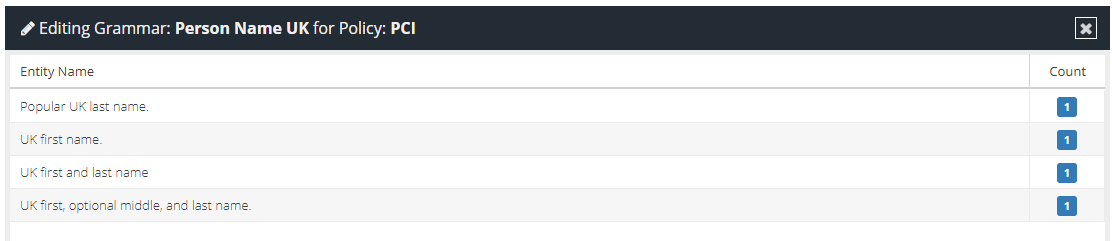
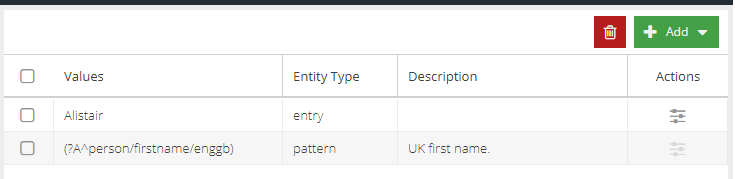
For this example, a modification to the "UK first name" entity is required, so that we can detect a specific persons name. Select the "UK first name" entity to view the list of entity patterns that exist:

In the right hand panel that appears you can see all of the entity values (lists or patterns) that are included in the entity by default.
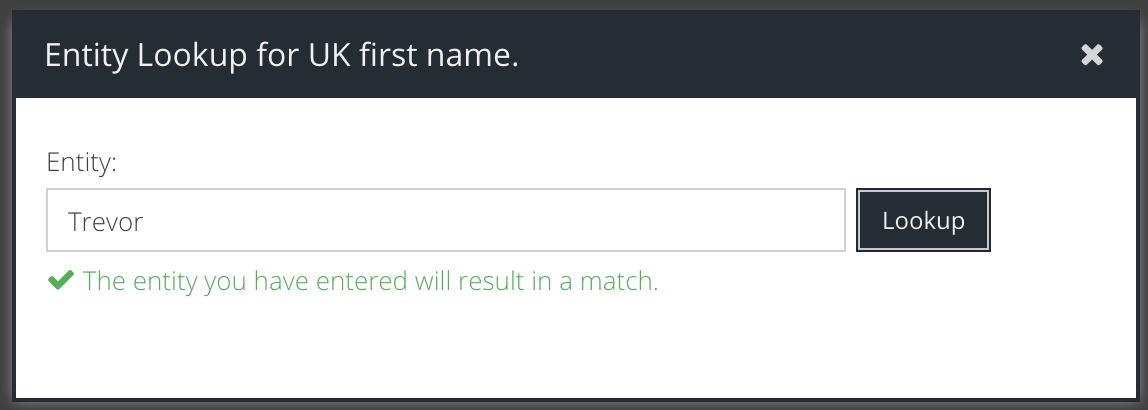
In this example, we want to add detection for the name "Alistair" and the synonyms "Ally" and "Ali". To do this, click the Add button and select Entry for a list of words.
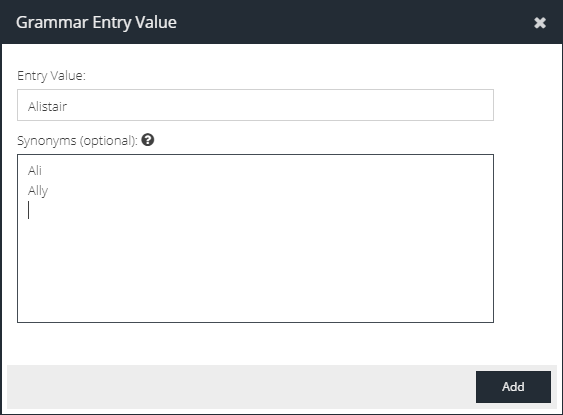
Click Add. The new word list is shown in the list of entity values.
Another example may be to use a list of words to identify sensitive or confidential code names in email messages.
Customising a Grammar Entity with a Regular Expression
A more powerful option for customising a grammar entity is to create Regular Expressions. In this example we will add a pattern to identify Spanish Tax Numbers.
Select the grammar entity you want to modify, for example the base Spanish DNI grammar.
Click the Add button and then select Pattern
The Regular Expression Test dialog will appear.
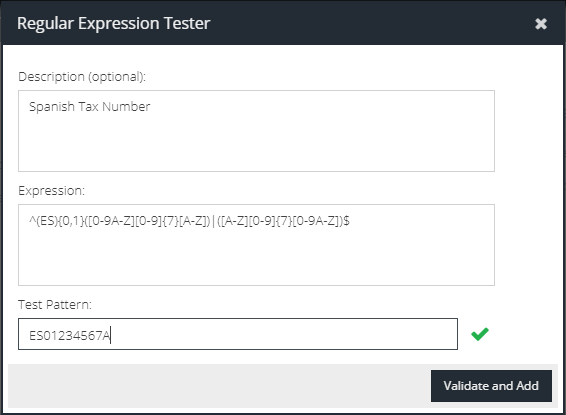
- Description - provide a human readable explanation of the new pattern. Recommended to make administration easier.
- Expression - enter the desired Regular Expression
- Test Pattern - in order to be able to add the Regular Expression, you must provide a test value to pass. You can also use this to confirm that the pattern does not overmatch.
Click Validate and Add to add the pattern to the entity.
Severity Levels
When a DLP Policy is executed during rule evaluation (for example, by Email Security) the policy must output a Severity Level. The severity level is the response of each grammar being evaluated against the content and returning a score, normalised into a number between 0 and 100.
The score is determined based on the Match Logic and number of grammars in use.
For Any Grammar Can Match (OR logic) a score of 100 is generated as soon as any matching pattern is found by any one of the grammars in the policy.
For All Grammars Must Match (AND logic) the score is determined based on the number of grammars and the number of matches found per grammar. For example, if there are 3 grammars (Credit Card numbers, Bank Account numbers, Sort Codes) and a file is detected containing 1 credit card number, the score is 100 / 3 * 1 = 33. If there was a bank account number and a sort code, the score is 100 / 3 * 2 = 66.
The resulting Severity Level is determined based on where that score falls within the scale defined for the policy, returning a level of Low, Medium, High or Critical. It is also possible for a score to be so low that it can be Ignored by the rules engine.
The following image shows the default Severity Level scale and the score required for each level.
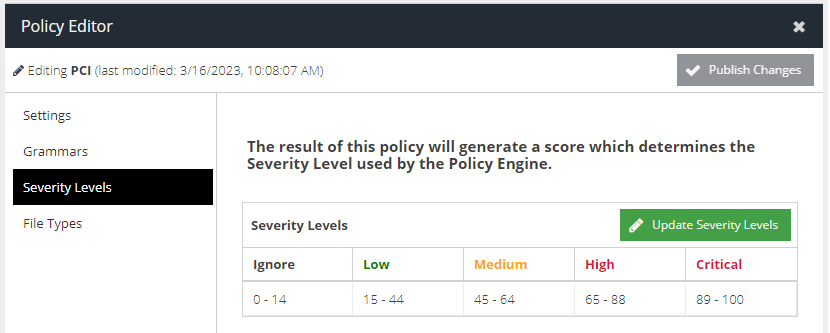
In most cases the default scale will be sufficient however for more advanced configurations it can be changed.
To change the Severity Levels click Update Severity Levels
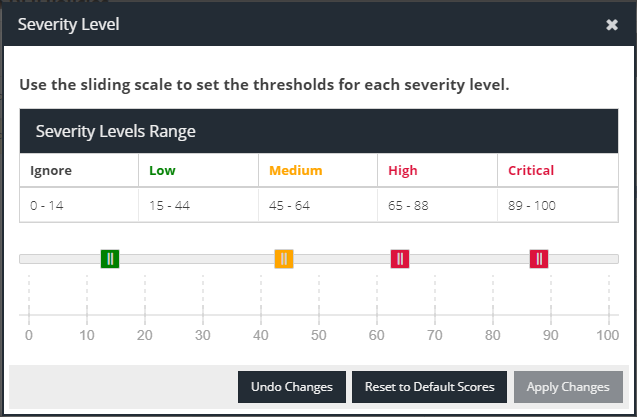
To alter the range for a particular level, drag the appropriately coloured handle. The scores will adjust to reflect the new range.
If you make a mistake, you can Undo Changes to revert the last change or Reset to Default Scores to reset the policy back to the default.
File Types
By default a DLP Policy will be applied to any content that is captured during rule evaluation (e.g. a web site upload or an email attachment). In some cases you may want to fine tune this to improve performance and reduce false positives, for example if you know that the content you are looking for will only exist in PDF documents.
To limit the scope of the DLP Policy to a particular set of File Types, tick the Limit this policy to specific file types check box.
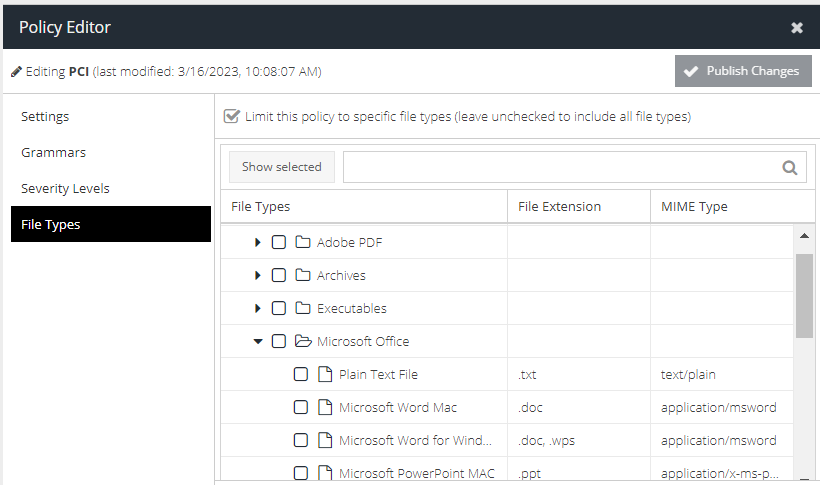
A panel will appear showing the File Type categories and types that you can limit the scanning to by file extension or MIME type.
Publishing a Policy
Once all the DLP Policy settings have been configured (by clicking Save Changes in each section described above) you are ready to publish the DLP Policy. The act of publishing sends the policy to the products based on the Policy Availability selection.
Reporting on DLP Activity within Email
The Advanced DLP for Email Security add-on enhances the Email Activity report with DLP specific search features and information.
When viewing Message Details, an additional panel of information will be included to summarise DLP matches:
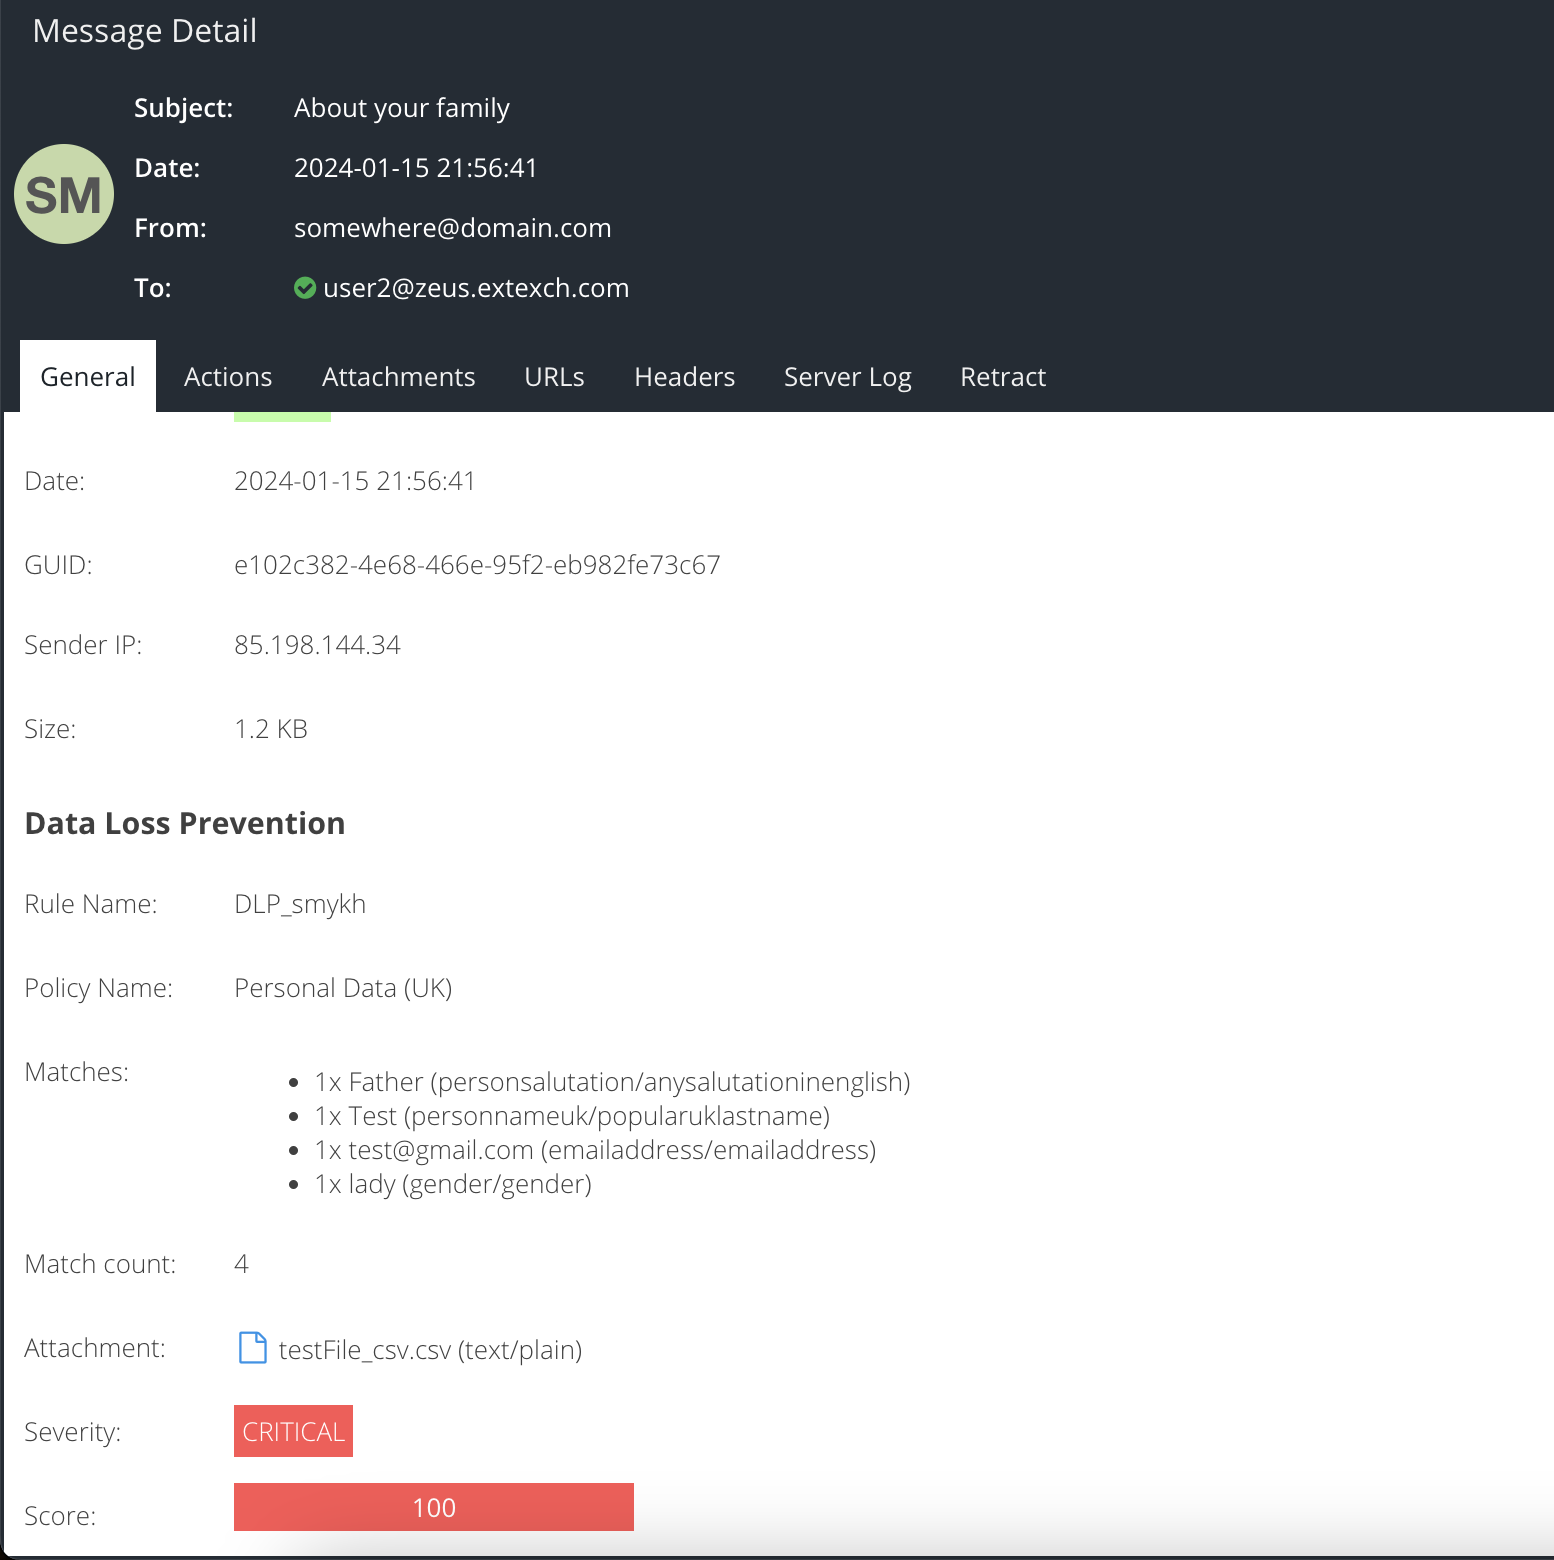
For further information please see the Email Activity -> Advanced DLP reporting information.