Google Workspace SSO
![]() Updated 2 years ago
by
admin
Updated 2 years ago
by
admin
This article applies to:
- Gmail
- Google Drive and Docs
- Google Calendar
- Google Sites
- Google Groups for Business
For this guide you will need:
- Your Google Workspace primary domain
- Usernames in your identity provider will need to match usernames in Google Workspace e.g. if your IdP has a user bob@acmetest.com then Google Workspace will also need the same user to exist. This may mean you have to add a secondary domain to Google Workspace (please note, setting that up is outside of the scope of this document and requires access to the DNS records for your domain)
- Ensure that you have an Identity Provider configured
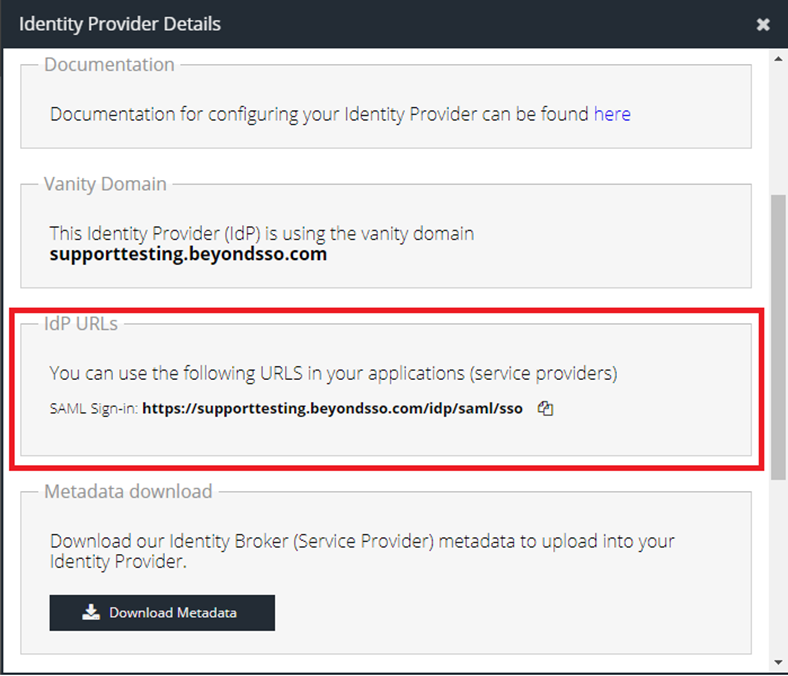
- Your IdP URL - this can be found by clicking the relevant Identity Provider tile in Products -> IDaaS -> Identity Providers and will save some time later in the guide
- Ensure that you have a Google Workspace account that supports Single Sign on using a Third Party IdP
- Navigate to App Launcher -> Add Apps
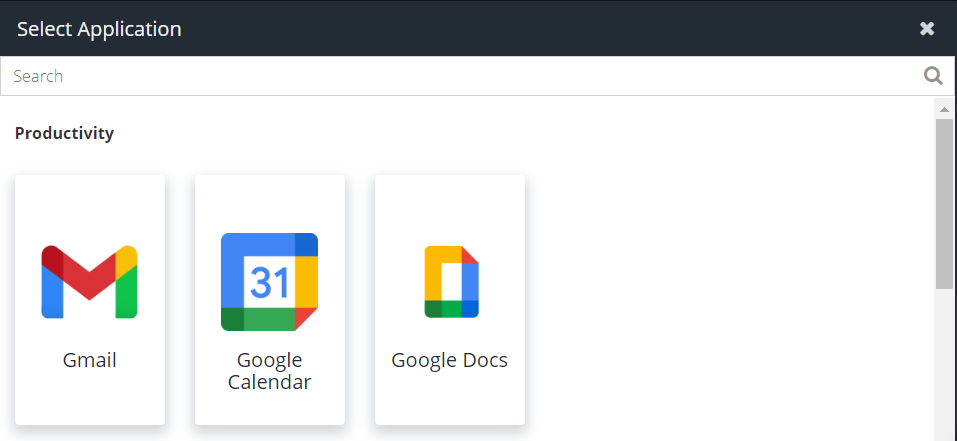
- Select the Google App tile for the app you are adding. This guide will use Gmail as an example. If you do not see a tile that matches the desired Google App, select the Google App (Generic) tile and change the Application Name to the name of the app you are setting up
- Select an existing category or create a new category by using the Manage option. The app tile will appear in this category for IDaaS users.
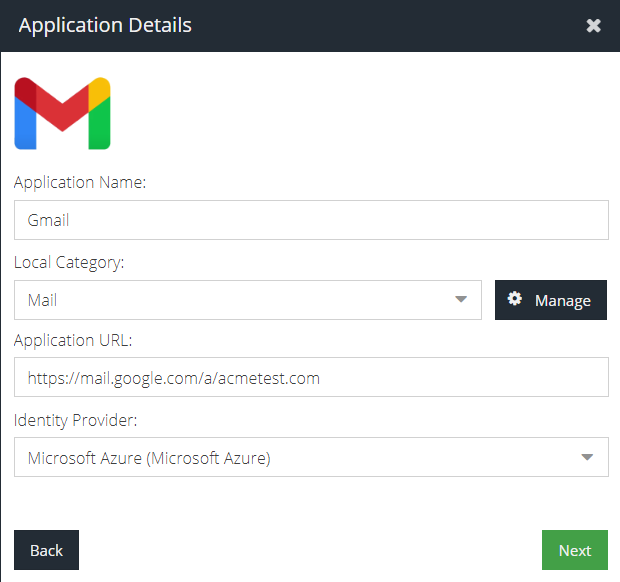
- Leave the Add Application window open and open a new tab and log in to Google Admin. Navigate to Account Settings -> Custom URLs and make a note of the URL for the app you are adding i.e. Gmail. Note that you may have a custom domain set up rather than the default Google URL, which usually takes the format
<app>.google.com/a/<custom domain> - Switch back to the Add Application window and paste the link for the app into the Application URL field
- Select the preferred Identity Provider for this app
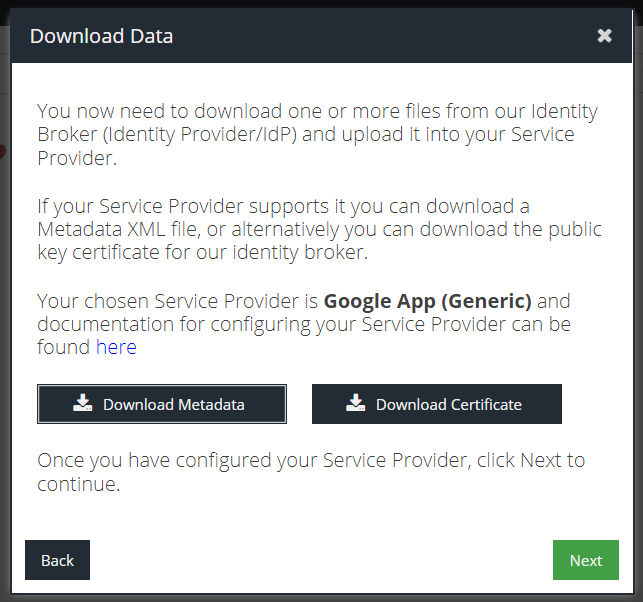
- Click Next
- Click the Download Certificate button and save the file on your computer
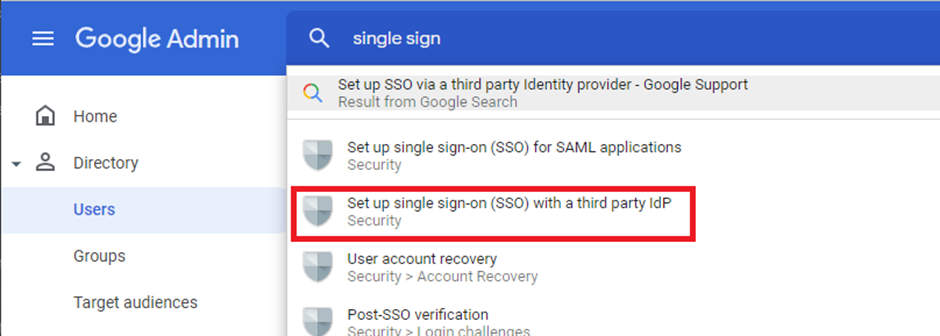
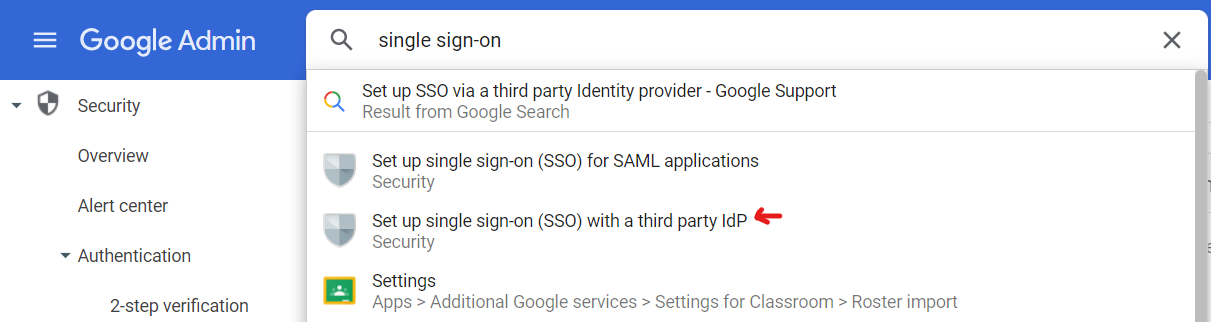
- Leave this window open and switch back to Google Admin as an administrator. Now search for Single sign-on and select the Set up single sign-on (SSO) with a third party IdP menu option
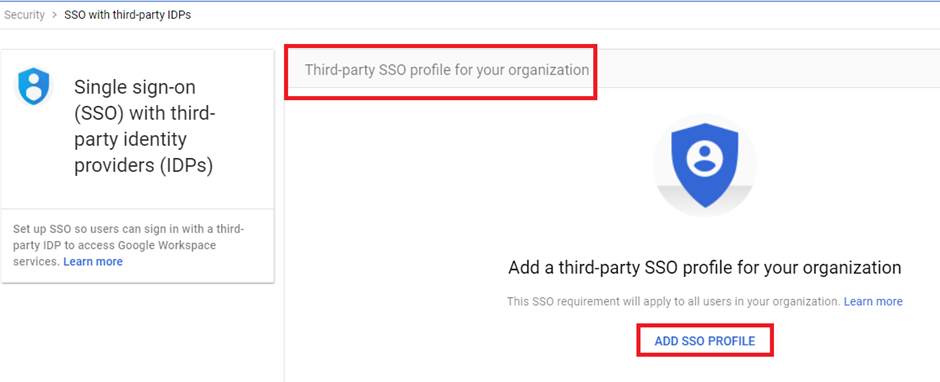
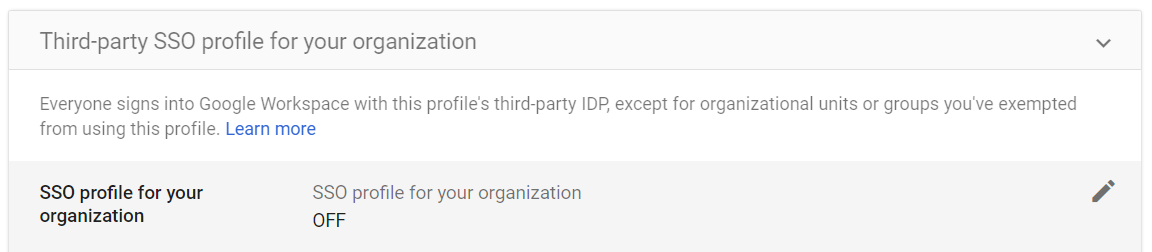
- If this is the first time you have configured third party SSO, you will need to click Add SSO Profile otherwise click the pencil icon to the right of SSO profile for your organization to edit the settings
- Tick Set up SSO with third-party identity provider
- The next step is to set the Sign-in Page URL for Google to use
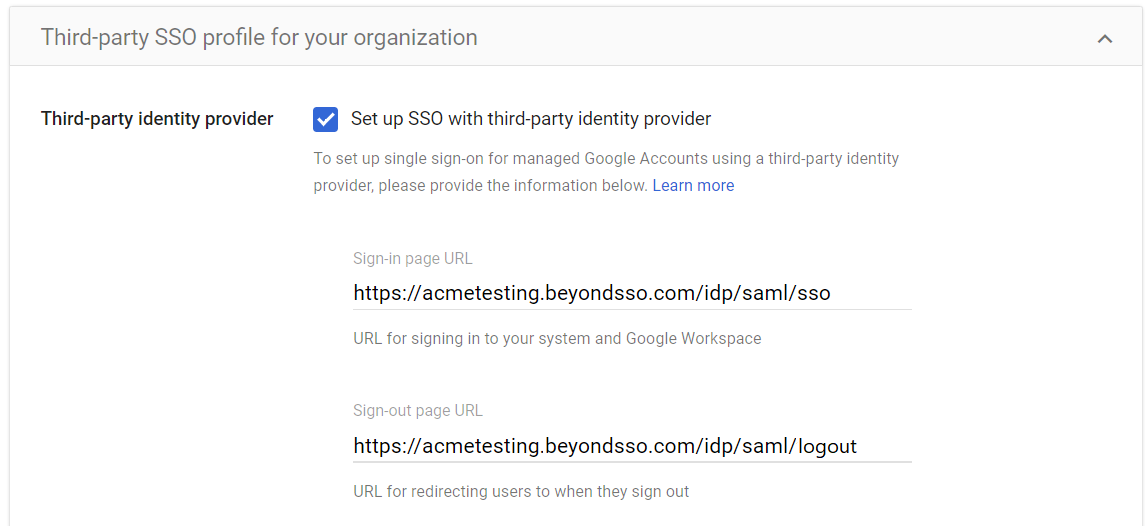
This URL will take the format https://<your-vanity-subdomain>.beyondsso.com/idp/saml/sso and can be found by clicking the relevant Identity Provider tile in Products -> IDaaS -> Identity Providers
https://<your-vanity-domain>.beyondsso.com/idp/saml/logout for the purposes of configuration.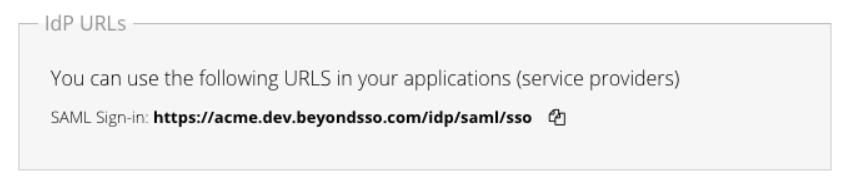
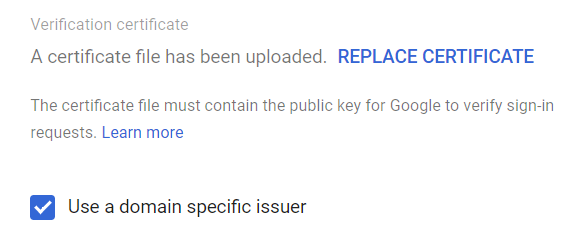
- You will either see “No certificate file has been uploaded. UPLOAD CERTIFICATE” or “A certificate file has been uploaded. REPLACE CERTIFICATE”. Click on whichever option is available, and upload the certificate from Step 10.
- Ensure the Use a domain specific issuer checkbox is ticked
- Click the Save button in the bottom right-hand corner of the page
- At this point, the Google side is configured. Unfortunately, at this moment in time, Google does not provide the option to download metadata for use with the IdP. Copy the following template into your clipboard, taking note that the <CUSTOM_DOMAIN> tag will be updated in both sections before use in the following steps
google.com/a/<CUSTOM_DOMAIN> will determine the Identity Provider that all subsequent Google app tiles will use, if more are added at the end of this guide. Put simply, it is not possible to split Google Apps access across multiple Identity Providers.<EntityDescriptor entityID="google.com/a/<CUSTOM_DOMAIN>" xmlns="urn:oasis:names:tc:SAML:2.0:metadata">
<SPSSODescriptor protocolSupportEnumeration="urn:oasis:names:tc:SAML:2.0:protocol">
<NameIDFormat>urn:oasis:names:tc:SAML:1.1:nameid-format:unspecified</NameIDFormat>
<AssertionConsumerService index="1" Binding="urn:oasis:names:tc:SAML:2.0:bindings:HTTP-POST"
Location="https://www.google.com/a/<CUSTOM_DOMAIN>/acs" />
</SPSSODescriptor>
</EntityDescriptor>
- Switch back to the Add Application window and click Next.
- Click Paste Metadata XML and then paste in the XML from the previous step
- Before clicking OK, change
<CUSTOM_DOMAIN>tags to the name of your Google Workspace primary domain e.g. acmetest.com, in both parts of the XML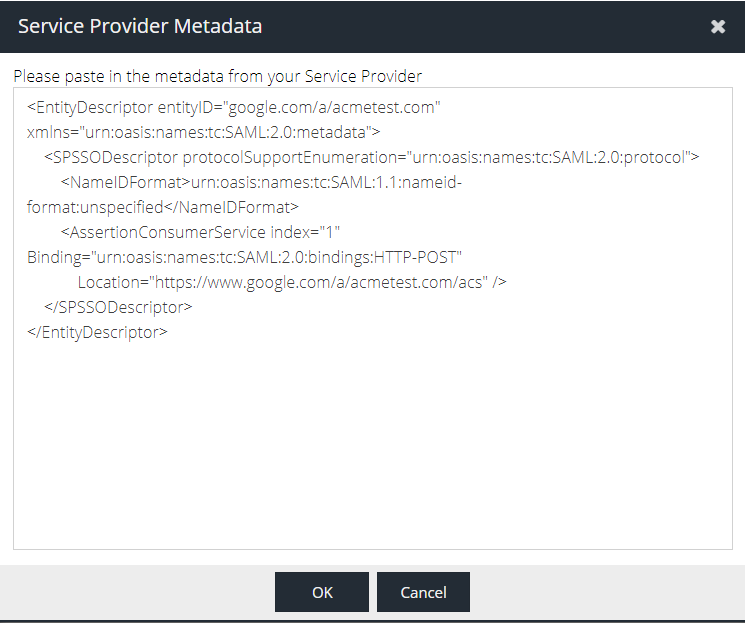
- Click OK and then Next to finalise the configuration
- The new tile should be visible in the application list. Test the authentication by clicking the newly created Gmail tile and when prompted sign in with your identity provider credentials
Additional Google App tiles
Once a user has authenticated with the primary Google app that has been configured, they can switch between Google Apps using the selector menu.
However, it is also possible to add additional Google app tiles to the Applications list if required.
To add another app, such as Google Drive, repeat the same steps 1-5 and steps 17-19 taking care to use a unique EntityID in step 17 that matches the Application URL e.g. entityID="<APP>.google.com/a/<CUSTOM_DOMAIN>" . In the example of Google Drive the entityID would become entityID="drive.google.com/a/<CUSTOM_DOMAIN>". Failing to do this will generate an error that an application already exists with the given metadata.
Further Reading
- Google documentation (external)