Setup AD Sync on the SAT Portal
![]() Updated 1 year ago
by
admin
Updated 1 year ago
by
admin
Below is a short guide on how to set up AD Sync so that your AzureAD is linked to the Security Awareness Training (SAT) product.
To perform these steps, you must be logged into the SAT portal with a Microsoft Global Admin account with a live mailbox to receive the setup email. To complete this, please follow this KB Article
Before starting your AD Sync, you MUST create a separate group within your AzureAD called Censornet SAT Users where only the required SAT users reside. Failure to do this may impact your SAT license.
Ensure you are using an M365 global administrator account.
If you have already set up Single Sign On (SSO) as detailed in this KB article prior to setting up AD-Sync, then please complete steps 10 and beyond of this KB Article before starting step 1.
To complete this KB we recommend accessing the SAT portal via your browser in Incognito/Private mode to avoid session caching.
- Navigate to the SAT Portal directly https://uk.sat.clouduss.com/ or https://de.sat.clouduss.com/login (Not via the USS dashboard) and log in with your admin account.
- Click on Tenancy on the left-hand side
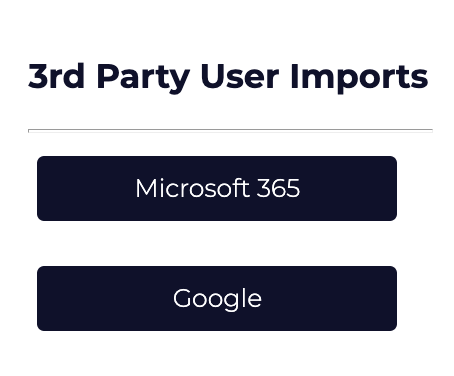
- On the top tab, click Users
- Click on the Microsoft 365 icon as shown below:
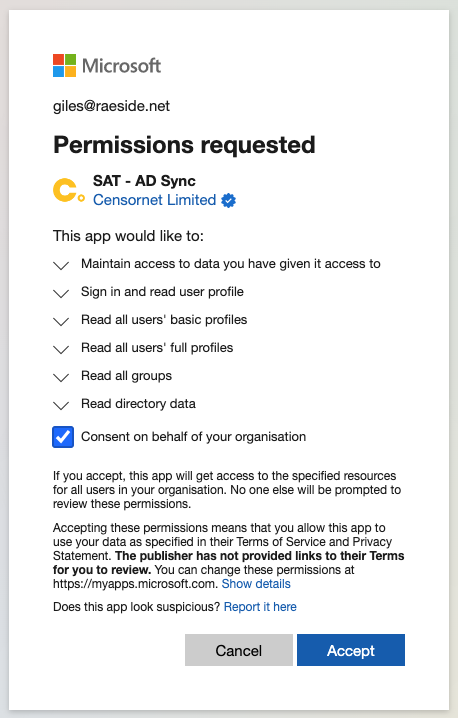
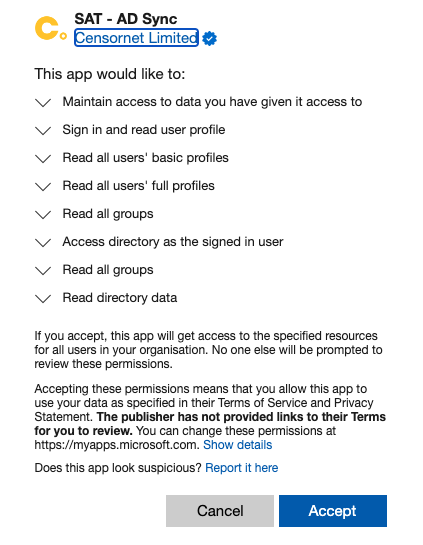
- You should now be redirected to your M365 login page where you need to select Accept to enable the requested permissions as shown below. Ensure you tick the Consent on behalf of your organisation button, if your permissions don't look like the below image, then you have not logged in with a Global Administration for M365, please redo this step.
- You will then see the below screen:

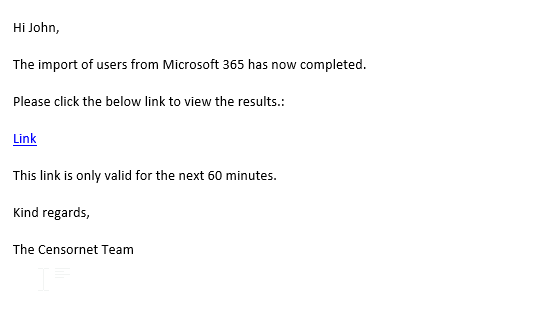
- After a few minutes, you should receive an email informing you to click a link in order to import your users as shown below:
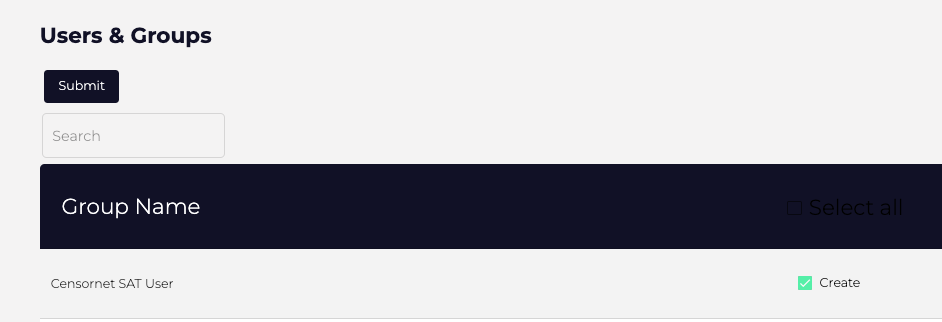
- Select the previously created Censornet SAT Users group then tick the Create box next to the group then select the Submit button as shown below, please note by default this is a one-time sync (If you do not see a list of your AzureAD groups then follow step 11 and beyond of this KB Article):
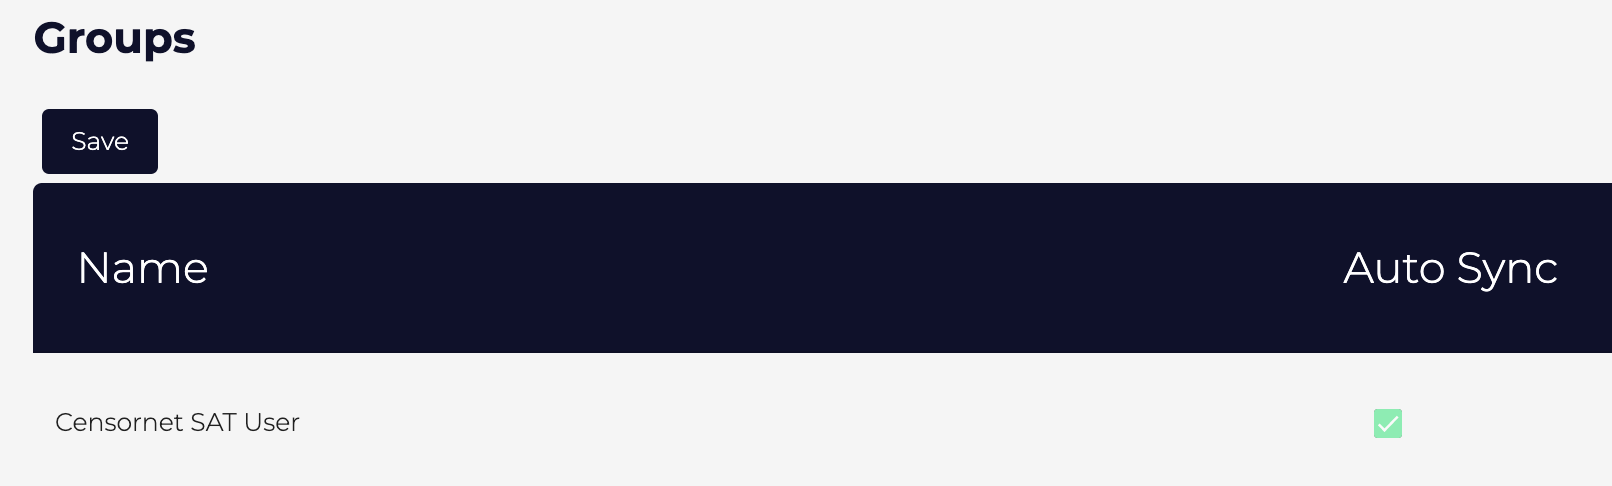
- To enable Auto-Sync, select Tenancy then the Additional Data tab, under groups select the Edit button, you will now be able to select Auto Sync on the required group, then select the Save button as shown below.
AD Sync has now been set up on your SAT portal. Step 11 and beyond are not required unless SSO was configured before AD-Sync.
- Because SSO has been set up before AD-Sync you will need to edit the permissions on the SAT - AD Sync enterprise application within your AzureAD environment. login to your Azure Active Directory Admin Center.
- Select Enterprise Applications and select the SAT - AD Sync application as shown below:

- Select Permissions under the Security section then select Grant Admin Consent for button as shown below:

- You will now be redirected to your M365 login page where you need need to re-enter the credentials of a Global Administration for M365, then select Accept to enable the requested permissions as shown below:
- The required permissions will be added and completes the process.