Multiple Microsoft 365 Connectors
![]() Updated 8 months ago
by
admin
Updated 8 months ago
by
admin
You can onboard multiple Microsoft 365 Connectors onto the Posture Management service.
View Number of Available Microsoft 365 Connectors
To check the number of available accounts, follow these steps:
- Visit your USS Dashboard.
- Go to the Settings -> Licenses.
- Check the number of users next to the Microsoft 365 Connector product.
- Or visit the Posture Management Dashboard.
- From the top ribbon, select Connectors and then +
- View the number of remaining accounts in the Microsoft 365 tile.
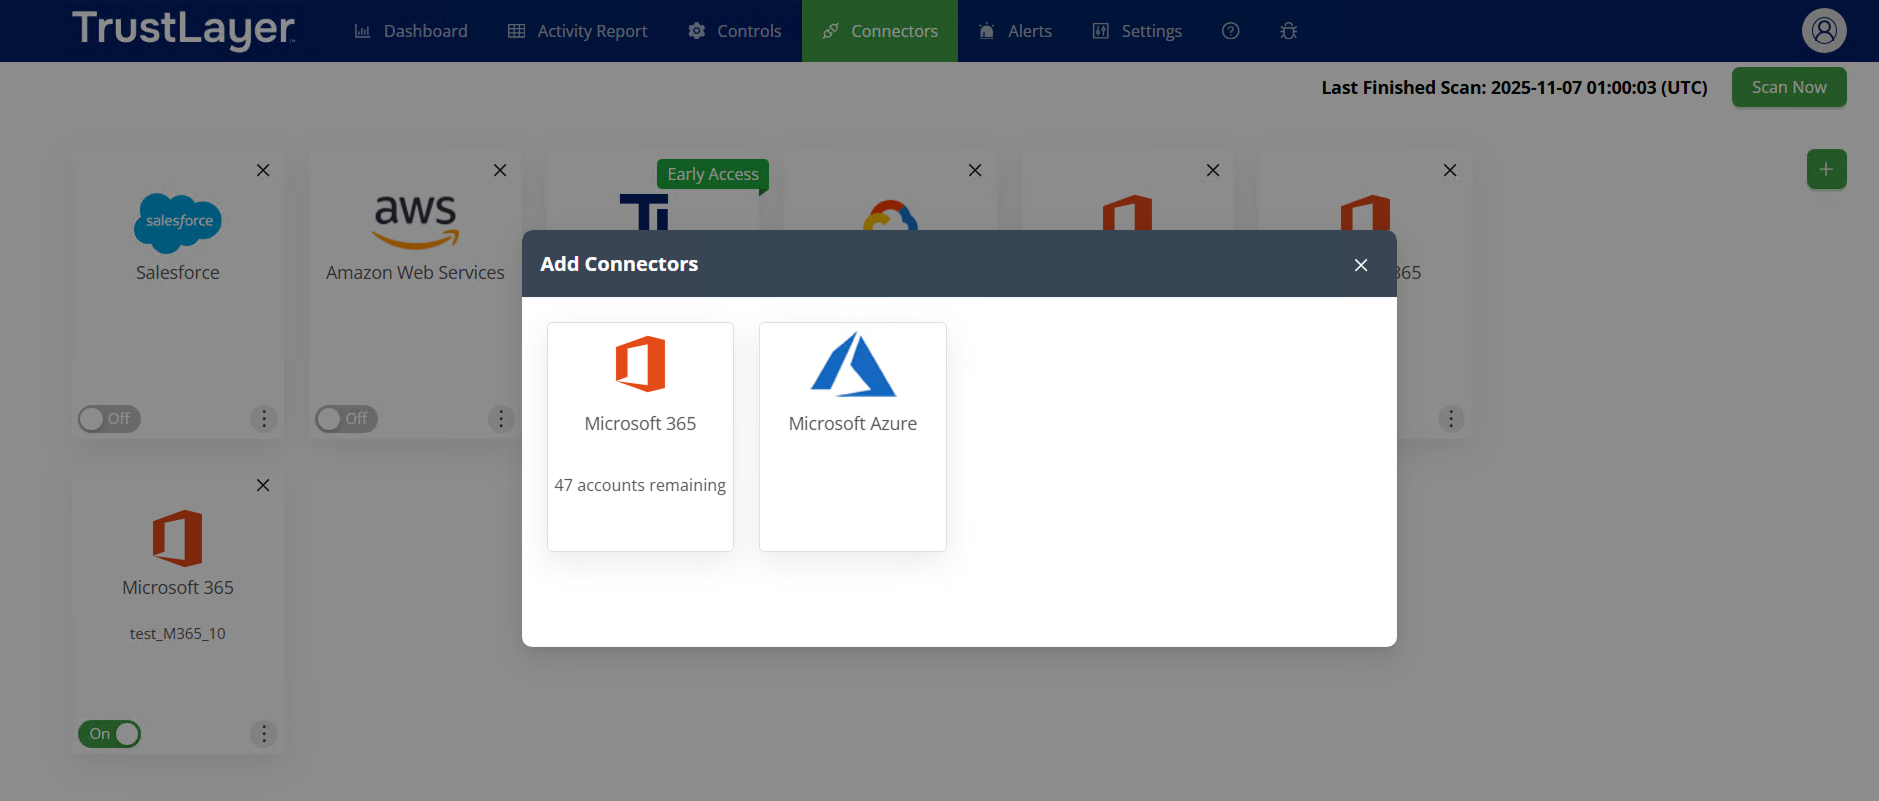
Add Microsoft 365 Connector
To add a new Microsoft 365 Connector, follow these steps:
- Open the Posture Management Dashboard.
- From the top ribbon, select Connectors and then +
- Select Microsoft 365.
- Input the Tenant ID, Client ID, and Client Secret, obtained by following the Microsoft 365 Onboarding Guide.
- Click Next.
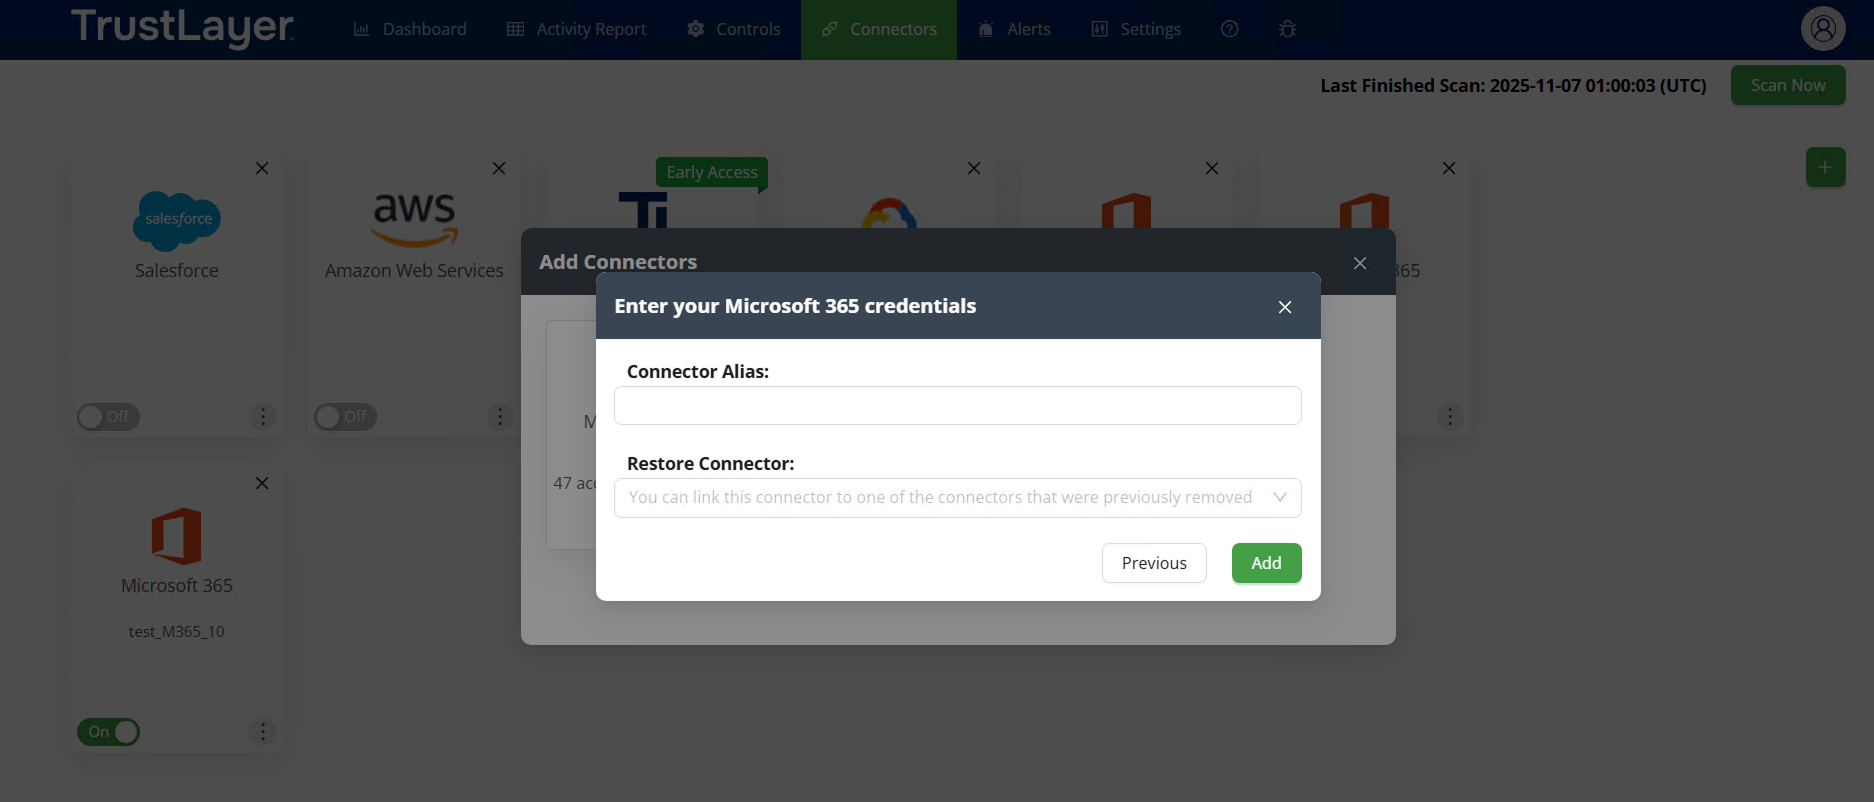
- Add a Connector Alias to help distinguish your M365 connectors. You can edit the alias of M365 connectors later if needed.
- You can also restore one of the connectors you’ve removed within the last 90 days. Thus, all its historical scans will be linked to the new connector you are adding.
- Click Add.
- The connector with the specified alias will be displayed in the list.
- The default controls configuration will be applied to it. You can change this via the Controls tab.
Configure Microsoft 365 Controls
- Open the Controls tab.
- Access the list of all M365 connectors by clicking the Microsoft 365 option in the left sidebar menu.
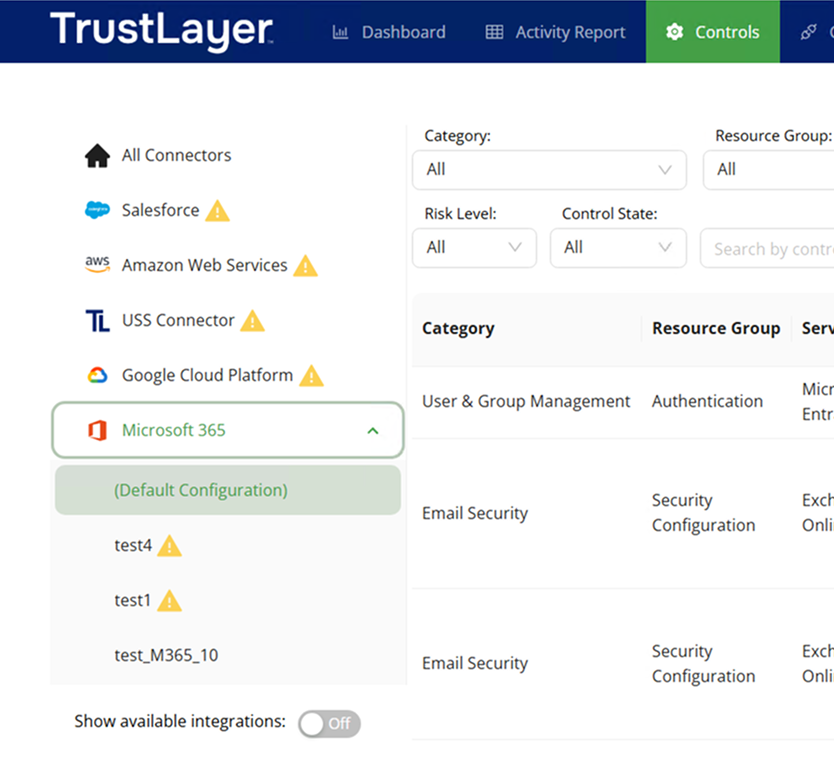
- There is a default configuration applied to all newly added connectors.
- You can open the specific connector and override the default configuration if needed.
- If you later decide to revert the connector back to its default settings, click Apply Default.
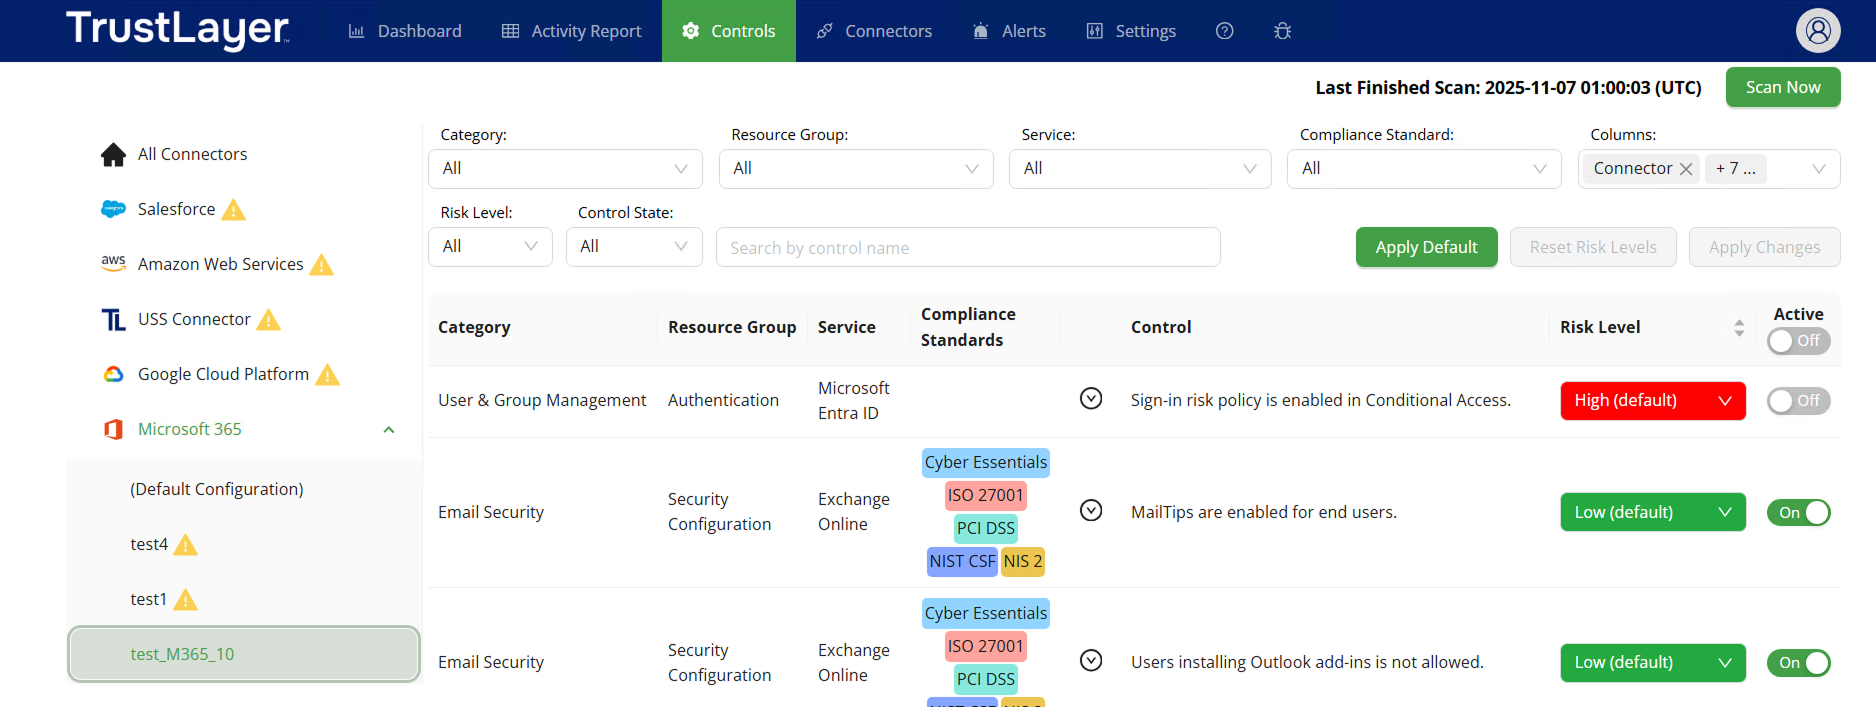
View Scan Results and Dashboard
All your M365 connectors will be scanned separately, and you can review the scan results for each connector.