CEA - Setting Retention Period
![]() Updated 1 month ago
by
admin
Updated 1 month ago
by
admin
How to set your archive's email retention period.
What is the Retention Limit?
The Retention Limit is the number of days that emails will be retained by CEA. The email date is used, and not the date on which the email was processed into CEA, to decide whether it should be retained in the archive or not. Emails older than the retention period will be permanently deleted by a daily housekeeping task (that runs at midnight). The retention limit setting requires support to assist: you must provide some proof, for example a signed letter, that a specific retention period is to be applied. By default, CEA will not remove any data.
Instead of, or in conjunction with, a retention limit it is now possible to set SEARCH DATE LIMITS. This will limit the earliest date that certain classes of user or local user accounts can set for any searches. This lets Administrators retain data for longer than your business actually requires, or the users are aware of.
For retention to be fully successful, the NTP settings must be set up. This ensures that the CEA clock is correct, and a malicious user cannot set the CEA clock forward in order to force a large email deletion process. If the system detects local server clock drift when compared to a remote NTP service, then alerts will be raised. To change the retention date setting, Administrators will need a code which will be supplied by a CEA support engineer. Again, this is to prevent the casual setting of the retention period which might cause large-scale email deletion.
Changing your Retention Settings
- Navigate to Adv Configuration > Retention Limit.
- Click the Change Retention Period link.
- Enter the desired retention period and click the Submit button.
- Notify & Await Approval by your archive's Data Guardians.
Data Guardian Approval
When you or your colleagues submit a request to change the retention period in your archive, you will need to obtain approval from the designated data guardians of your archive.
Granting Approval
Requires a Data Guardian Account
To authorise a request for changing retention, follow the steps outlined below:
- Log in to your Archive.
- Click on your profile icon located at the top right corner of the screen.
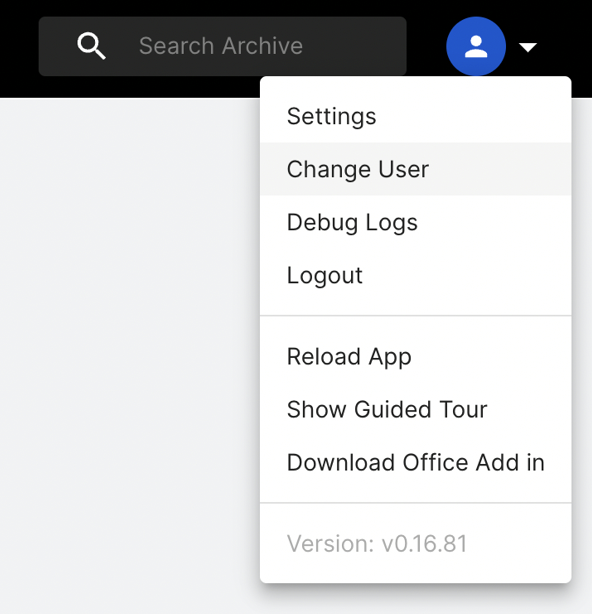
- From the menu, select "Change User."
- Pick the user labelled as "Data Guardian."
- Once on the Data Guardian screen, on the navigation bar, - click on "Requests."
- Identify the specific request you want to manage.
- Choose whether to "Approve" or "Decline" the request.
It's worth noting that, as mentioned earlier, most systems necessitate approval from two data guardians to process a retention request. If a request still requires additional approval from another data guardian, its status will change to "Part Approved," indicating the need for another data guardian's approval.