Preparing the USS Gateway for use with a load balancer
![]() Updated 4 years ago
by
admin
Updated 4 years ago
by
admin
This article is concerned with highlighting the typical steps required to configure load balancing for the USS Cloud Gateway, when configured as an explicit HTTP proxy with kerberos authentication. It is not intended to provide step by step instructions for a load balanced deployment.
Step 1 - Preparation
This guide will assume you are load balancing only two servers however more can be added by repeating the steps.
You will need:
- Two USS Cloud Gateway servers (virtual or physical)
- Three static IP addresses from your local network
- A TLS/SSL certificate generated on one of the gateways (see Step 2)
- Kerberos keys generated on one of the gateways (see Step 2
For this example, the following IP addresses will be used:
Description | IP address |
Primary (first gateway server) |
|
Secondary (second gateway server) |
|
Load balancer |
|
The following hostnames will be used:
Description | Hostname / FQDN |
Primary |
|
Secondary |
|
Load balancer |
|
The end result is that the host configuration is as follows:
FQDN | IP address |
|
|
|
|
|
|
gateway1 and gateway2 will be configured as if they are filter temporarily in order to configure Kerberos with the shared hostname. Both will be changed afterwards, leaving the load balancer to use the correct filter hostname and IP address.Step 2 - Configuring the Primary gateway
- Using the gateway web interface, navigate to Configuration, Network and select Interfaces. Select the primary network interface and set the IP address to
10.10.10.10. This will be changed later.
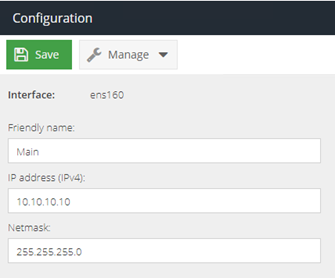
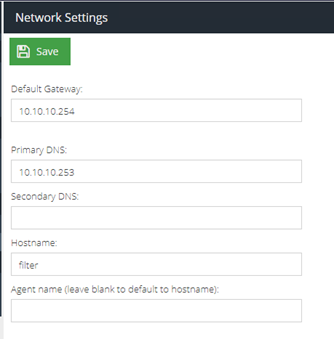
- Select the DNS & Gateway menu option and enter the short name of the server:
filter
- Reboot the server
- Next, navigate to the System section and from the SSL Certificates menu button select Export CA.
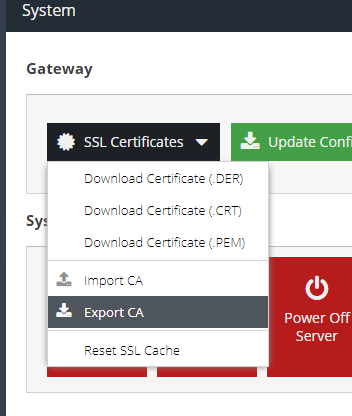
- Save the certificate file somewhere safe.
- Follow the steps to configure User Authentication (Active Directory) in full.
- Navigate to Configuration and then Active Directory and use the Server menu to export the Keyfile:
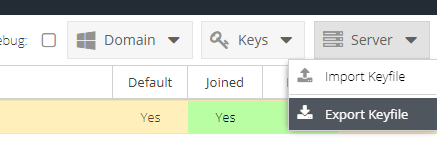
- Save the Keyfile somewhere safe.
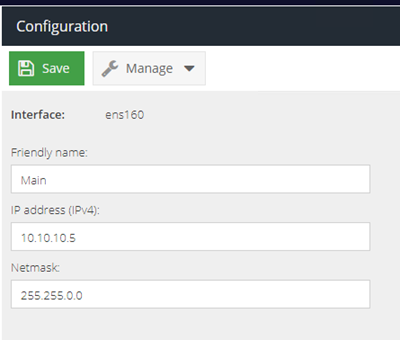
- Return to the Configuration and then Interfaces section and change the IP to its final address:
10.10.10.5
- Change the hostname in DNS & Gateway to its final hostname (short version):
gateway1

- Reboot the server
- Finally, in the Configuration and then Advanced section, set the IP address of the load balancer:
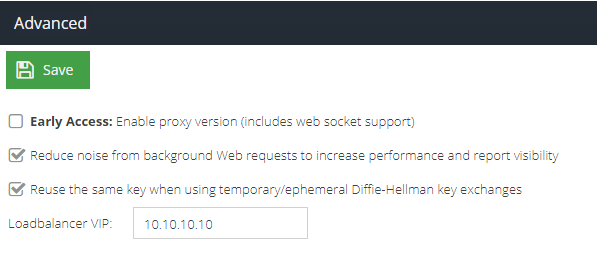
Step 3 - Configuring the Secondary gateway
Follow the same approach to temporarily configure the secondary gateway with the same settings as the load balancer and then import the certificate and key from Step 2:
- Using the gateway web interface, navigate to Configuration, Network and select Interfaces. Select the primary network interface and set the IP address to
10.10.10.10. This will be changed later.
- Select the DNS & Gateway menu option and enter the short name of the server:
filter
- Next, navigate to the System section and from the SSL Certificates menu button select Import CA. Select the certificate file you exported in Step 2 - point 4 & 5 above.
- Follow the steps to configure User Authentication (Active Directory) however do not follow the step to Create Keys.
- Navigate to Configuration and then Active Directory and use the Server menu to Import the Keyfile you exported in Step 2 - point 7 & 8 above.
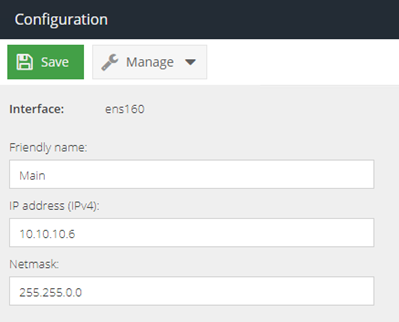
- Return to the Configuration and then Interfaces section and change the IP to its final address:
10.10.10.6
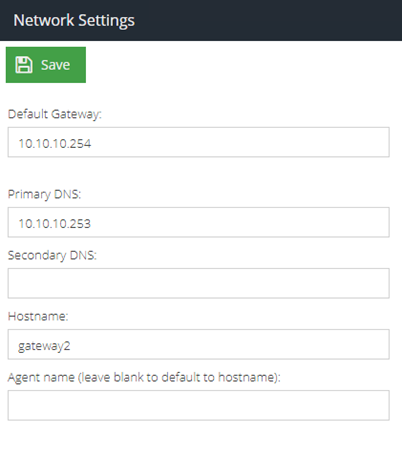
- Change the hostname in DNS & Gateway to its final hostname (short version):
gateway2
- Reboot the server
- Finally, in the Configuration and then Advanced section, set the IP address of the load balancer:
Step 4 - Configuring the load balancer
The following guidance should help you to configure a third party load balancer:
- The load balancer should be configured to use the IP address configured in Step 2 point 12 and Step 3 point 9. The example given in this article:
10.10.10.10 - The load balancer should be configured to use the hostname that client devices will use to connect. The example given in this article:
filter.domain.local - Some load balancers (such as Loadbalancer.org) will need to use the
filterIP address as a virtual IP address rather than a static configuration - The load balancer should now be configured to use layer 4 networking to redirect traffic on port 8080 to the gateways
- Important: you will need to ensure that
filter.domain.localis configured in your local DNS to point to the IP address of the load balancer – in this example10.10.10.10. This is so that client devices can connect. - Client devices should be configured to use the
filter.domain.local:8080proxy address.