Gateway failing to join the domain - the address handle that was given to the transport was invalid
![]() Updated 1 year ago
by
admin
Updated 1 year ago
by
admin
USS Gateway failing to join AD domain
If the USS gateway fails to join the Active Directory domain and you have verified all of the settings are correct you might need to join the domain via the command line.
A common join return code which indicates this route might need to be taken is:
return code = -1
Failed to join domain: failed to find DC for domain DOMAIN - The address handle that was given to the transport was invalid.
Below we'll outline steps to resolving the issue via the command line. We recommend using Putty or a console connection which allows copy and paste. See the article Accessing the Command Line.
Pre-requisite – please install the Kerberos utilities using:
apt-get -y install krb5-user
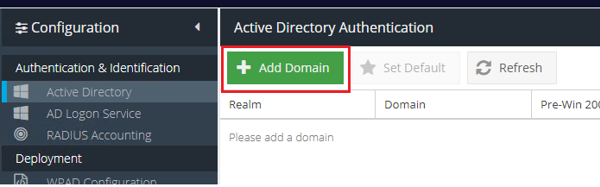
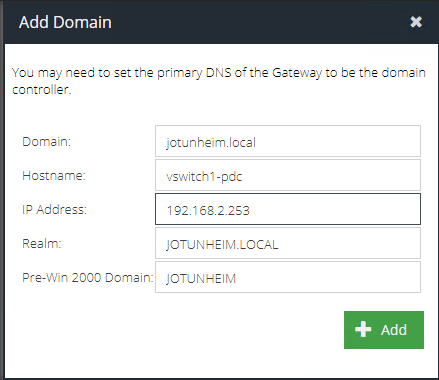
- Create the Active Directory domain in the UI as usual (replacing the fields with details for your own domain)

- Join the domain using this command (using your own user and replace
JOTUNHEIM.LOCALwith your own domain in capital letters):net ads join -U mick@jotunheim.local -s /etc/samba/JOTUNHEIM.LOCAL_smb.conf
This will prompt for a password, which will not be echoed to the screen while typing. If the join is successful, you will see an error about adding the DNS record, but this can be ignored as this will need to be created manually.
- Update the proxy database with this info (replace
JOTUNHEIM.LOCALhere with your own domain):
sudo su -c "psql -d cloudgw -c \"update ad_auth_domains set is_joined='1' where realm='JOTUNHEIM.LOCAL'\";" postgres
It should look like this if successful:

- Create the keys (replacing the user and
JOTUNHEIM.LOCALin the filename with your own details):
net ads keytab add_update_ads HTTP -U mick@JOTUNHEIM.LOCAL -s /etc/samba/JOTUNHEIM.LOCAL_smb.conf

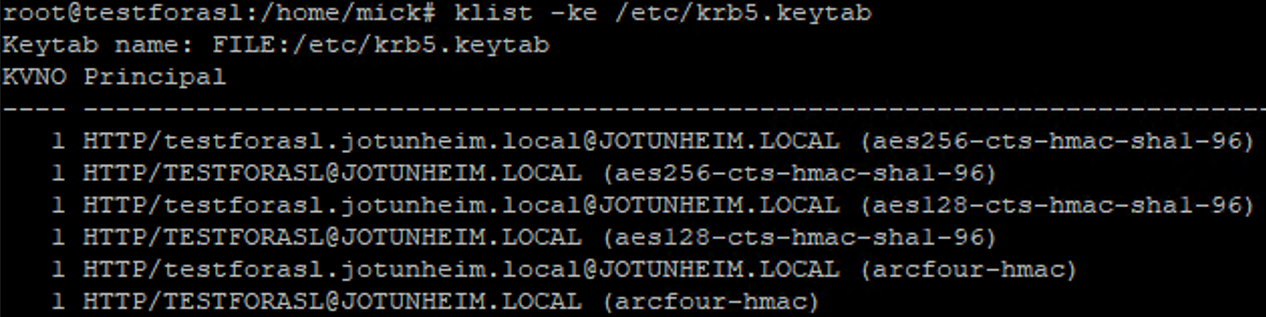
Verify that the keys have been created:
klist -ke /etc/krb5.keytab
- Update the proxy database with this info:
sudo su -c "psql -d cloudgw -c \"update ad_auth_domains set has_keys='1' where realm='JOTUNHEIM.LOCAL'\";" postgres
It should look like this if successful:

- Enable AD Authentication:
sudo su -c "psql -d cloudgw -c \"update global_config set val='1' where key='ad_authentication'\";" postgres
- Finally restart the proxy here and everything should work:
