Deploying the Windows agent via a custom MSI
- Download this version of Orca.
The version of ORCA you use must be the one above.
- Download the latest version of USS Agent for Windows.
- Open up the ORCA tool.
- Load up the USS Agent
.msifile within ORCA. You can do this by either dragging and dropping the file into it, or by choosing File ⟶ Open ⟶ Select downloaded MSI. - Click Transform ⟶ New Transform.
This step is extremely important.
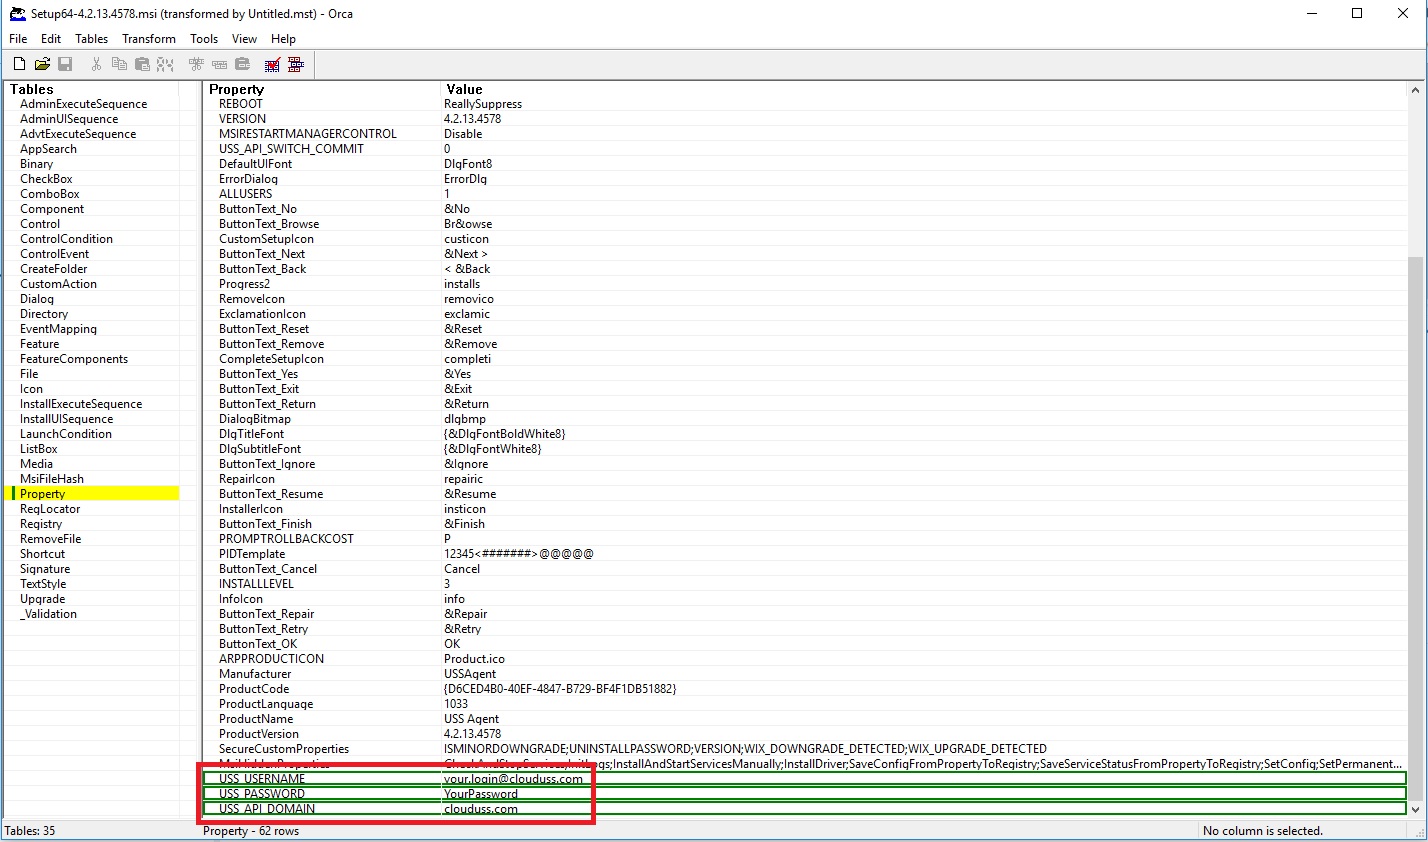
- Under the Tables column on the left, go to Property.
- There are several configuration options but the following is required for a silent install as a minimum.
USS_USERNAME (this must be your username used to log into your USS portal ending with @clouduss.com)
USS_PASSWORD
Optional in version 4.1.x and above: USS_API_DOMAIN set to clouduss.com
You will need to right-click in the window and create these entries, as they are not created by default.
It is best practice to create a new administrator user for provisioning.
There are other configuration options available via this article.
- The entries should look something like the following with your assigned account details (highlighted by red box):
- Once you have added all the overrides you require, go to Transform and click Generate Transform.
- Place both the
.msiand.mstfiles into a shared folder. - To install, you can run the following command:
msiexec /i \\dc\Share\Setup64.msi TRANSFORMS=\\dc\deploy\Setup64.mst /qn
Replace
\\dc\share with the servername and location of your share folder.- For GPO deployment, follow the instructions in this article.