Configure Office 365 for EMS
To successfully add Office 365 customers, you will need to perform three steps:
- Configure Cloud USS for the Office 365 accounts.
- Configure Inbound mail on Office 365 to reject non-EMS emails.
- Configure Outbound mail on Office 365 to send email via the EMS servers.
Configure Cloud USS for the Office 365 accounts
Configuring Inbound Mail
- Visit your USS Dashboard and click Products ⟶ E-mail Security ⟶ Product Configuration ⟶ Inbound Mail.
- Click
 to add a new delivery route.
 - In the Domain field, enter the domain name of the host you want to redirect. For example,
tonyfrankum.co.uk. - In the Route field, enter the outlook routing host for this domain name. For example,
tonyfrankum-co-uk.mail.protection.outlook.com.

Configuration Changes for Office 365
- Log in to Microsoft 365 Defender at https://security.microsoft.com/
- Navigate to Email & collaboration ->Policies & Rules -> Threat Policies -> Anti-Spam Policies. Click on the Connection filter policy (Default).
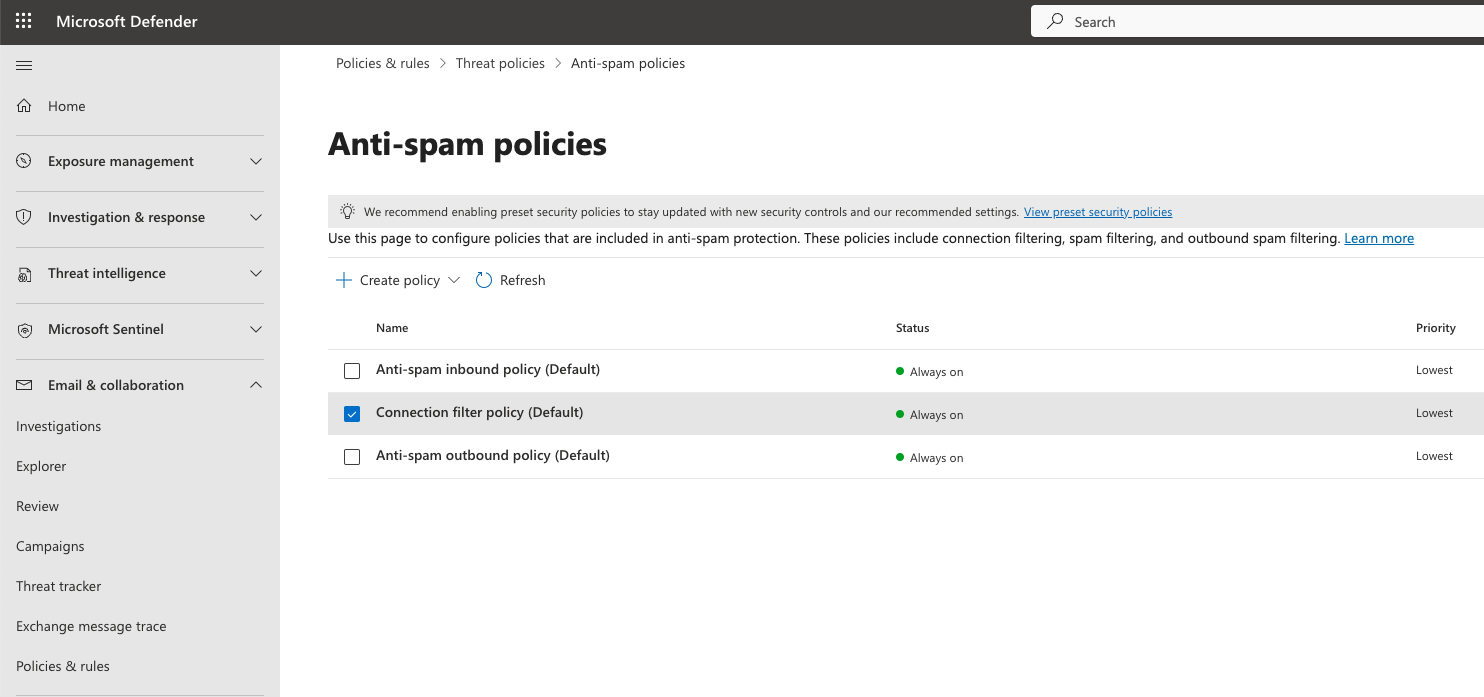
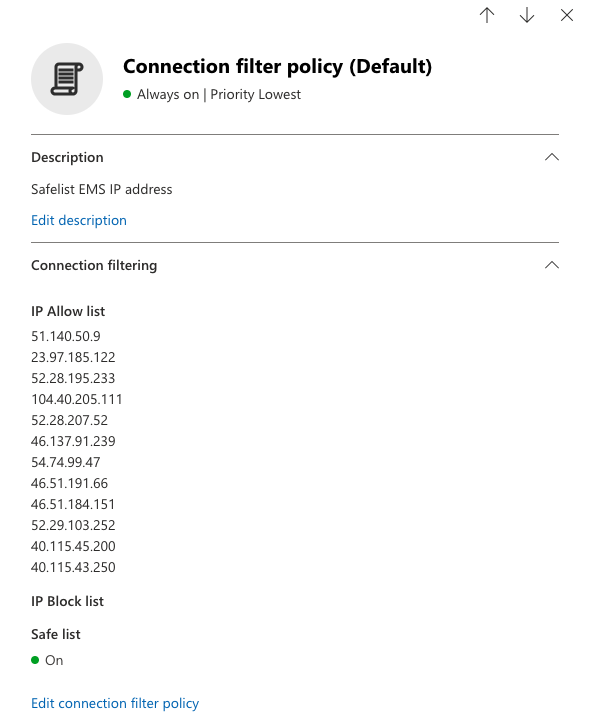
- When the menu opens, Edit the Description and
EMS Safelist IP Address. Click onEdit connection filter policy. Under theAlways allow messages from the following IP addresses or address range, add all the IP addresses for the Email Security region you use.
Please refer to our knowledge-based articles by clicking HERE for the configuration steps.
The IP Address must be added one at a time due to Microsoft.
- Enable Turn On Safe List
Configuring Outbound Mail
- Visit your USS Dashboard and click Products ⟶ E-mail Security ⟶ Product Configuration ⟶ Outbound Mail.
- Add a new sending host, by entering the string
spf://spf.protection.outlook.comand clicking .
.

Configure Inbound mail on Office 365 to reject non-EMS emails
IMPORTANT: You should configure Office 365 to block any inbound email that does not originate from the Email Security (EMS) product.
Please follow the steps in this article to restrict Office 365 and then return to this article to continue configuration.
Configure Outbound mail on Office 365 to send email via the EMS servers
You should configure Office 365 to always send mail using the EMS servers.
- Log in to your Office 365 Admin Center, and navigate to Admin Centers ⟶ Exchange.
- In the left-hand pane, click Mail Flow ⟶ Connectors.
- Click + to add a new connector.
- In the From: field, select Office 365.
- In the To: field, select Partner Organization.
- Give the new connector a sensible name.
- Click Next.
- Under When do you want to use this connector? select Only when email messages are sent to these domains, then click the + icon and enter
*. - Click Next.
- Under How do you want to route email messages, select Route email through these smart hosts.
- Add hosts according to the correct addresses for your cluster - either US, EU or UAE.
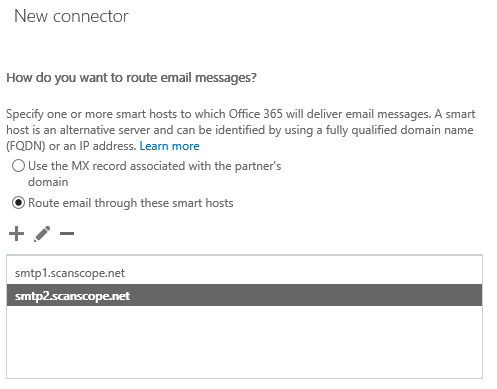
- Click Next and then click Confirm to create the connector.
If you wish to verify the connector, be sure not to use an internal address. For example, use a personal email address which is not a domain configured for your customer.
If the validation fails check the settings below before contacting technical support.
1. The connector is enabled
2. The default domain is the domain configured in EMS domain settings (MailFlow -> Accepted Domains)
1. The connector is enabled
2. The default domain is the domain configured in EMS domain settings (MailFlow -> Accepted Domains)
M365 can still accept emails direclty bypassing EMS filtering, we recommend locking down M365 to only accept emails from your EMS region only follow this KB article here.