Using an intermediate CA signed by Windows DC root CA
To begin, log in to the USS Gateway command line console and become root:
sudo su
The next steps create a directory structure to store the intermediate CA on the gateway.
cd /usr/local/uss-squid4/
mkdir -p intermed-ca/{certreqs,certs,crl,newcerts,private}cd intermed-ca
touch intermed-ca.index
echo 00 > intermed-ca.crlnum
openssl rand -hex 16 > intermed-ca.serial
Afterwards, your directory structure should look like the following:
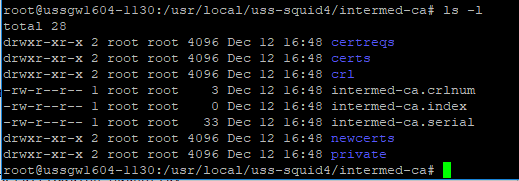
10.0.0.150.In the current intermed-ca directory, create a new file called intermed-ca.cnf
nano intermed-ca.cnf
Copy and paste the following template configuration, changing the settings as required, specifically the settings highlighted as # CHANGE AS NECESSARY
#
# OpenSSL configuration for the Intermediate Certification Authority.
#

#
# This definition doesn't work if HOME isn't defined.
CA_HOME                 = /usr/local/uss-squid4/intermed-ca
RANDFILE                = $ENV::CA_HOME/private/.rnd
oid_section             = new_oids

#
# XMPP address Support
[ new_oids ]
xmppAddr          = 1.3.6.1.5.5.7.8.5
dnsSRV            = 1.3.6.1.5.5.7.8.7

#
# Default Certification Authority
[ ca ]
default_ca              = intermed_ca

#
# Intermediate Certification Authority
[ intermed_ca ]
dir                     = $ENV::CA_HOME
certs                   = $dir/certs
serial                  = $dir/intermed-ca.serial
database                = $dir/intermed-ca.index
new_certs_dir           = $dir/newcerts
certificate             = $dir/intermed-ca.cert.pem
private_key             = $dir/private/intermed-ca.key.pem
# CHANGE AS NECESSARY or accept the default
default_days            = 3650 # Ten years
crl                     = $dir/crl/intermed-ca.crl
crl_dir                 = $dir/crl
crlnumber               = $dir/intermed-ca.crlnum
name_opt                = multiline, align
cert_opt                = no_pubkey
copy_extensions         = copy
crl_extensions          = crl_ext
default_crl_days        = 30
# CHANGE AS NECESSARY
default_md              = sha256
preserve                = no
email_in_dn             = no
policy                  = policy
unique_subject          = no

#
# Distinguished Name Policy
[ policy ]
countryName             = optional
stateOrProvinceName     = optional
localityName            = optional
organizationName        = optional
organizationalUnitName  = optional
commonName              = supplied

#
# Distinguished Name Policy for Personal Certificates
[ user_policy ]
countryName             = supplied
stateOrProvinceName     = optional
localityName            = supplied
organizationName        = optional
organizationalUnitName  = optional
commonName              = supplied
emailAddress            = supplied
#xmppAddr               = optional # Added to SubjAltName by req

#
# Intermediate CA request options
[ req ]
# CHANGE AS NECESSARY or accept the default
default_bits            = 2048
default_keyfile         = private/intermed-ca.key
encrypt_key             = no
# CHANGE AS NECESSARY or accept the default
default_md              = sha256
string_mask             = utf8only
utf8                    = yes
prompt                  = no
req_extensions          = req_ext
distinguished_name      = distinguished_name
subjectAltName          = subject_alt_name

#
# Intermediate CA Request Extensions
[ req_ext ]
subjectKeyIdentifier    = hash
subjectAltName          = @subject_alt_name

#
# Distinguished Name (DN)
[ distinguished_name ]
# CHANGE AS NECESSARY or accept the default
organizationName        = USS Gateway
# CHANGE AS NECESSARY or accept the default
commonName              = USS Gateway Intermediate Certification Authority

#
# Server Certificate Extensions
[ server_ext ]
basicConstraints        = CA:FALSE
keyUsage                = critical, digitalSignature, keyEncipherment
extendedKeyUsage        = critical, serverAuth, clientAuth
subjectKeyIdentifier    = hash
authorityKeyIdentifier  = keyid:always
issuerAltName           = issuer:copy
authorityInfoAccess     = @auth_info_access
crlDistributionPoints   = crl_dist

#
# Client Certificate Extensions
[ client_ext ]
basicConstraints        = CA:FALSE
keyUsage                = critical, digitalSignature
extendedKeyUsage        = critical, clientAuth
subjectKeyIdentifier    = hash
authorityKeyIdentifier  = keyid:always
issuerAltName           = issuer:copy
authorityInfoAccess     = @auth_info_access
crlDistributionPoints   = crl_dist

#
# User Certificate Extensions
[ user_ext ]
basicConstraints        = CA:FALSE
keyUsage                = critical, digitalSignature
extendedKeyUsage        = critical, clientAuth, emailProtection
subjectKeyIdentifier    = hash
authorityKeyIdentifier  = keyid:always
issuerAltName           = issuer:copy
authorityInfoAccess     = @auth_info_access
crlDistributionPoints   = crl_dist

#
# CRL Certificate Extensions
[ crl_ext ]
authorityKeyIdentifier  = keyid:always
issuerAltName           = issuer:copy

#
# Certificate Authorities Alternative Names
[ subject_alt_name ]
#
# CHANGE AS NECESSARY
URI                     = http://company.local/
# CHANGE AS NECESSARY
email                   = certmaster@company.local

#
# Certificate download addresses for the intermediate CA
[ auth_info_access ]
# CHANGE AS NECESSARY - replace IP with the IP of your USS Gateway server
caIssuers;URI           = http://10.0.0.150/ussgw.pem

#
# CRL Download address for the intermediate CA
[ crl_dist ]
# CHANGE AS NECESSARY - replace IP with the IP of your USS Gateway server
fullname                = URI:http://10.0.0.150/ussgw.crl

# END OF FILE
The next step is to create a CSR and private key file using the openssl tool:
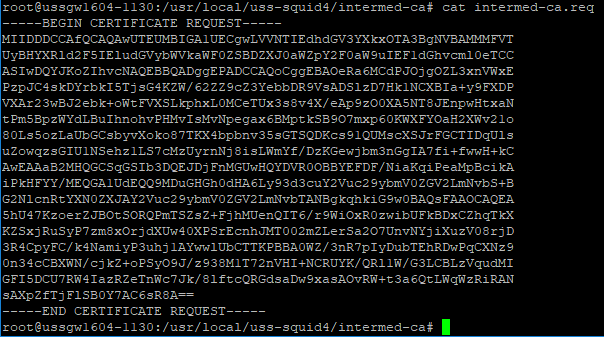
openssl req -config /usr/local/uss-squid4/intermed-ca/intermed-ca.cnf -new -out intermed-ca.req
You should see the following output:

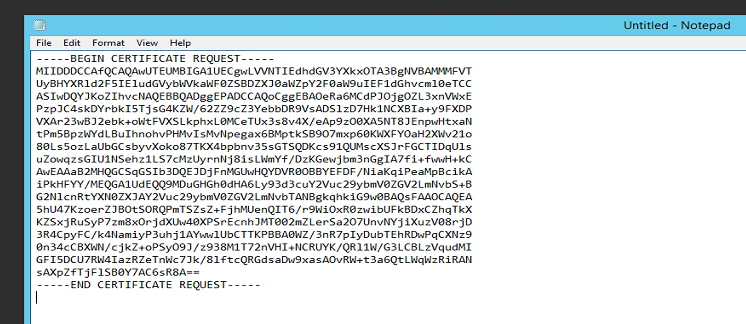
The next step is to transfer the intermed-ca.req CSR file to your Windows domain controller. This file is plain text, so you can copy and paste or use your preferred file transfer method.
Save the file on your Windows domain controller, e.g. desktop\intermed-ca.req
In order for modern browsers to accept the certificates generated, you may have to change the default hash algorithm used by the domain root CA when signing new certificates.
However, this may not be necessary if your domain root CA already uses the SHA256 (or better) hash algorithm.
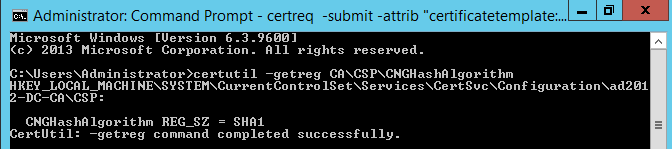
To confirm which hash algorithm is in use, open a Windows command prompt with elevated permission and execute:
certutil -getreg CA\CSP\CNGHashAlgorithm
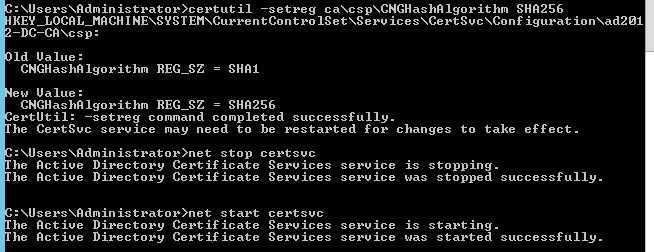
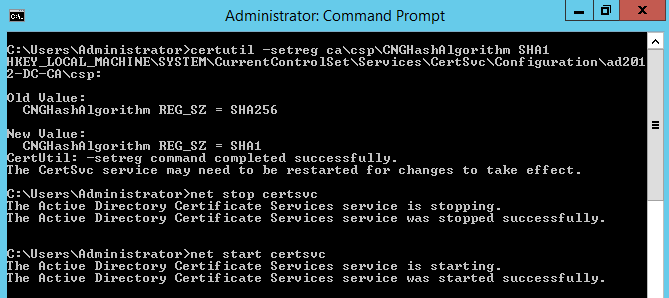
To change the default hash algorithm used, execute the following commands in the elevated command prompt (the steps to reverse this are included below):
certutil -setreg ca\csp\CNGHashAlgorithm SHA256
net stop certsvc
net start certsvc
The output should be similar to the following screenshot:
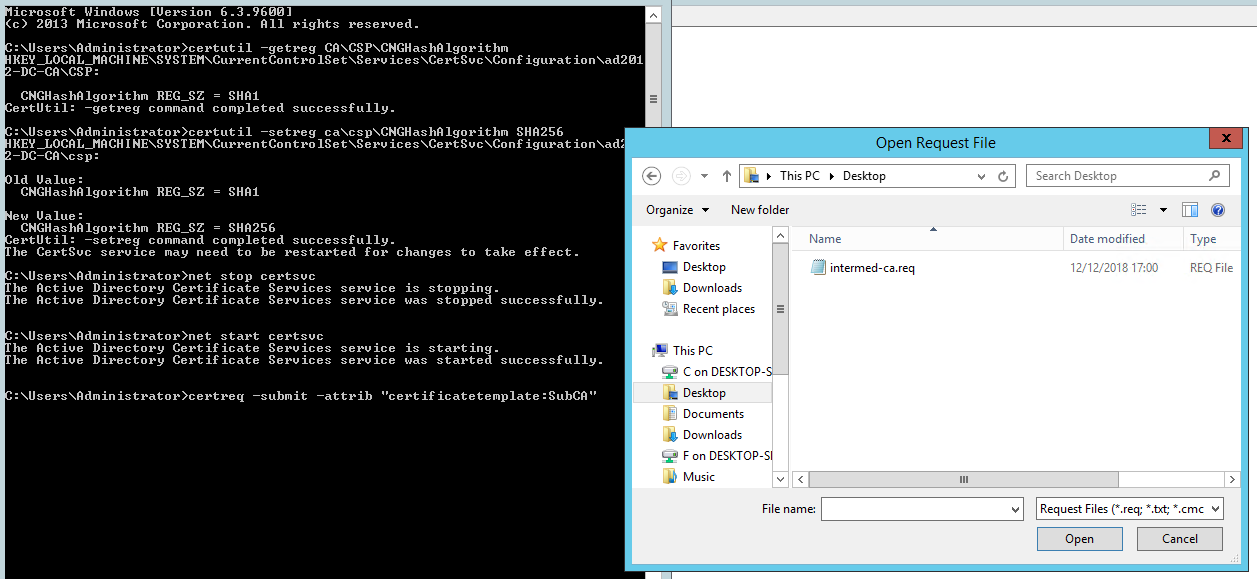
The next step is to sign the subordinate intermediate CA cert using the CSR. To do this, execute the following command:
certreq -submit -attrib "certificatetemplate:SubCA"
You will be prompted to select the CSR file that was saved earlier, e.g. desktop\intermed-ca.req
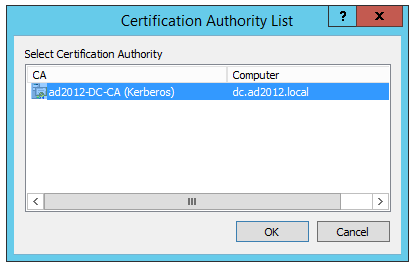
Select the root CA you want to use to sign it.
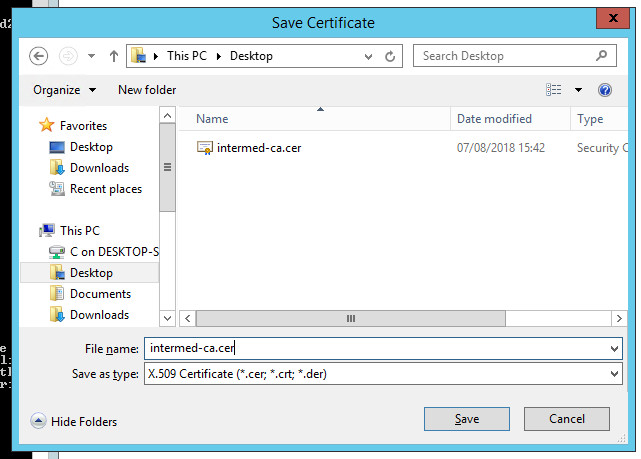
Save the certificate e.g. desktop\intermed-ca.cer
IMPORTANT: If you had to change the hash algorithm earlier in this guide, reverse the change by executing the following commands in an elevated command prompt, otherwise skip to the next step.
certutil -setreg ca\csp\CNGHashAlgorithm SHA1
net stop certsvc
net start certsvc
The next step is to transfer the intermed-ca.cer file to /usr/local/uss-squid4/intermed-ca/ on the USS Gateway server. This file is plain text, so you can copy and paste the file or use your preferred file transfer method.

If you are copy and pasting, ensure you create a new file intermed-ca.cer in /usr/local/uss-squid4/intermed-ca/, e.g.
nano intermed-ca.cer
The next step is to remove the password from the private key file so that the USS Gateway proxy service can use the key.
openssl rsa -in /usr/local/uss-squid4/intermed-ca/private/intermed-ca.key -out /usr/local/uss-squid4/intermed-ca/private/intermed-ca-nopassword.key
The next step is to join the key and certificate together into one file by executing:
cat /usr/local/uss-squid4/intermed-ca/private/intermed-ca-nopassword.key /usr/local/uss-squid4/intermed-ca/intermed-ca.cer > /usr/local/uss-squid4/ussgw.pem
The next set of commands will install the new CA into the USS Gateway proxy service.
/etc/init.d/uss-squid stop && sleep 10
The following commands remove the private key from the downloadable certificate.
openssl x509 -in /usr/local/uss-squid4/ussgw.pem -outform DER -out /var/www/ussgw.der
openssl x509 -in /usr/local/uss-squid4/ussgw.pem -outform PEM -out /var/www/ussgw.pem
chmod 644 /usr/local/uss-squid4/ussgw.pem /var/www/ussgw.der /var/www/ussgw.pem
rm -Rf /usr/local/uss-squid4/ssl_db
/usr/local/uss-squid4/libexec/uss-security_file_certgen -c -s /usr/local/uss-squid4/ssl_db
chown -R proxy.proxy /usr/local/uss-squid4/ssl_db
/etc/init.d/uss-squid start
The process is complete.
Any computers connected to the Windows domain should now be able to browse HTTPS web sites without requiring the self-signed certificate that is created during installation.