Deploying via Microsoft SCCM
![]() Updated 2 years ago
by
admin
Updated 2 years ago
by
admin
This guide assumes that you are familiar with deploying packages vis SCCM.
Prerequisites:
- Download the USS Agent for Windows and Orca MSI Editor tool.
- Use Orca to prepare an MST transform file based on the USS Agent MSI, to include the configuration options you want. See Deploying via Custom MSI for a guide on creating a transform file.
- Copy the MST transform file and the USS Agent MSI to an accessible directory used by SCCM.
Deploying via SCCM
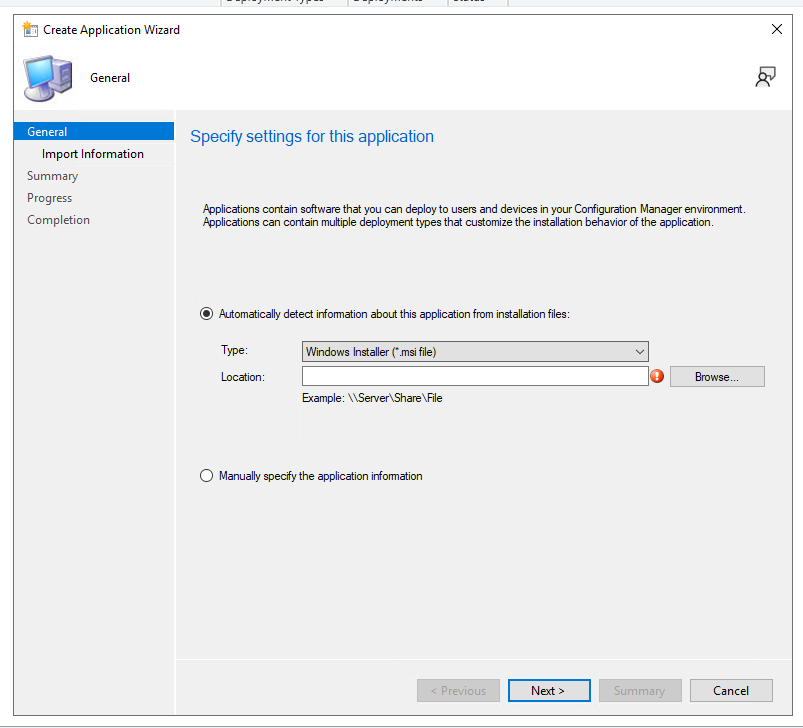
- From your SCCM dashboard create a new application via the wizard then select the folder where the MST transform file and the USS Agent MSI are stored, then select Next.
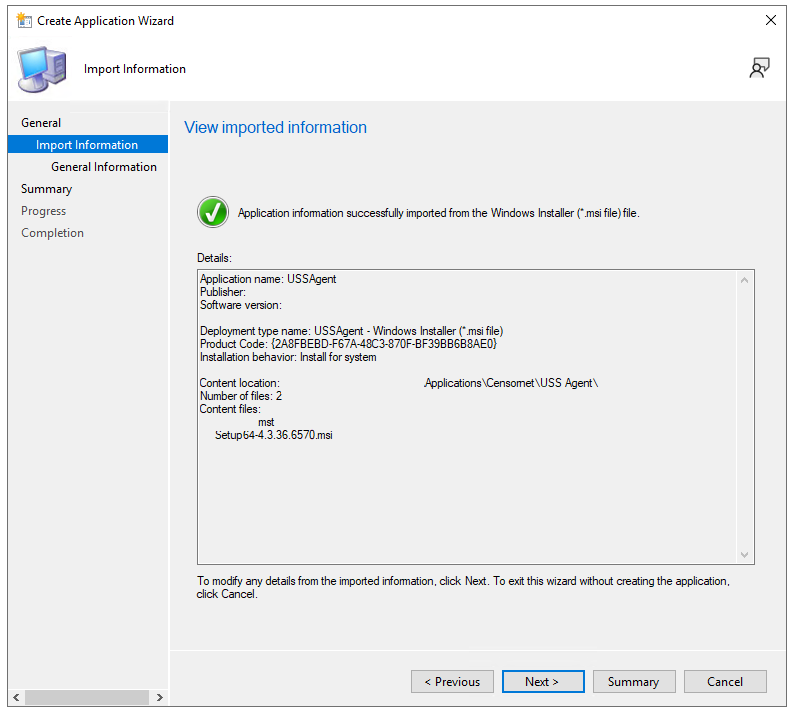
- SCCM will then detect the MSI and MST files as shown below, to continue click Next.
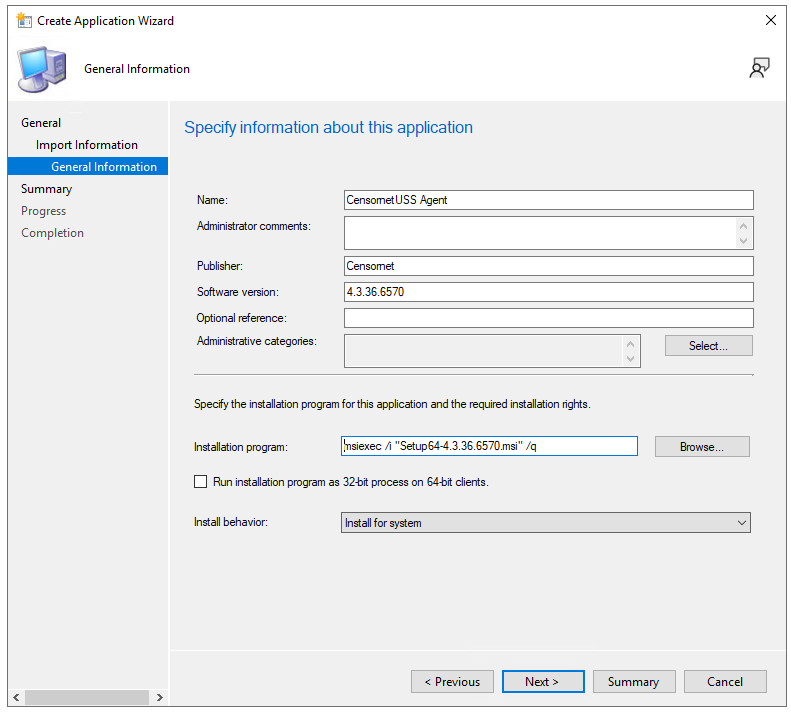
- On the General Information screen under the Installation program: section it will contain the required msiexec command and the Agent MSI file name, for example Setup64-4.3.36.657:
msiexec /I "Setup64-4.3.36.6570.msi" /q
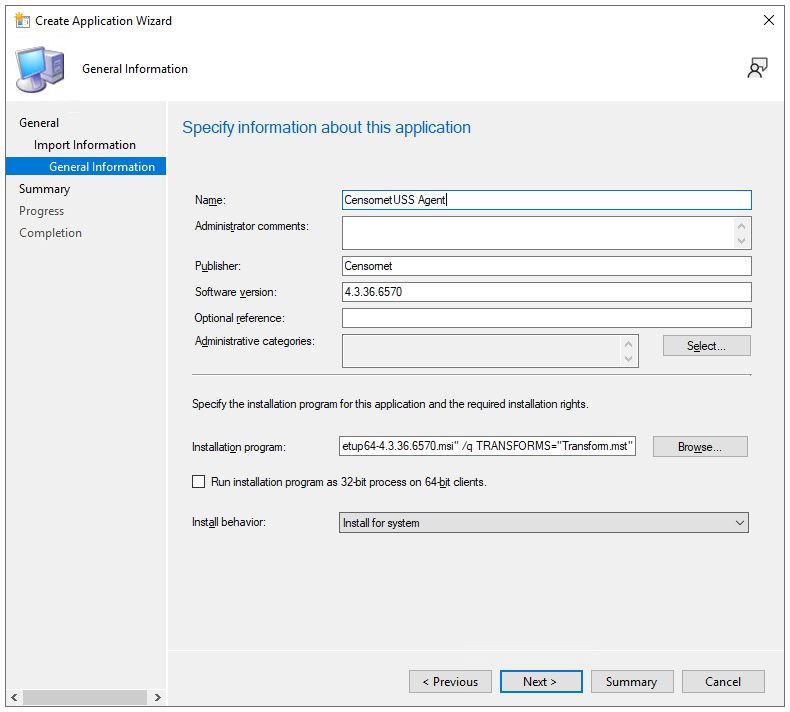
- Change the Installation program: section to include the MST transform file by using the below command (be sure to enter the correct USS Agent name). Example:
msiexec /I “Setup64-4.3.36.6570.msi” /q TRANSFORMS=“Transform.mst”
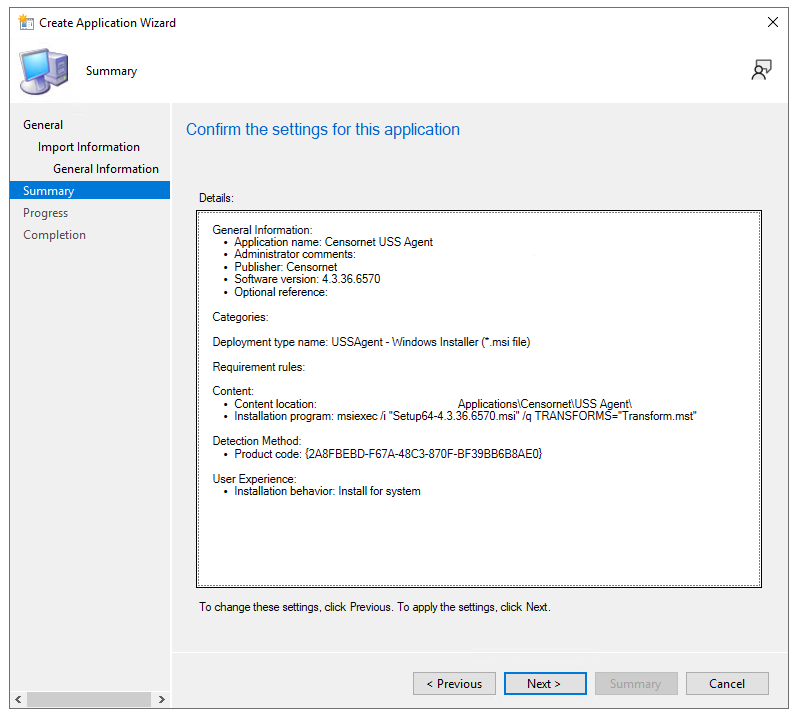
- The summary screen should look similar to the below example.
Click Next until the wizard process has been completed. Now the USS Agent is ready for you to deploy via SCCM.
Please refer to SCCM documentation on how to complete the deployment tasks.