Unblock Requests
The Unblock Request system is designed to streamline requests from end-users for websites to be unblocked. It's a more convenient workflow for administrators to maintain custom URL Categories and manage requests to unblock sites from within the USS portal.
Enabling Unblock Requests
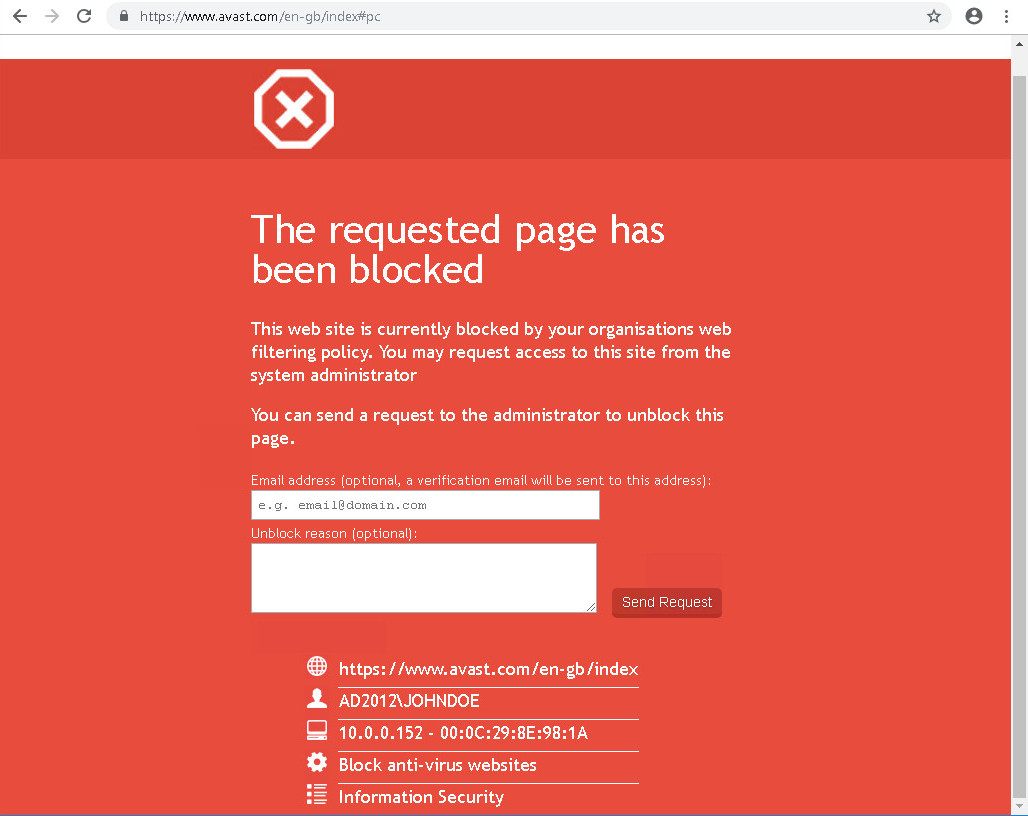
To ensure that end-users are able to submit Unblock Requests, you should add the $UNBLOCK_FORM$ placeholder string to an existing HTML template, and ensure that template is used by at least one Filter Rule. When a user performs an action that triggers the relevant Rule, the user will then be presented with a page that includes a form to send an Unblock Request.
Managing Unblock Requests
$UNBLOCK_FORM$ placeholder string in order to receive Unblock Requests.To view your current Unblock Requests, visiting your dashboard and click Products ⟶ Web Security ⟶ Unblock Requests. You can now see a list of all outstanding Unblock Requests sent by your users.
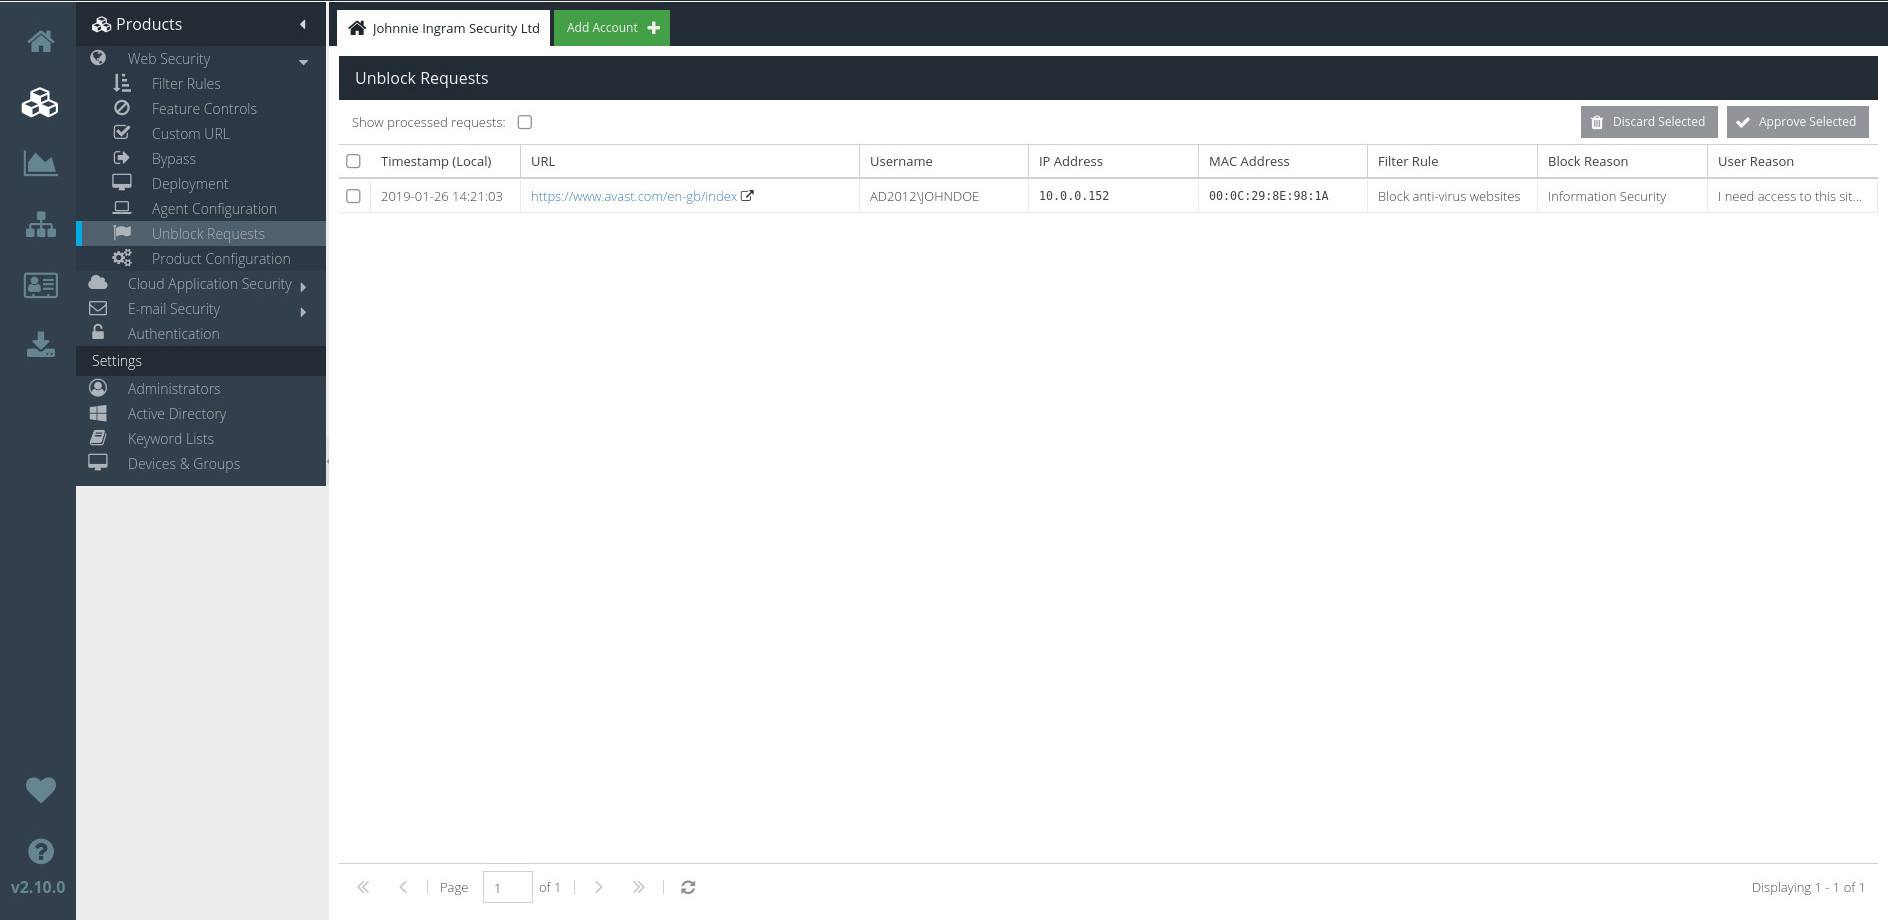
The Unblock Request list gives the following details:
Timestamp (local)
The time in local time at which the Unblock Request was received.
URL
The full URL that was blocked.
Username
The username of the end-user that submitted the request, if User Authentication or User Identification is enabled in the Agent Configuration Profile.
IP Address
The IP address of the device from which the request was sent.
MAC Address
The MAC address of the device from which the request was sent.
Filter Rule
The name of the Rule that triggered the block.
Block Reason
The category reported by the Rule that triggered the block.
User Reason
The text entered by the user in the Unblock Request form. This text is optional, and may therefore have been left blank by the user.
Approving Unblock Requests
To Approve any number of requests, first select the requests you want to Approve (by clicking the checkmark next to the request on the Unblock Requests screen).
You can select all outstanding requests by clicking the "select all" checkbox at the top of the list.
Then, simply click  to Approve all selected requests.
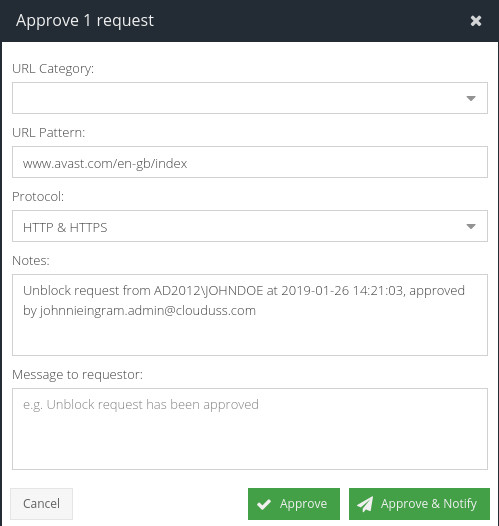
When you Approve an Unblock Request, the Manage Unblock Request dialog will be displayed.
URL Category
Choose a custom URL Category to which the newly-approved URL will be added. The custom URL Category will be updated to permanently include the new URL.
Pattern
Specify a version of the URL that is compatible with the URL Category.
Protocol
The protocol from the original URL that will form the basis of a new URL Category pattern. Choose between HTTP, HTTPS or HTTP & HTTPS.
Notes
A description of why the Unblock Request was approved. This message is optional, and will only be visible to administrators within the Web Security product.
User message
An optional short message that can be sent to the user, if the user has specified an email address for notifications.
Click  to add the new URL pattern to the chosen URL Category, or
  if you wish to also notify the end-user.
Discarding Unblock Requests
If an Unblock Request requires no action, or if you want to delete it, select the request from the Unblock Requests screen and click  .
.
You can choose to either discard the request, or to discard the request and notify the end-user.
Viewing historical Unblock Requests
You can view all previously actioned Unblock Requests (approved and discarded) by selecting the  checkbox at the top of the Unblock Requests screen.
The Unblock Requests screen will now display all previously processed requests, along with their status (approved or discarded) and some basic details.
To switch back to the list of pending requests, simply deselect the Show processed requests checkbox.
Enabling automatic notifications for Unblock Requests
You can specify an email address which will receive a message as soon as an end-user submits an Unblock Request. To do so, visit your USS Dashboard and click Account Settings ⟶ Notifications.