Resizing a Partition in ESX Server Virtual Machine
One of the problems you may encounter if you are running USS Gateway through a virtual machine is running out of disk space. It's a simple enough task to change the disk allocation, however getting the Ubuntu OS that USS Gateway runs on to recognise the change can be a little fraught. To that end, we've prepared this guide to assist you in making the changes you need.
To back up your virtual machine, first shut down the Virtual Machine, then from the File menu in the VMware infrastructure client, select Export ⟶ Export OVF Template. This will allow you to restore the original USS Gateway setup should this fail to work. It should be noted that you will need at least 400MB of free space on the virtual machine hard drive.
To being the resizing process, you will need to download the GParted tool. This can be found here.
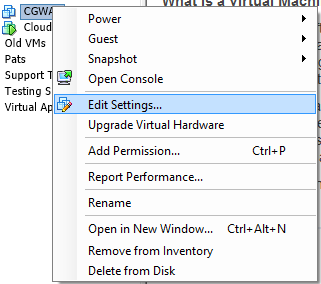
- After doing the above, the first thing you will to do is edit the settings on the virtual machine
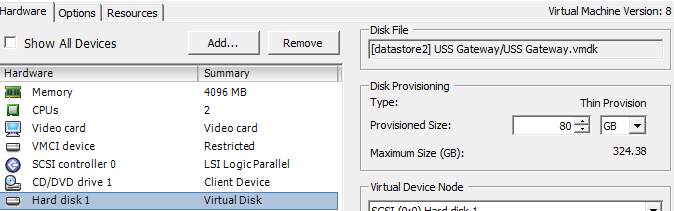
- Please increase the size of the Virtual Machine hard drive to whatever size you need
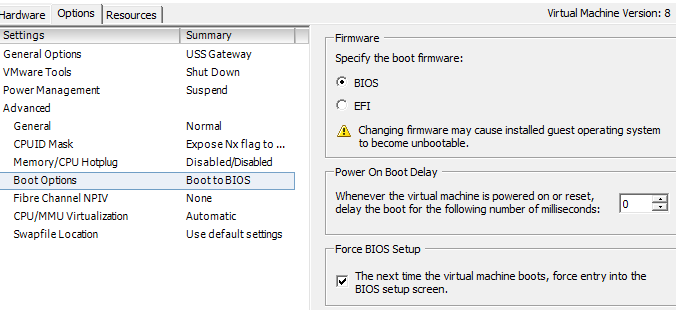
- You will also need to boot in the virtual machine BIOS. To enable that, click on the Options tab, then select Boot Options and check the box that forces the BIOS setup:
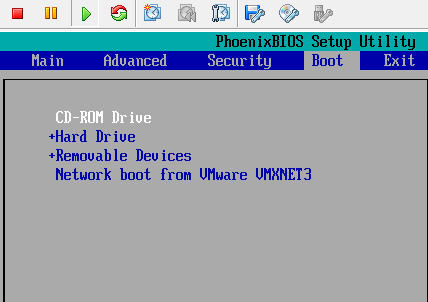
- Exit the properties editor and open a console for the virtual machine. Now boot up the machine, and the VM will start up in the BIOS settings. Using your arrow keys, navigate to the Boot menu. Make sure that the CD-ROM Drive is higher in the list than the hard drive. Use the
+and-keys to set up the boot order.
- Now we need to make sure that it boots from the GParted ISO that we downloaded earlier. To enable this, click on the button at the top for Connect CD/DVD. Choose Connect to ISO image on local disk and browse to where you previously saved the ISO. Click open, and the next time the virtual machine boots, it will boot from this image.
- Now press
F10to save and exit the BIOS settings. The virtual machine will now reboot. When you get to the boot prompt, pressEnter. This will then bring up the boot menu. Please choose the Gparted Live (Default settings) option.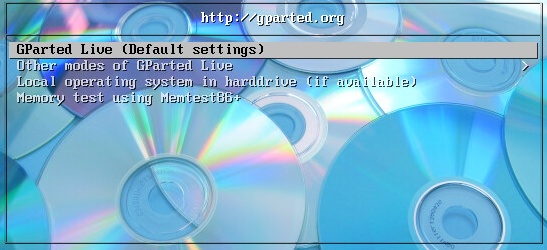
- At the next menu, select Don't Touch Keymap.
- At the prompt "What language do you prefer?", just hit
Enter. This will choose US English by default. HitEnteragain to choose the Start Gparted Automatically option. - This will now automatically boot into the Gparted tool. The swap partition is in a logical partition at the end of the old partition. This needs to be moved to the end of the unallocated space, so the extra space can then be added to the primary partition. Unfortunetly, this is more complicated that it sounds. There are several steps. First you need to extend the size of the logical partition to fill all of the unallocated space. Do this by highlighting the
extendedpartition in the list. Right-click then choose Resize/Move.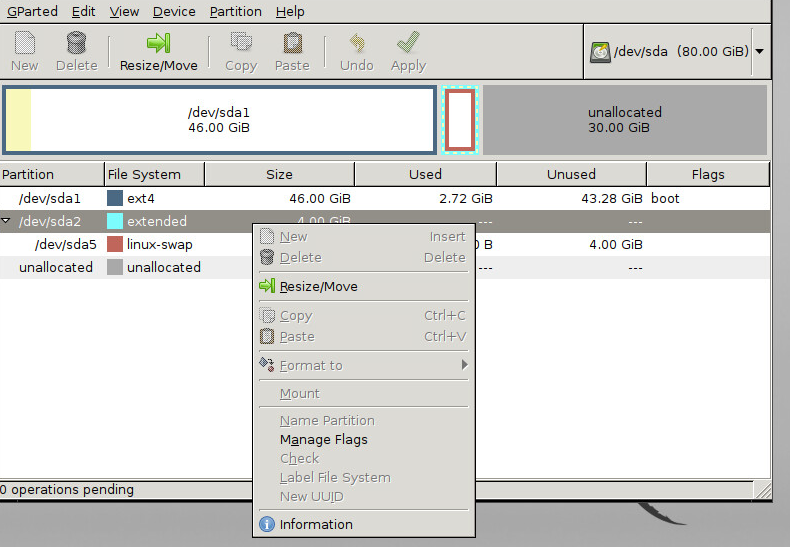
- In the next screen, use your mouse to drag the end of the partition to the right hand of the screen, so it looks like the following:
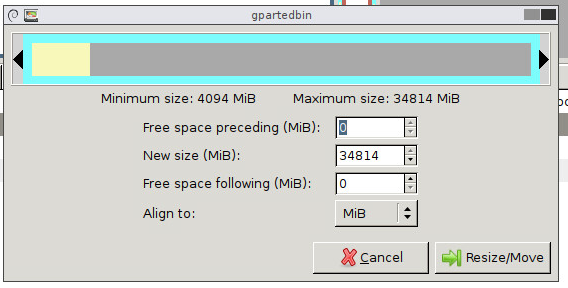
- Click Resize/Move.
- Highlight the swap partition in the list, and once again right-click and choose Resize/Move. Now using the mouse, drag the partition from the left side of the screen to the right, and again click Resize/Move.

- Next we need to move the start point of the logical partition so it is now at the end of the disk. To do that, highlight the
extendedpartition in the list, right-click Resize/Move and grab the left hand side of the partition. Drag this over to the right as far as it will go. Once done, click Resize/Move.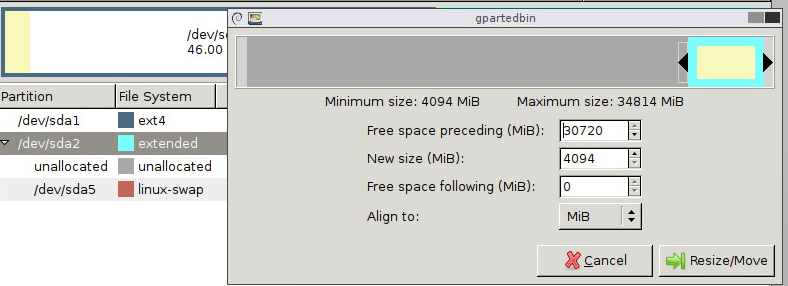
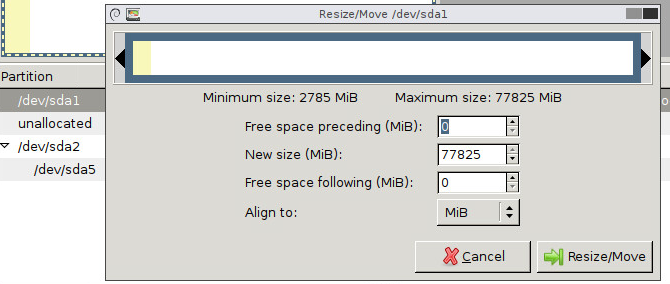
- Now you should have the unallocated space sitting next to the existing primary partition. We now need to resize this to use all that space. Highlight the primary partition and right-click Resize/Move. Drag the right hand side of the partition as far to the right in the unallocated space it can go. Click Resize/Move again.
- Once this is done, we are ready to apply all the changes. Click on the Apply button and wait for GParted to complete all of the tasks.
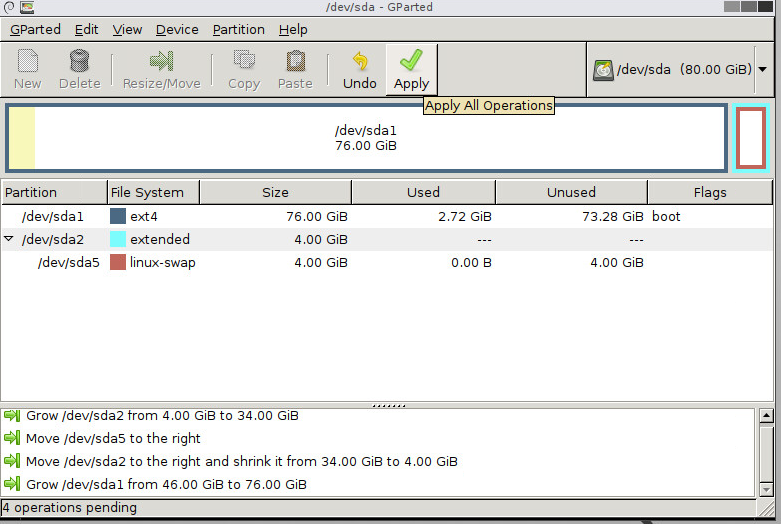
- Once this is completed, you will be presented with a report on the operations. In most cases you will see four warnings. This is normal so don't be alarmed.
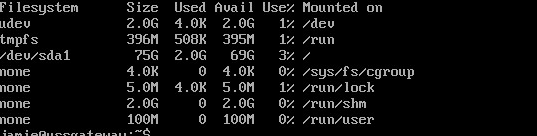
- You now reboot your virtual machine. Boot it back into the command line, or login via Putty to check your disk space (by running the command
df - h). You should now see the extended space you just allocated.