Filter Rules
A Rule is a collection of Conditions, Matches and Actions. Rules are used to apply web filtering, security and Cloud Application controls to users and devices. Rules are managed centrally via the Web Security product, and are enforced by Agents on the network or on the user's device.
Managing Rules
Rules belong to the Policy of a USS Account. To create a new Rule, or to view or edit the Rules currently active on your account, visit your USS Dashboard, and click Web Security -> Filter Rules.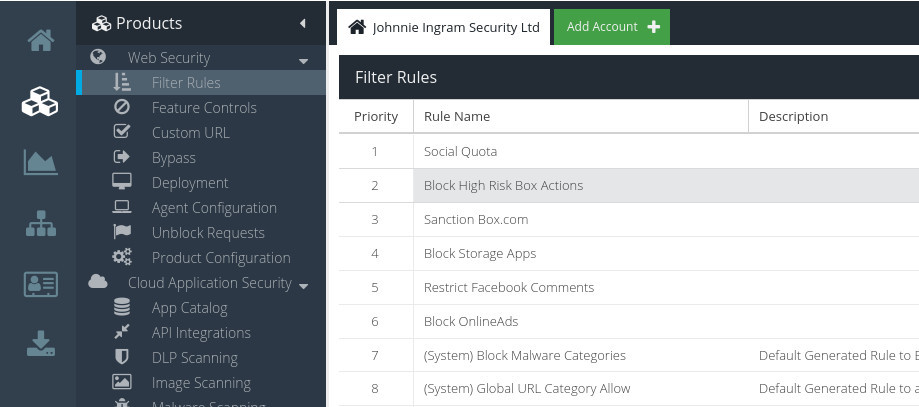
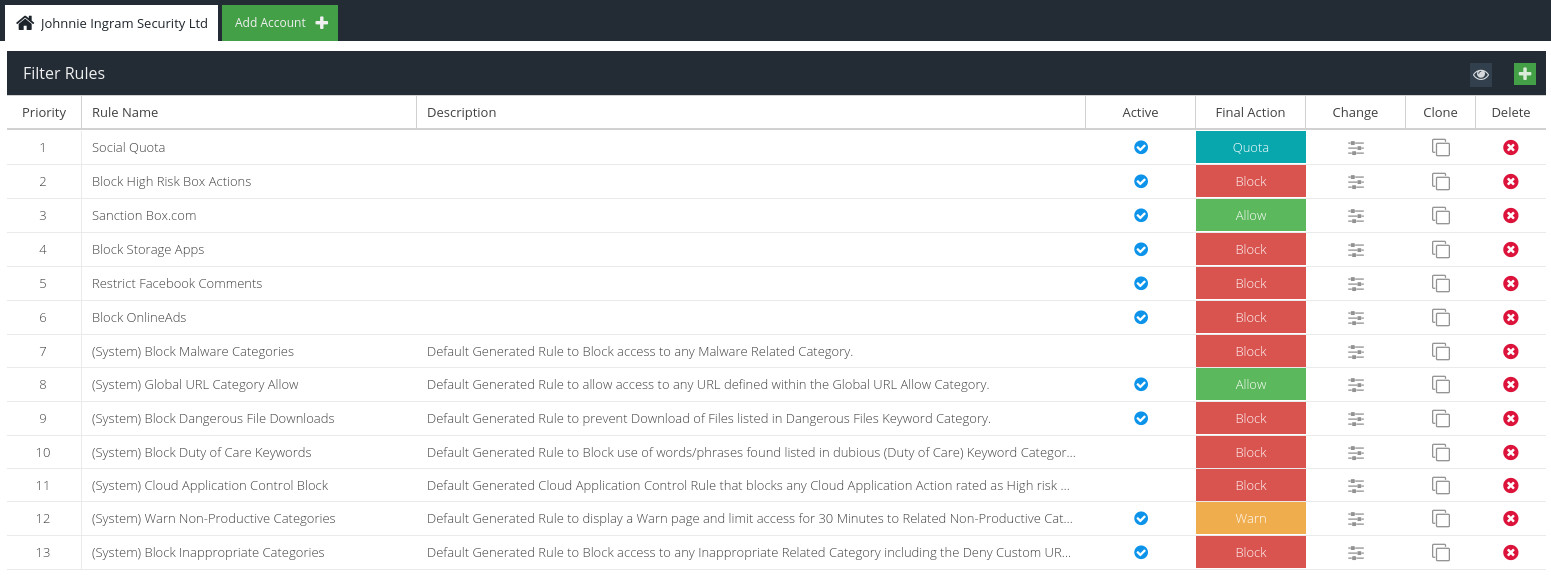
The Filter Rules screen lists all the Rules currently available for your USS Account.
Rules are listed on the Filter Rules screen in the order that they will be triggered (from top to bottom).
Changing Priority order
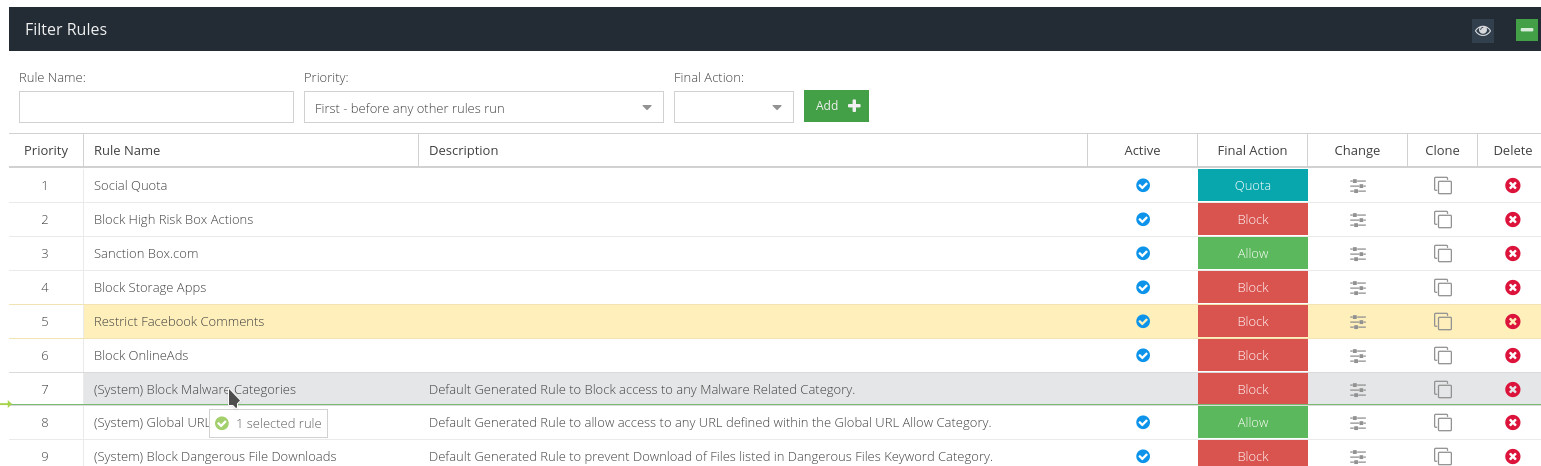
You can easily change the order in which your Rules are processed. Just left-click a Rule on the Filter Rules screen, and drag-and-drop to change its position.
Creating a new Rule
To create a new Rule, click the  button (in the top right corner). Give the Rule a friendly name, and then choose a Priority. The Priority dictates where the Rule should be placed in your Policy Rule table. Lastly, choose a Final Action for this Rule. You can choose to Allow content that matches this Rule, or Block the content.


Editing Rules
To edit a Rule, click the  button next the Rule.
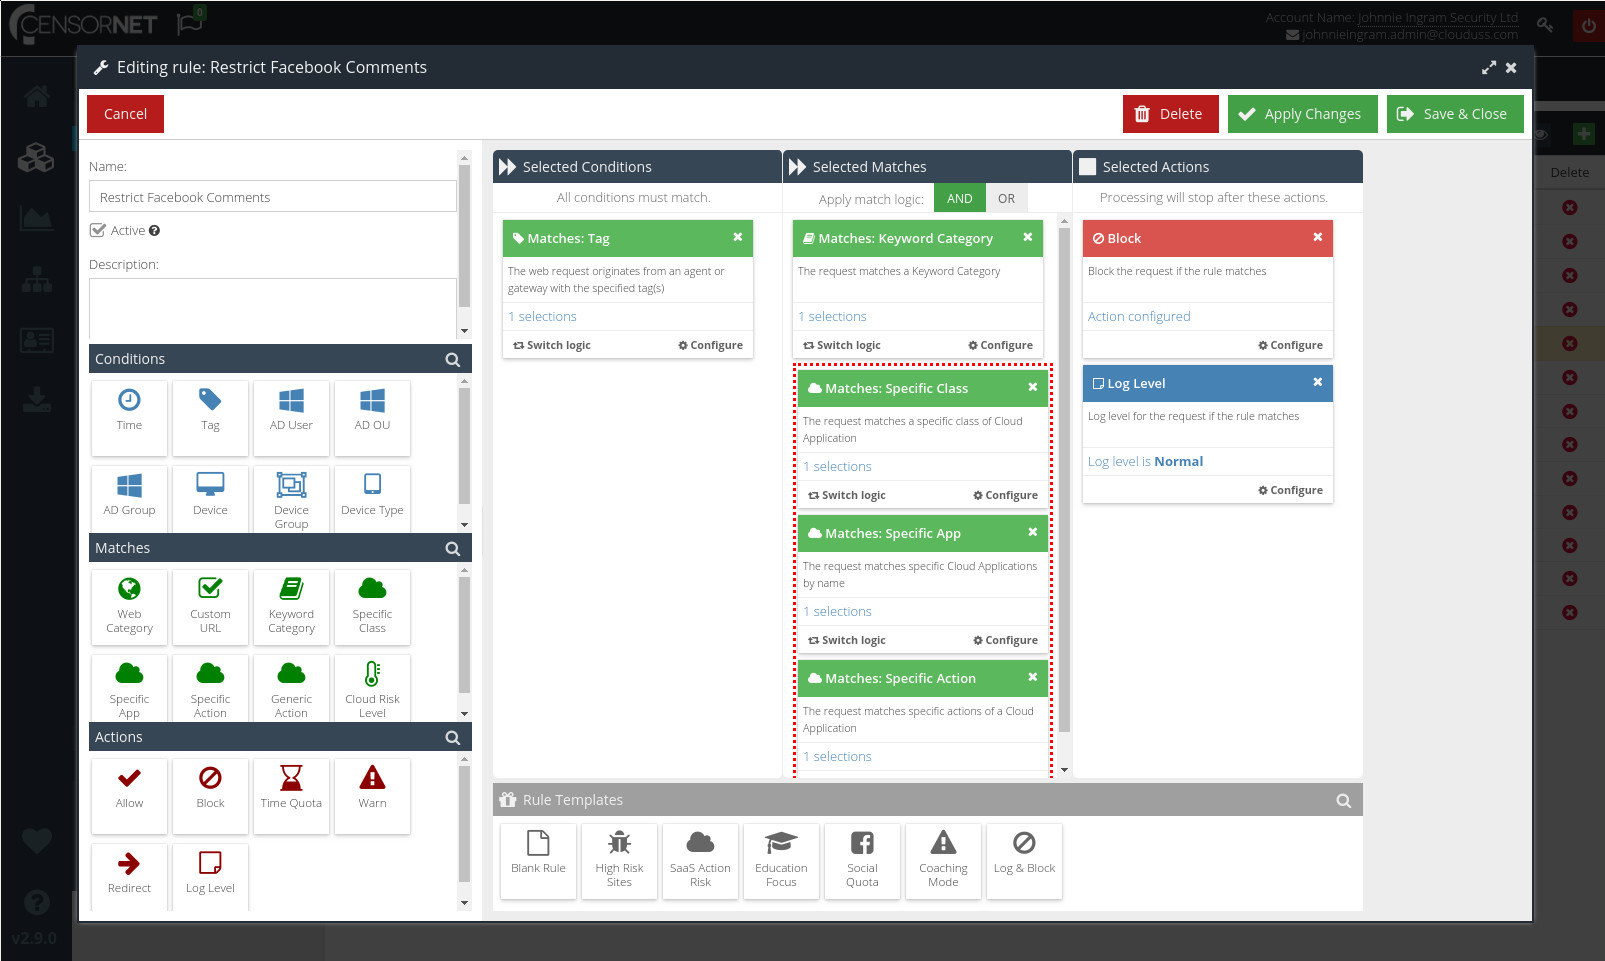
Editing a Rule will open the Rule Properties screen for that Rule. This screen shows in detail the Conditions, Matches and Actions that make up the Rule.
Details
You can edit the basic settings for the Rule in the details pane, at the top left of the Rule Properties screen.

Name: The friendly name for this Rule.
Description: A short description of the Rule. This text is optional, but can help to easily identify and differentiate Rules throughout the Web Security product.
Active: A check-mark indicates that this Rule is currently active. If the Active box is unchecked, the Rule is not currently active and will have no effect on web traffic. Inactive Rules will still be listed on the Filter Rules screen.
Selected Conditions
The Selected Conditions panel specifies the conditions that must be true in order for the Rule to trigger.
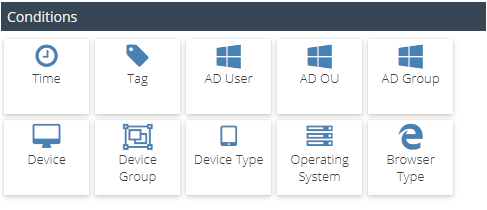
You can add a new Condition by simply dragging the relevant icon from the Conditions panel to the Selected Conditions column.
Click  to modify an existing Condition.
Click  to toggle the logic used to match the Condition - either "must match" or "must not match".
Click  to remove a Condition from the Selected Conditions column.
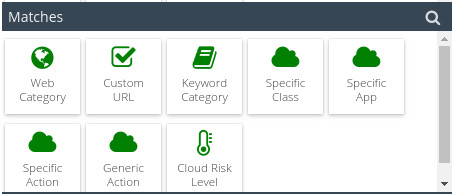
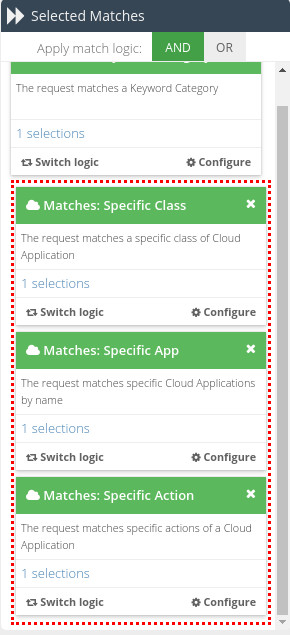
Selected Matches
The Selected Matches panel allows you to specify what Matches must be true in order for the Rule to trigger. Matches typically represent filter modules. The available options will depend on the products assigned to your USS account.
To choose how the Rule triggers, use the  toggle.
- AND: All of the Matches must be true in order for the Rule to trigger.
- OR: The Rule will trigger if any of the Matches are true.
You can add a new Match by simply dragging the relevant icon from the Matches panel to the Selected Matches column.
Click to modify an existing Match.
Click to toggle the logic used for the Match - either "must match" or "must not match".
Click to remove a Match from the Selected Matches column.
Selected Actions
The Selected Actions column allows you to specify what actions should be taken if both the Selected Conditions column and the Selected Matches column are triggered for this Rule.
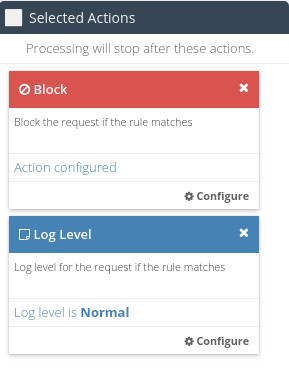
To choose an Action, drag an icon from the Actions panel to the Selected Actions column.
Click to modify an existing Action.
Click to remove an Action from the Selected Actions column.
Saving changes
To exit the Rule Properties screen, and to save your Rule, click  . If you want to commit the changes you made so far, but continue editing this Rule, click
  . Clicking the
  button will delete this Rule completely.
Rule Templates
The Rule Properties screen provides a number of Rule Templates, which can be used to quickly and easily create Rules for common scenarios. To apply a Rule Template, click any of the icons in the Rule Templates panel at the bottom of the Rule Properties screen.

Clicking an icon in the Rule Templates panel will give you the option of overriding any Condition, Match or Action currently configured in the Rule.
High Risk Sites
The High Risk Sites Rule blocks all classified web categories deemed High Risk, such as pornography, hacking and piracy.
SaaS Action Risk
The SaaS Action Risk Rule will block Cloud Application Security actions that are deemed to be High Risk.
Education Focus
This Rule blocks any content determined to be inappropriate for the needs of an educational environment.
Social Quota / Quota
The Social Quota Rule uses Time Quotas to allow your users one hour of Social Media access per day (after which their access will be blocked). See Rules Engine Concepts for more detail.
Coaching Mode / Warn
The Coaching Mode Rule has a Final Action of Warn. This means that websites will not be blocked when this Rule is triggered. Instead, users will be presented with a page that warns them of the content they are about to access (but still allows them to proceed after acknowledging the warning). See Rules Engine Concepts for more detail.
Log & Block
The Log & Block Rule is essentially a catch-all Block Rule. It will prevent access to all content, and is useful as a final Rule that will be triggered if no other Rule has been triggered. This effectively allows you to "whitelist" the web content and actions you want to allow, and block everything else. In order to use this Rule effectively, make sure it's the last Rule in Priority order (at the bottom of the list of Rules on the Policy screen).