Configure outbound DKIM
Domain Key Identified Mail or DKIM verifies that email is from the domain-configured source and has not been changed in transmit. By configuring DKIM outbound it will increase your domain reputation with different providers.
Enabling DKIM for all domains
- Obtain the Public certificate details for a domain
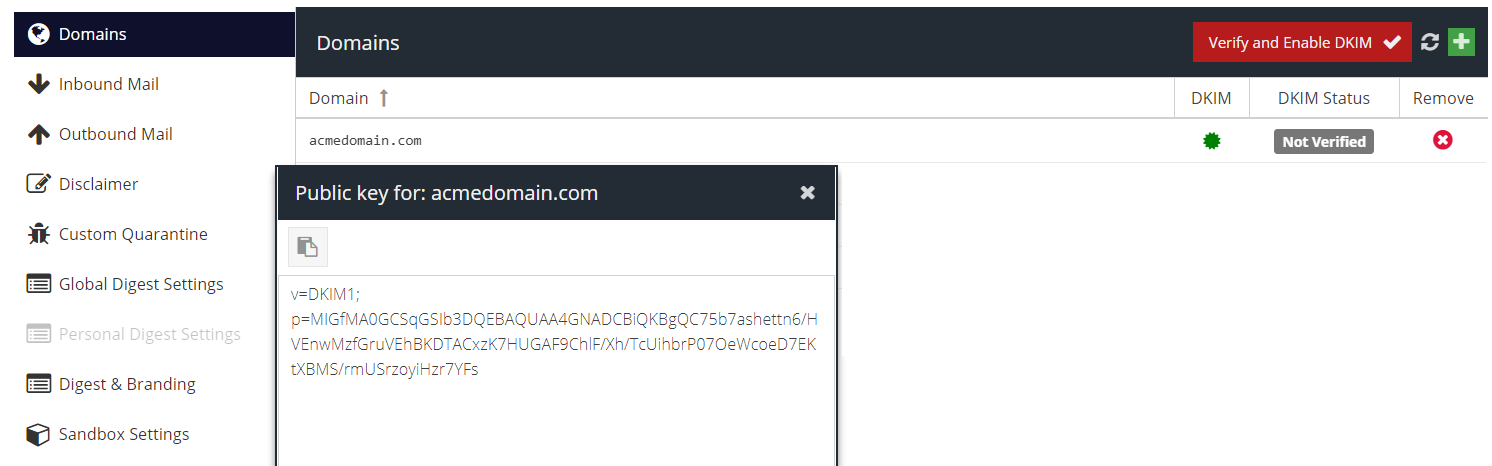
Visit your USS Dashboard and click Products ⟶ E-mail Security ⟶ Product Configuration ⟶ Domains. Click the  icon next to the domain you wish to configure.
The full DKIM key will be shown.
- Create a DNS
TXTrecord for the domain.
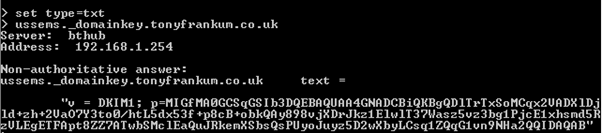
You need to create a txt record for ussems._domainkey.<your domain>. Here is an example of what should be seen on a nslookup. This entry should match the entry found in Step 1.
- Return to the Domains section and click Verify and Enable DKIM button. The DKIM status will be updated to Success if the DKIM key can be verified against the domain DNS. At least one domain must have DKIM verified in order to enable DKIM on your account.
Enabling DKIM for specific domains
If you want outbound mail to be DKIM-signed for some, but not all, of the domains on your account, follow the steps below.
- Create a set of Custom Rule Data. Name it "DKIM Signing", and add each domain that should be signed as a separate line.

- Create a new Message Rule. Name it "Apply DKIM Signing", and add the following elements:
Conditions | Actions | Final Actions |
Direction: Matches Outbound DKIM Enabled: Matches True Sender: Matches DKIM Signing Sender: Does Not Match DKIM Exclusions (optional) | DKIM Signing: RSA Key | None |
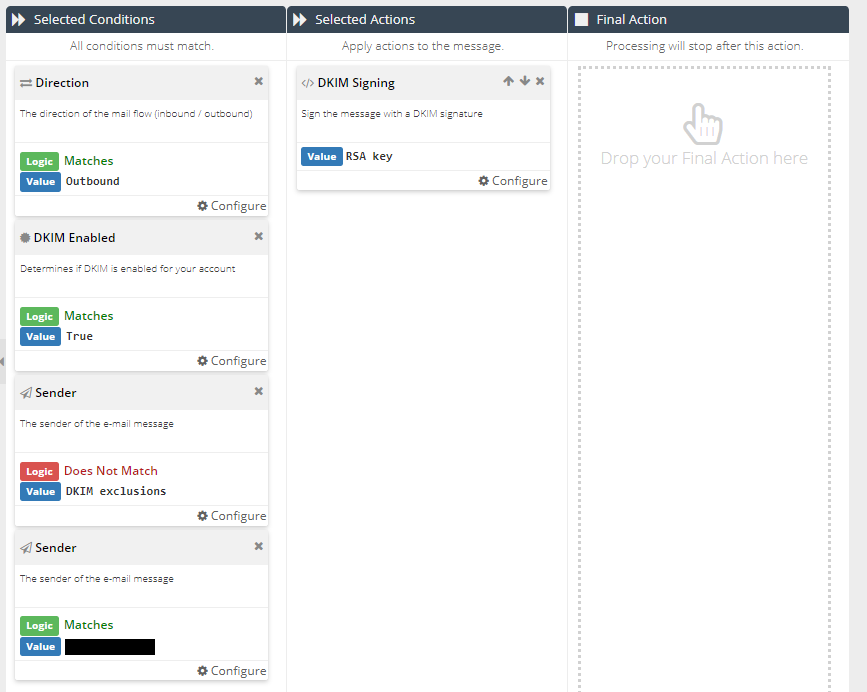
- Move the rule to top of the Message Rules list (drag and drop) to give it Priority 1.

- Disable the System Message Rule called (Default) Apply DKIM signing. Click the
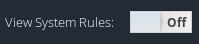 toggle, and then click
  next to (Default) Apply DKIM Signing to switch the Rule to off.
