Product Configuration
To configure your Email Security installation, visit your USS Dashboard and click Products ⟶ E-mail Security ⟶ Product Configuration
Domains
To add or remove domains from Email Security tracking, use the Domains tab.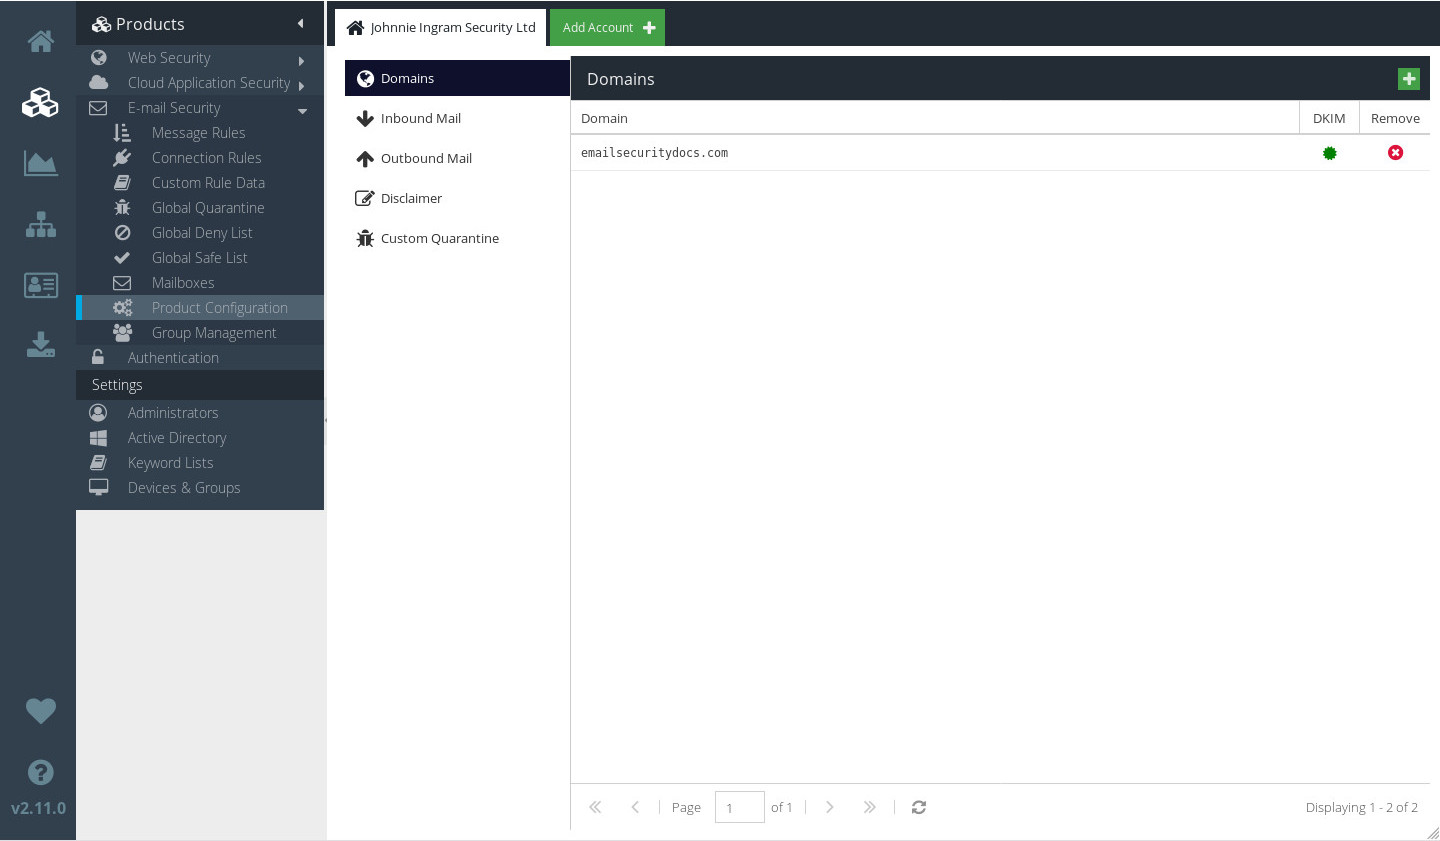
To add a new domain, click  . Enter the domain that you wish to track, and the full hostname or IP address of your mailserver, and click
  .
.
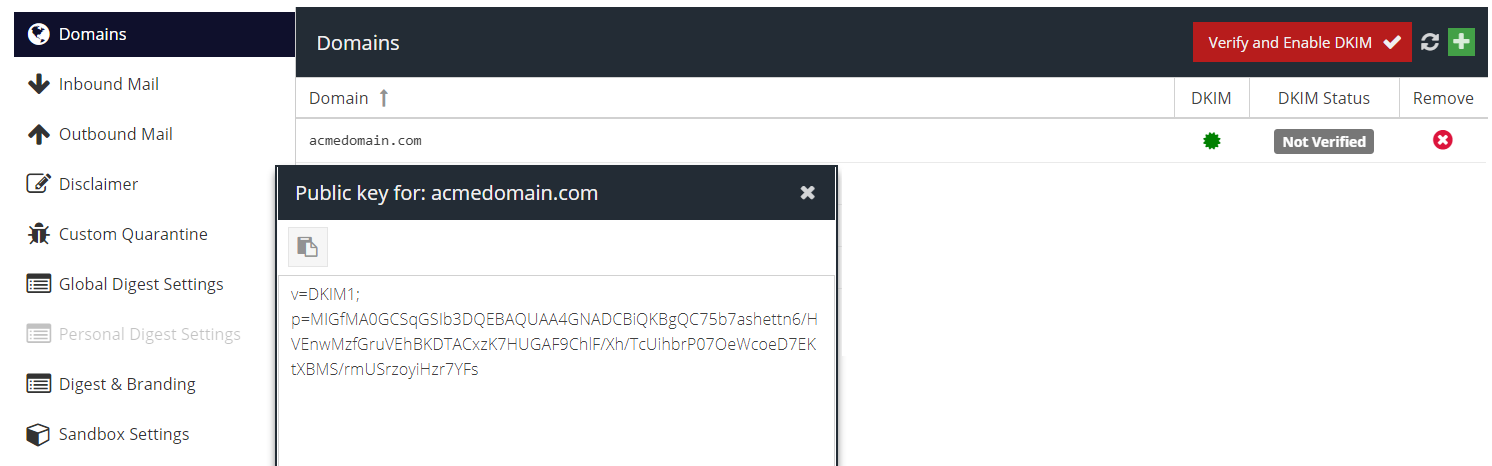
DKIM
You can view the full public DKIM key for a domain by clicking the green certificate icon next to the domain name.
Please see the DKIM Configuration article for further information.
Deleting a domain
To delete a domain, select it in the list and click 
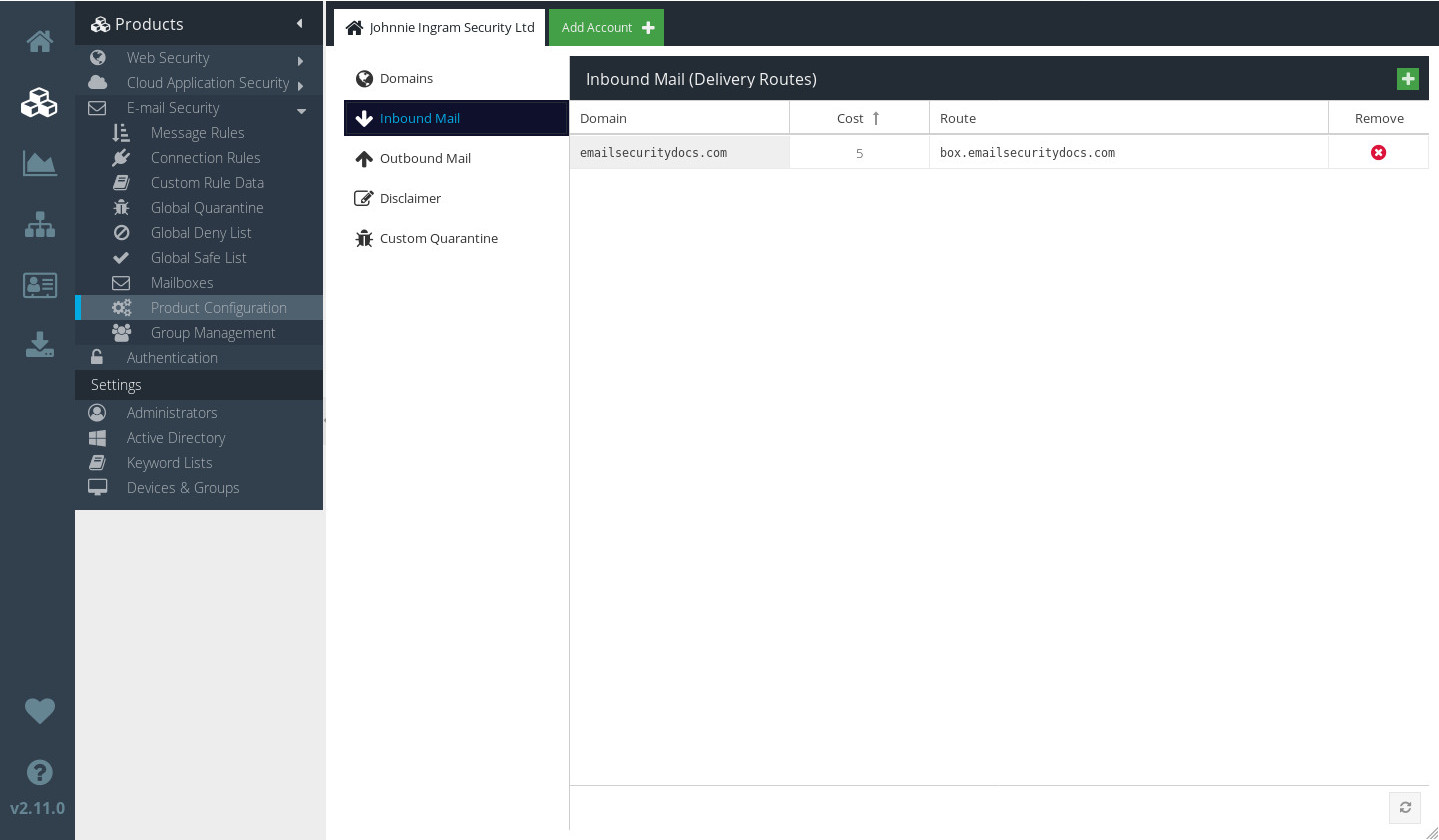
Inbound Mail
The Inbound Mail tab lists all of the inbound mail delivery routes that Email Security is aware of. You can edit an Inbound Mail route by double-clicking it in the list. Make any changes you need, and then click. Weight costs can be assigned to inbound mail routes.  .
.
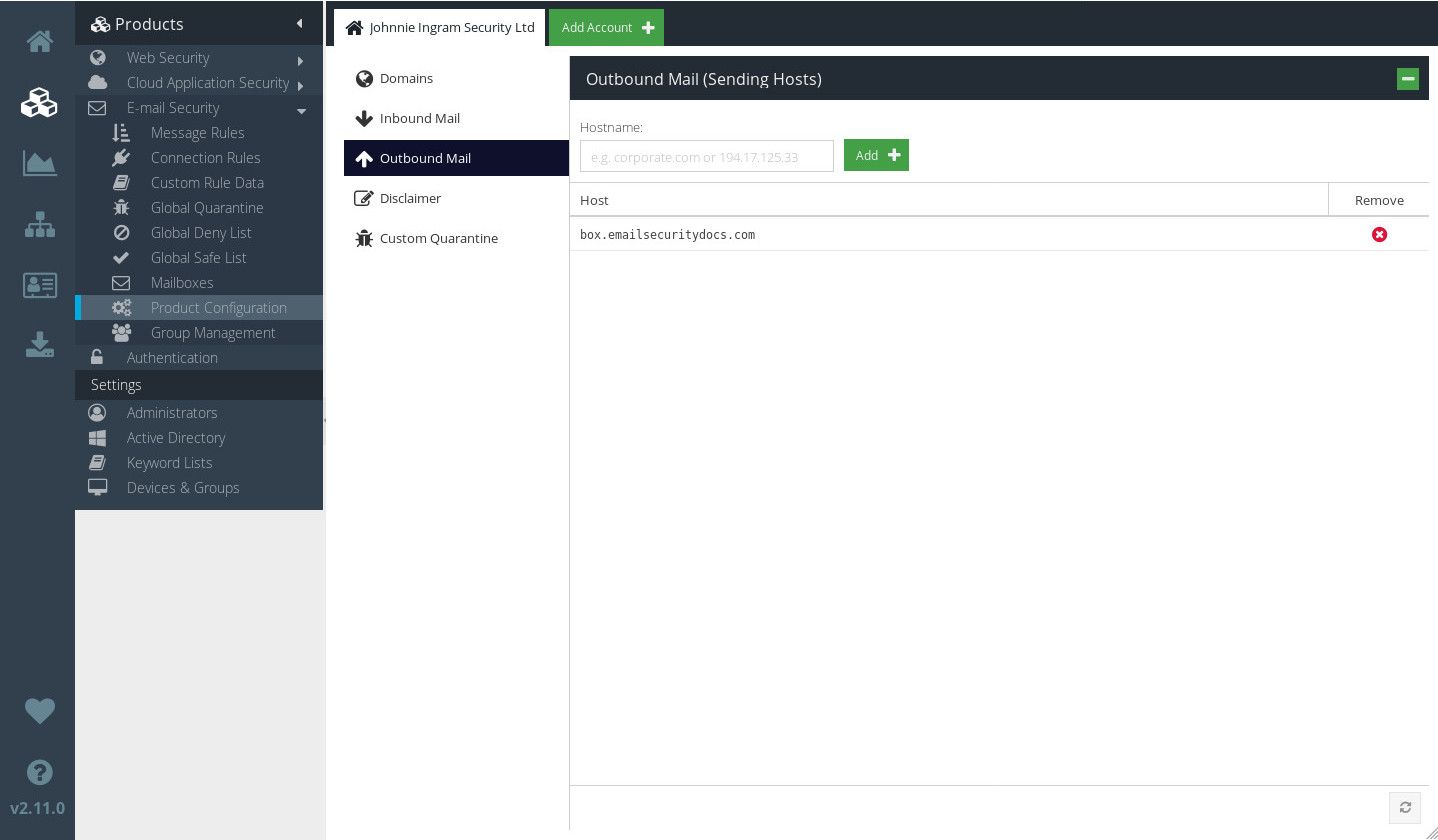
Outbound Mail
The Outbound Mail tab lists all of the outbound mail delivery routes that Email Security is aware of. You can edit an Outbound Mail route by double-clicking it in the list. Make any changes you need, and then click. The supported format isSPF, IP Address & FQDN, we don't support Dynamic Addressing.
Disclaimer
If you wish to add a textual disclaimer to every email that originates from your domain, you can do so using the Disclaimer tab.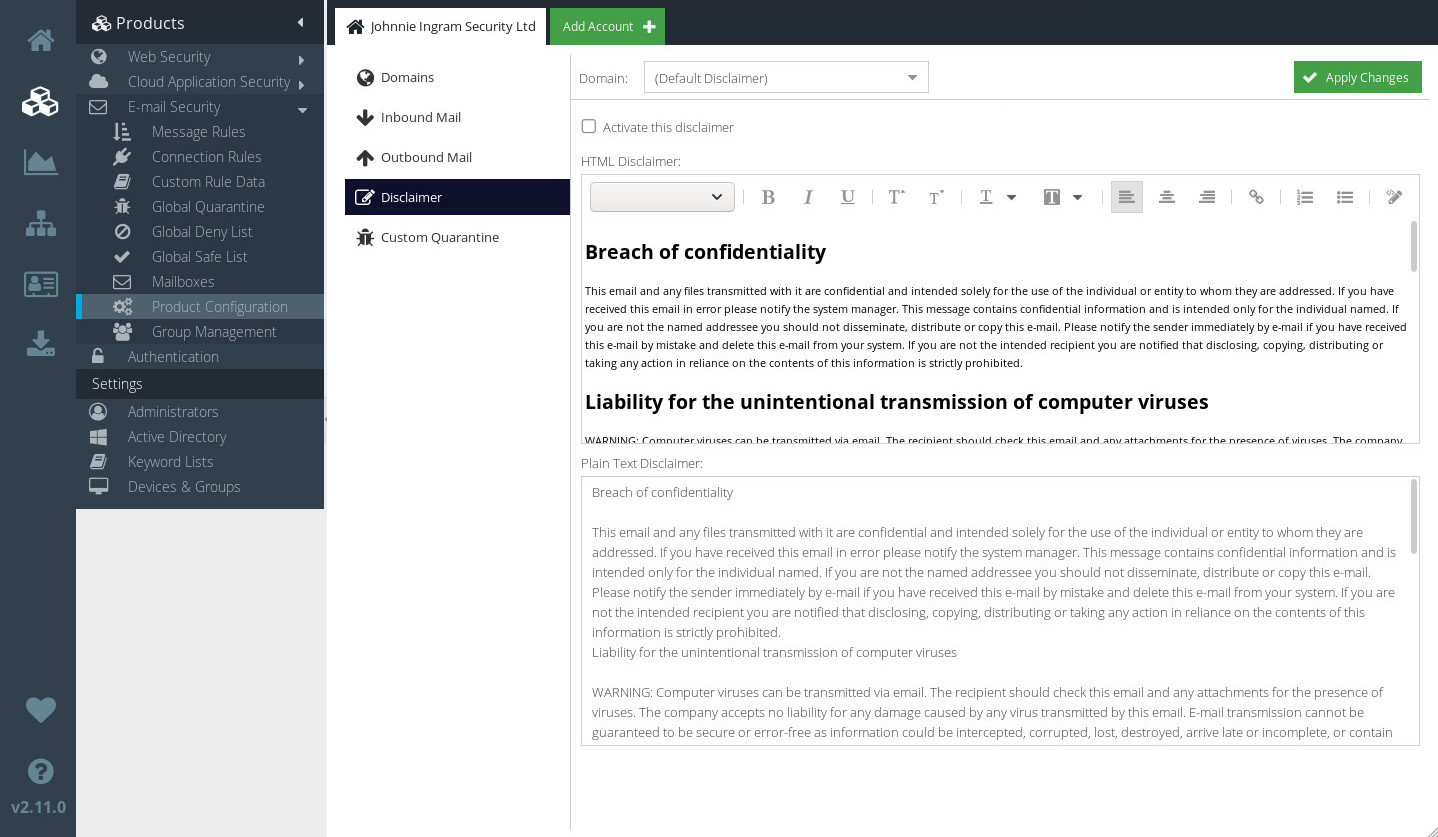
- Choose a domain
You can add a disclaimer for a specific domain by selecting it from the drop-down list.
- Add an HTML disclaimer
Use the rich text editor to enter your disclaimer in HTML format. This disclaimer will be automatically chosen if the email is in HTML format.
- Add a plain text disclaimer
Add your disclaimer in plain text format. This disclaimer will be automatically chosen if the email is in plain text format.
- Set the disclaimer to be active
Enable the Activate this disclaimer checkbox to set the disclaimer as active.
- Click
 .
.
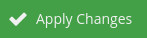
Custom Quarantine
Email Security comes with two default quarantine states of Spam and Virus. If you wish to add any other quarantine statuses, you can do so using the Custom Quarantine tab.
Click the  icon to add a new quarantine status. Give the new quarantine a sensible name, and click
User access
If a quarantine is set to permit User Access, the quarantine can be accessed via the user's Personal Quarantine.
Global Digest Settings
Use this tab to control the frequency with which Email Security sends a summary of recent activity.
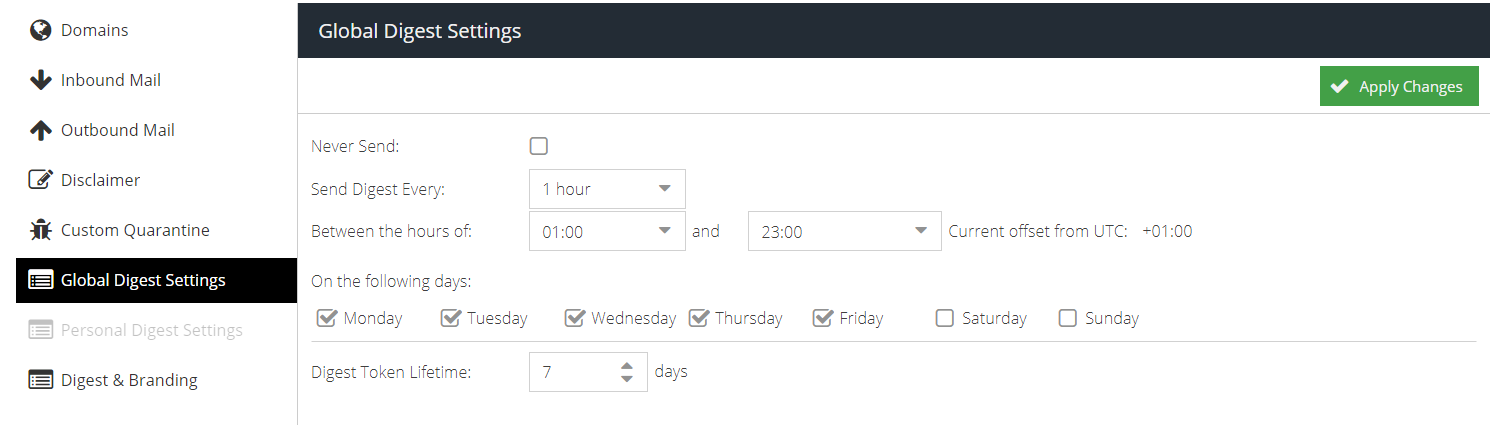
- Never Send - disable sending a Spam Digest email if there are new messages in the users quarantine.
- Send Digest Every - set the frequency of Spam Digest emails.
- Between the hours of - specify the start and end time for Spam Digest emails.
- On the following days - specify the days of the week that a Spam Digest should be sent.
- Digest Token Lifetime - specify the number of days links from a Spam Digest email to the Quarantine Portal should be valid for (maximum 1 year). After the token lifetime has passed, the Spam Digest email is no longer functional.
- Last Digest Sent Date - the date the last Spam Digest email was sent to any mailbox
- Last Digest Sent Time - the time on Last Digest Sent Date that the last Spam Digest email was sent to any mailbox
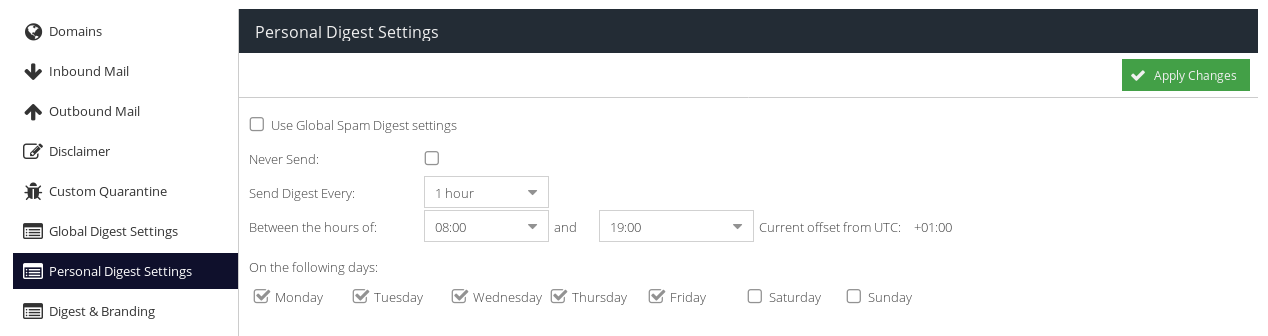
Personal Digest Settings
Use this tab to control the frequency with which Email Security sends a summary of recent activity on your own user mailbox. These settings are specific to the logged-in user.
By default, each user will receive digests based on the Global Digest settings. Disable the Use Global Spam Digest Settings checkbox to override this.
Digest and Branding
Use this tab to control the branding and appearance of digest emails sent by Email Security.
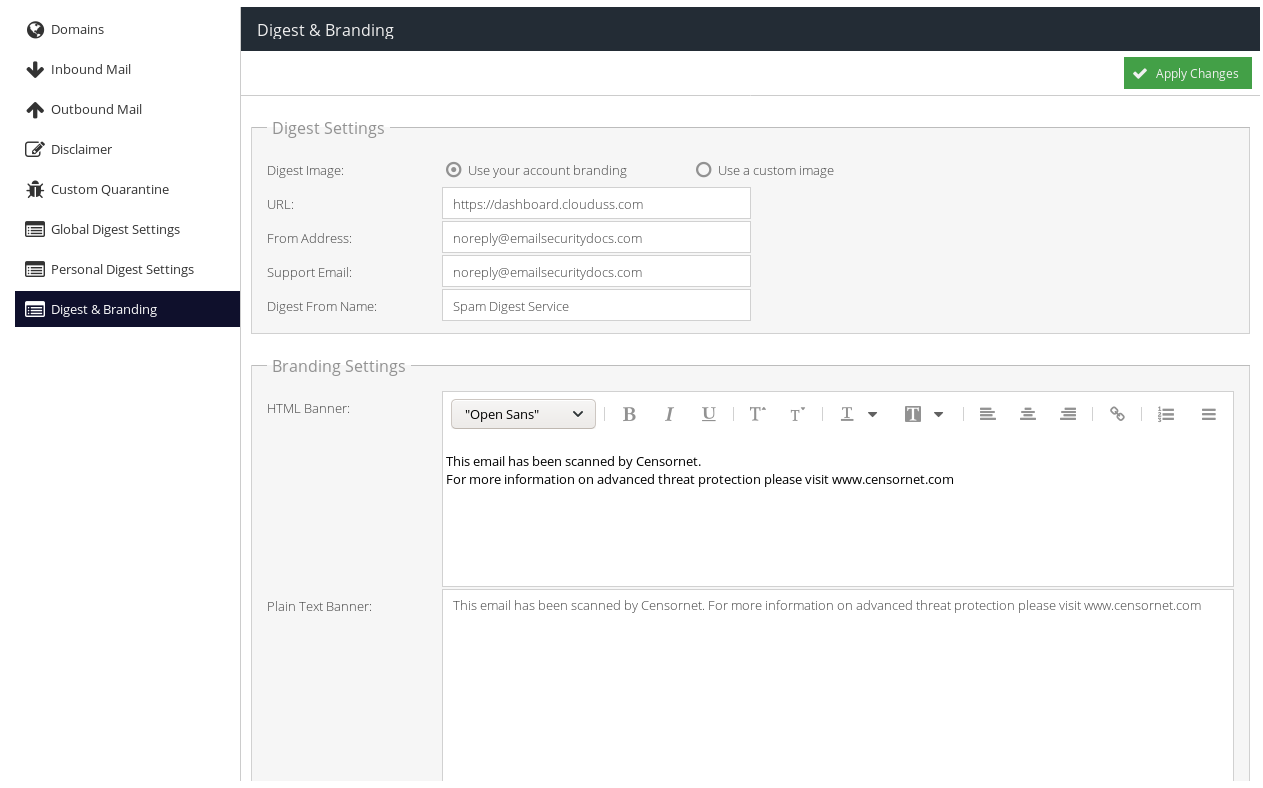
Digest Settings
It is possible to override the default branding used on the Spam Digest email. By default, this will use the logo from the Account Settings -> Branding section however this can be overriden with a specific URL to an image hosted externally. It is also possible to customise the envelope headers from the Spam Digest email.
Branding Settings
It is possible to add a domain wide notice to every email that is sent (if Outbound Mail filtering is configured), which could be used to advertise or notify recipients about some specific news.
Sandbox Settings (add-on product)
Use this tab to configure the notification options for the Email Security Sandbox. This option will only be visible if the product is active.
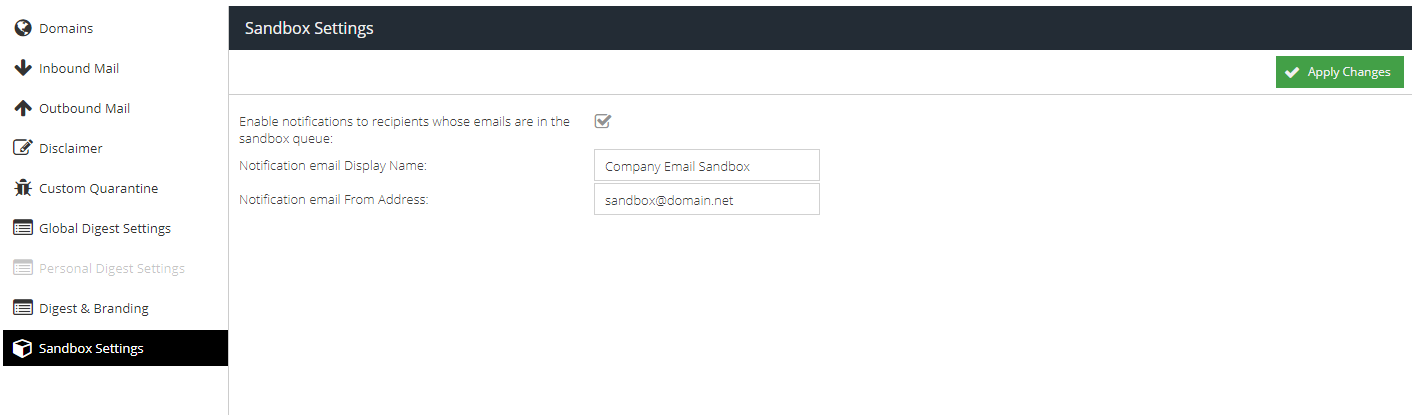
Enable Notifications to Recipients
If this option is selected, recipients will receive an email notice to inform them that they have received an email from a sender but the email has been sent to the sandbox for further scanning. The email is to advise recipients that the email will be delayed. Once the sandbox has completed, the original email will be delivered as normal if the attachments were clean.
Notification Email Display Name
If notifications are enabled, this is the name that will appear the email has come from.
Notification Email From Address
If notifications are enabled, this is the email address that will appear the email has come from.