Installing an SSL Certificate on iOS 13
How to install the USS Cloud Gateway SSL certificate on Apple iOS 13.
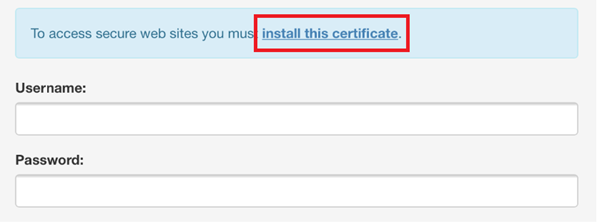
First, you need to download the SSL certificate to the device. The simplest way if using the captive portal is to click on the link that’s presented to you for login:
Alternatively, you can point your web browser at https://<ip.address.of.proxy>/ussgw.der
For example, if the proxy is on 10.10.10.19, you would go to https://10.10.10.19/ussgw.der
The link will open the following screen. Click “Allow”
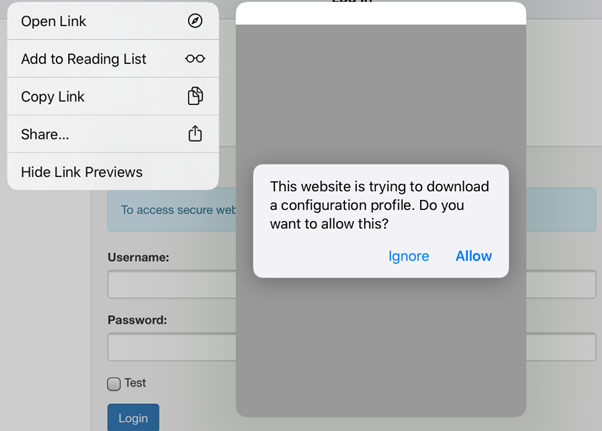
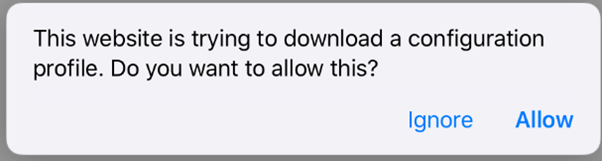
You will then be asked if you want to download a configuration profile. Click “Allow” again.
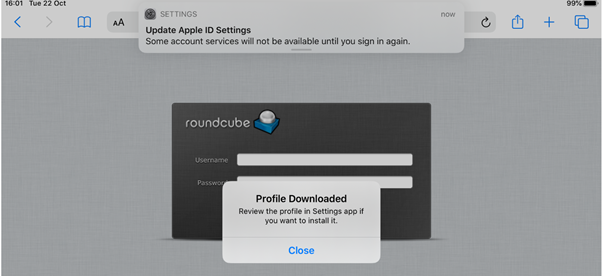
You will be presented with “Profile Downloaded”. Click close.
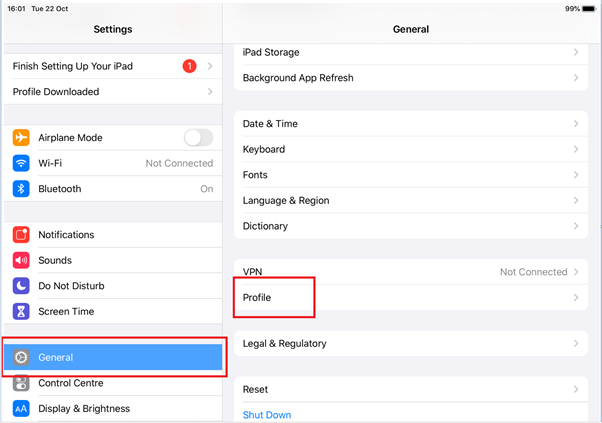
Now you need to open the Settings app, and enter General, then click on “Profile”:
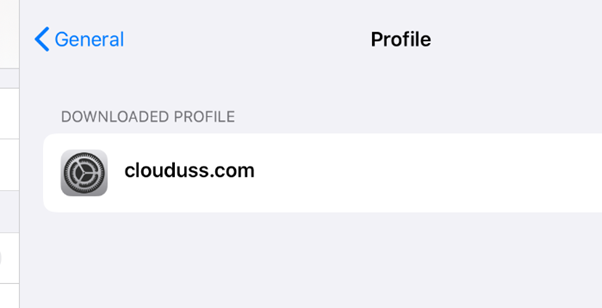
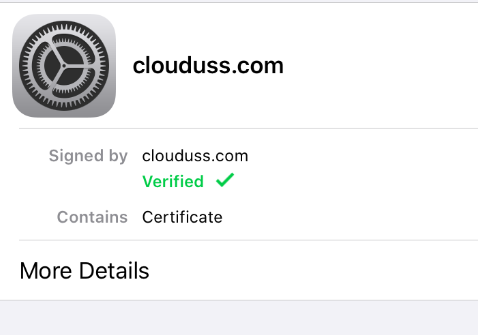
You should then be able to see the CloudUSS profile:
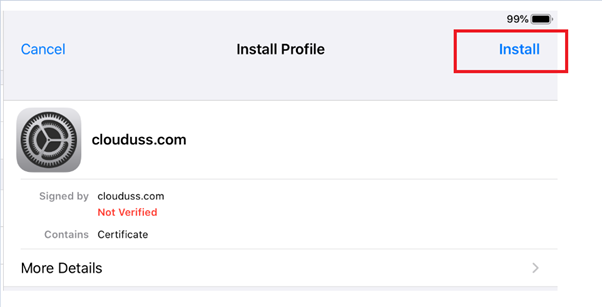
Click on this, then in the next screen, click “Install” in the top-right corner:
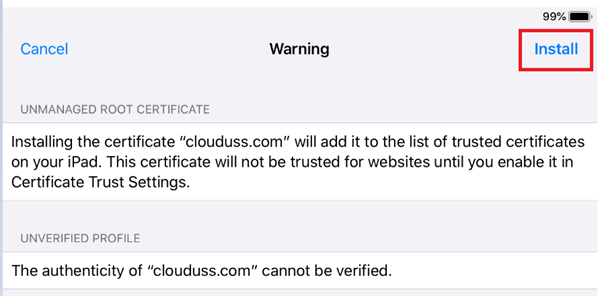
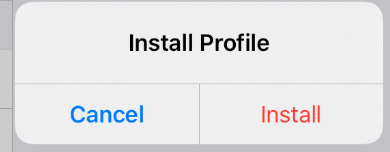
This will prompt you to enter your PIN. Once done you will see the screen below. Click “Install” in the top-right corner again:
You will be prompted to install again. Click install once more:
You should now see this. NB! This is not the end of the process, don’t skip any steps!
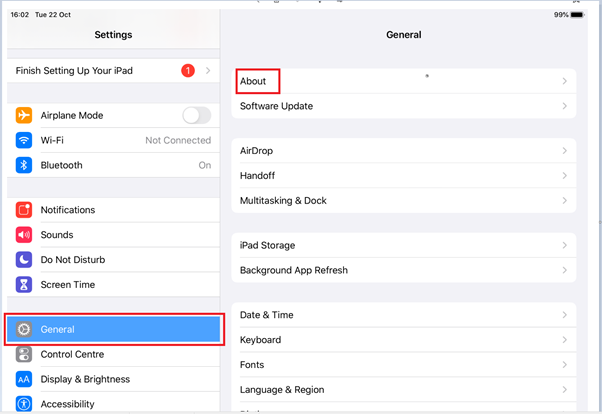
Back in the Settings app, go to General again, then click on “About”
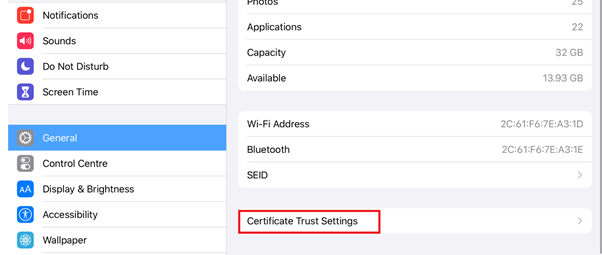
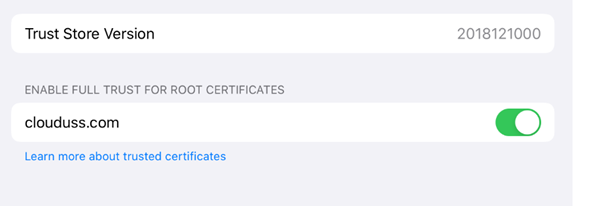
Then scroll down and find “Certificate Trust Settings”
You should now see a slider button to enable Full Trust for Root Certificates for CloudUSS.com:

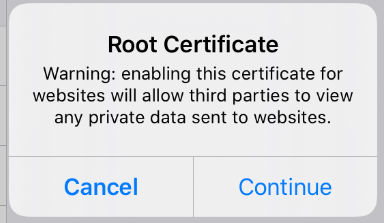
It will ask you to confirm – click Continue:
Finally you will see this:
The certificate should now be installed and trusted and you will be able to browse through the Cloud Gateway proxy without seeing SSL certificate errors.