Schedules
 Updated 3 hours ago
by
admin
Updated 3 hours ago
by
admin
The Scheduler emails a saved report automatically on a recurring basis. You can also use it as an alert, by only sending an email when the report has results.
Viewing schedules
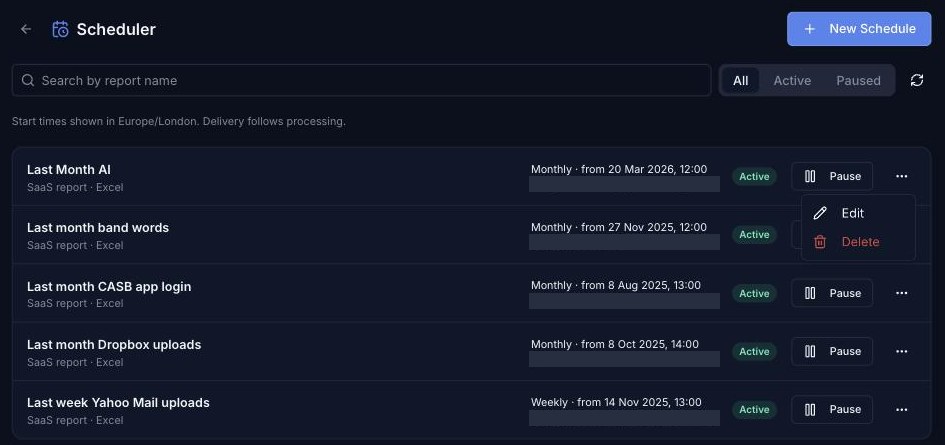
In the console, click Analytics in the left-hand menu, then Scheduler. Each schedule shows:
- the report name, the type of report (for example SaaS report) and the format;
- how often it runs and when it started;
- the recipients;
- its status (Active or paused).
Use the search box to find a schedule by report name, the All, Active and Paused buttons to filter the list, and the refresh button to reload it. Start times are shown in your time zone.
Creating a schedule
- Click New Schedule.
- Under Frequency and timing, choose Hourly, Daily, Weekly or Monthly, then the Start date (or First run date for hourly schedules) and Start time. For weekly and monthly schedules, the start date sets the day it runs.
- Under Saved report, choose the report. Only reports with a compatible timespan are listed.
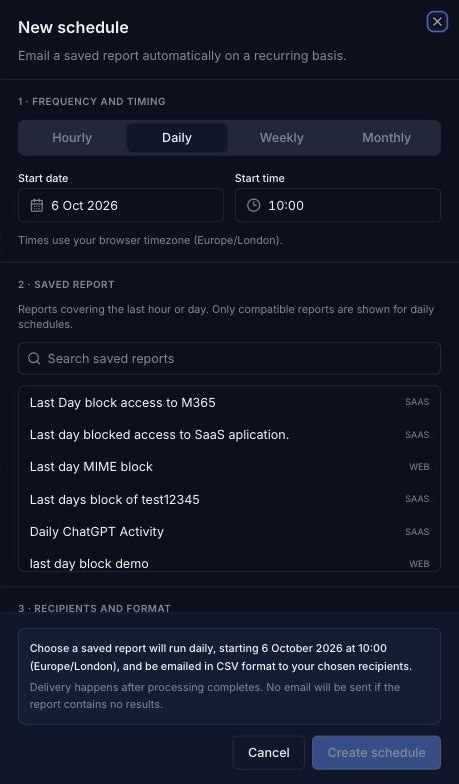
Frequency | Reports you can schedule |
Hourly | Last hour |
Daily | Last hour or last day |
Weekly | Last day or last week |
Monthly | Last week or last month |
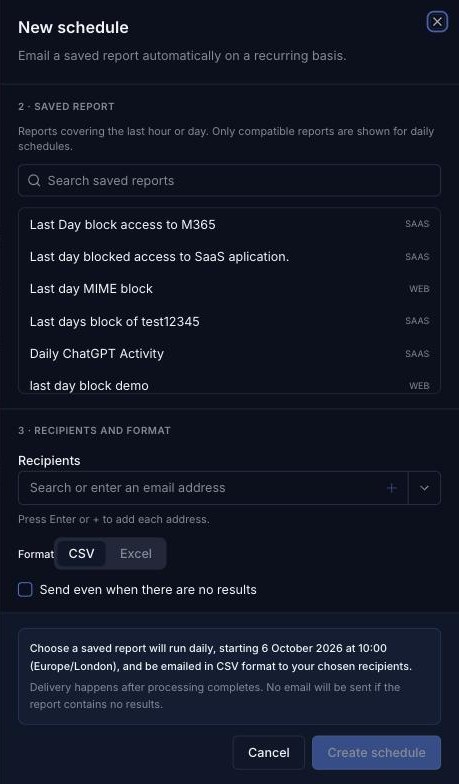
- Under Recipients and format, type each email address and press Enter or click +. Choose the Format: CSV or Excel.
- Tick Send even when there are no results if you always want an email. Leave it unticked to use the schedule as an alert.
- Check the summary at the bottom of the panel, then click Create schedule.
Pausing, editing or deleting a schedule
- Click Pause to stop a schedule running temporarily. The button then changes to Resume; click it to start the schedule again.
- Click the ⋯ button and choose Edit to change it, or Delete to remove it.