Unblock Requests
 Updated 45 minutes ago
by
admin
Updated 45 minutes ago
by
admin
The Unblock Request system lets end-users ask for a blocked website to be unblocked. Administrators can review each request and approve it by adding the site to a custom URL Category, all from within the TrustLayer console.
Enabling Unblock Requests
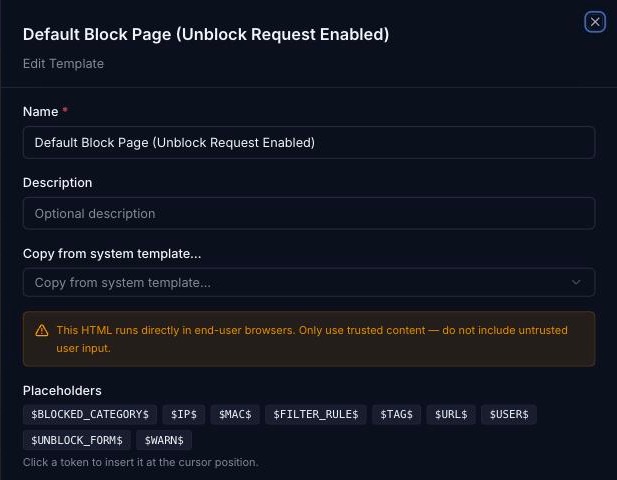
For end-users to be able to submit Unblock Requests, the block page they see must include the $UNBLOCK_FORM$ placeholder, and that block page must be used by at least one rule in the Rule Builder.
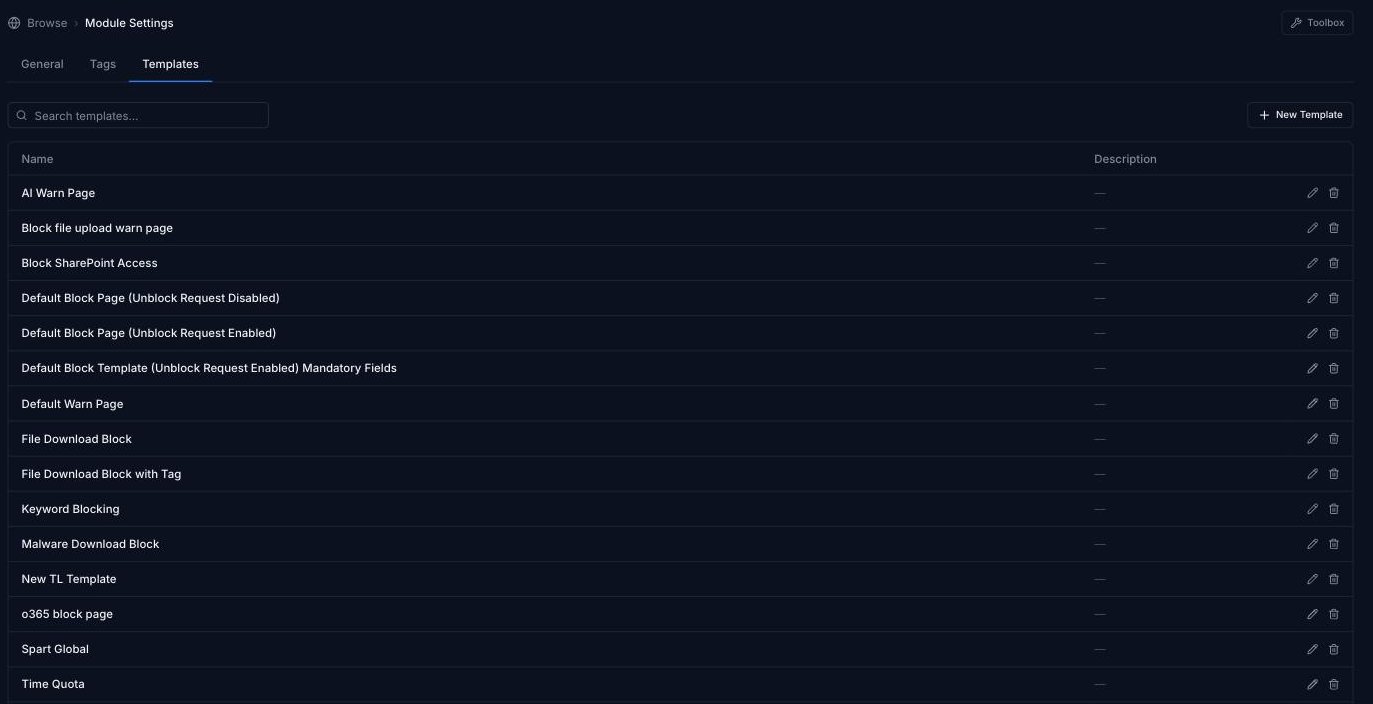
- In the console, go to Browse ⟶ Module Settings and open the Templates tab.
- Edit an existing template (click the pencil icon) or click New Template. The built-in Default Block Page (Unblock Request Enabled) template already includes the form.
- Under Placeholders, click
$UNBLOCK_FORM$to insert it into the HTML at the cursor position, then click Save. - In Browse ⟶ Rule Builder, make sure the rule's Block action uses that template.
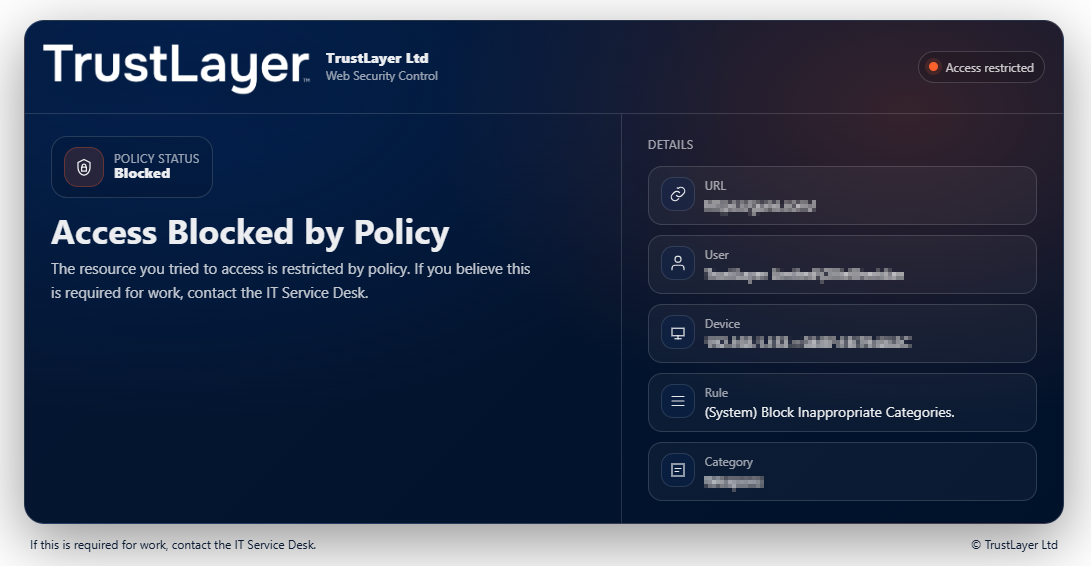
When a user performs an action that triggers the rule, they will see the block page with a form to send an Unblock Request.
Viewing Unblock Requests
$UNBLOCK_FORM$ placeholder in order to receive Unblock Requests.To view your Unblock Requests, go to Browse ⟶ Unblock Requests in the left-hand menu. The page has two tabs:
- Pending: requests waiting for an administrator to action them. The number of pending requests is shown on the tab.
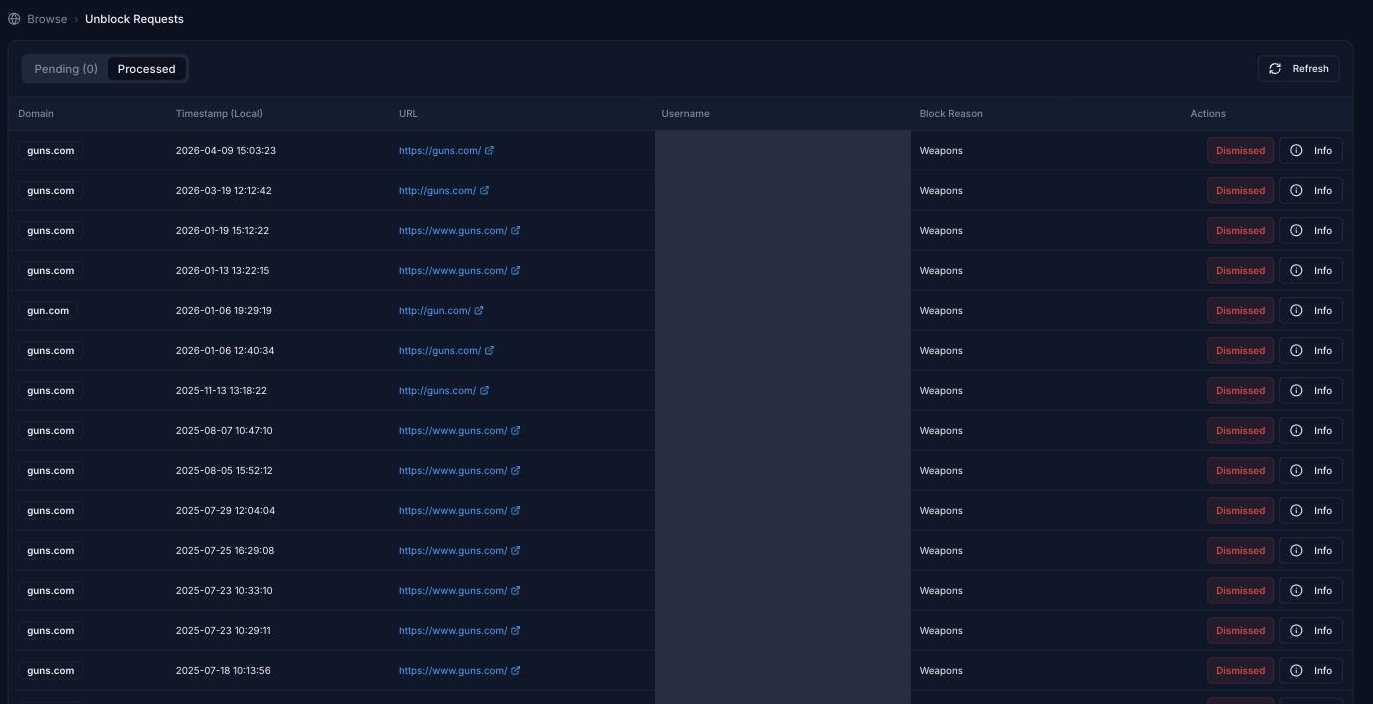
- Processed: requests that have already been approved or dismissed.
Click Refresh to check for new requests.
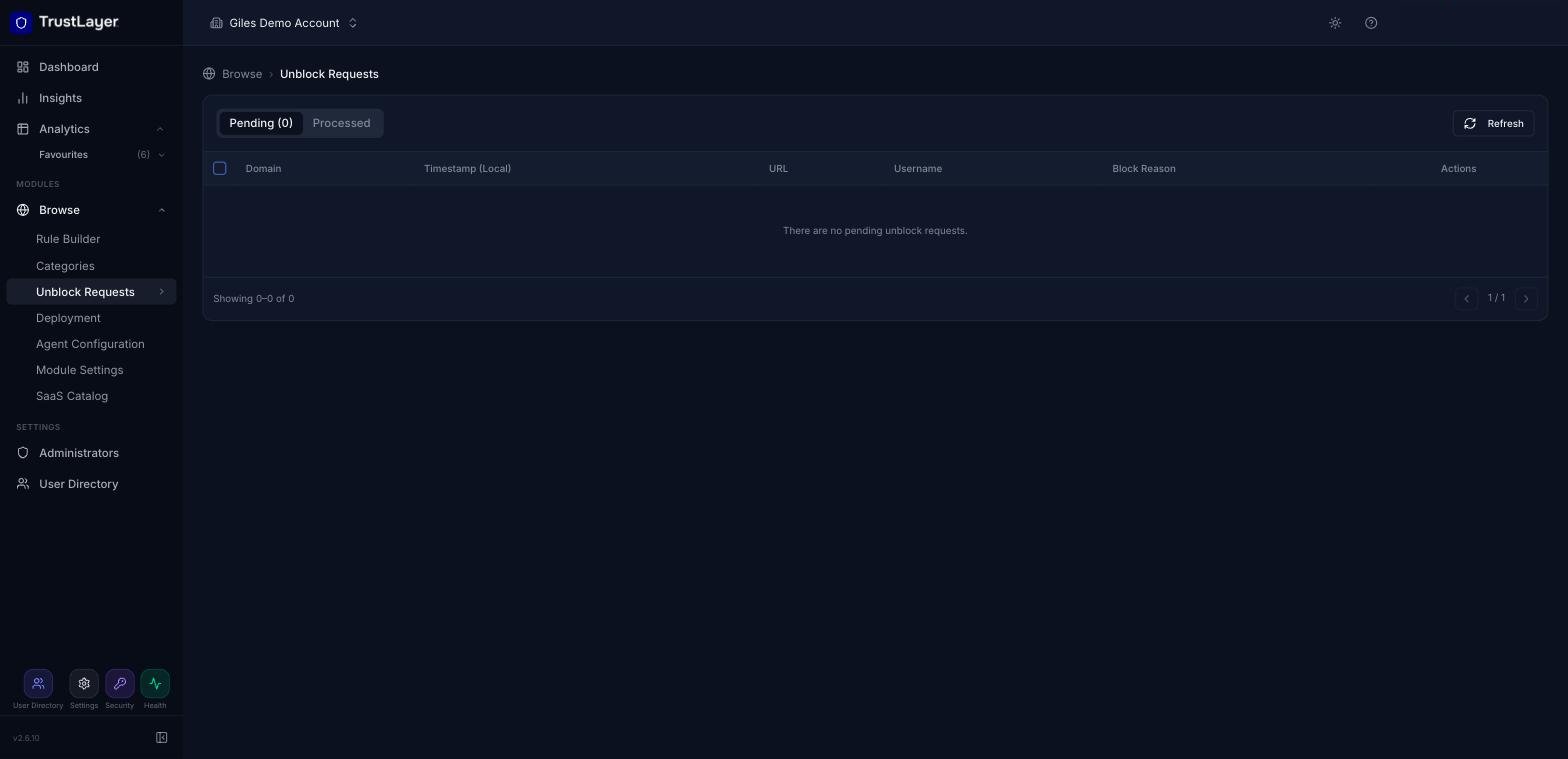
The list shows the following details for each request:
Domain
The domain of the site that was blocked.
Timestamp (Local)
The date and time, in local time, at which the Unblock Request was received.
URL
The full URL that was blocked.
Username
The username of the end-user who submitted the request, if User Authentication or User Identification is enabled in the Agent Configuration profile.
Block Reason
The category reported by the rule that triggered the block.
Actions
The buttons for actioning the request, or its outcome (for example Dismissed) on the Processed tab.
Viewing the full details of a request
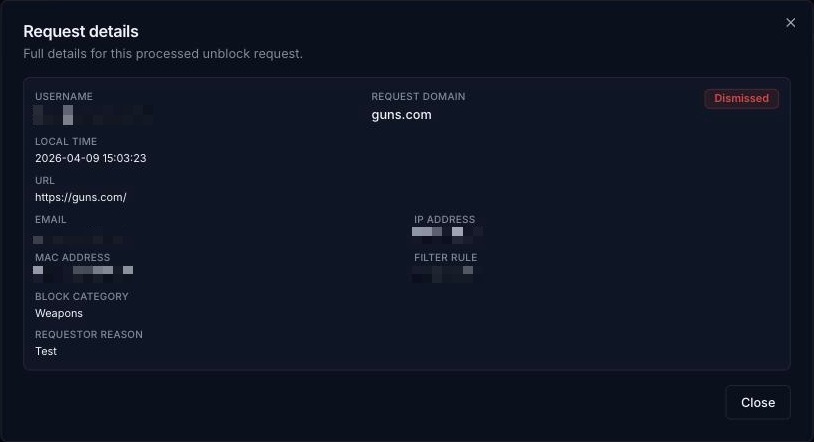
Click Info next to any request to open the Request details window. As well as the details above, it shows:
- Email: the email address the user gave for notifications, if any.
- IP Address and MAC Address of the device the request was sent from.
- Filter Rule: the name of the rule that triggered the block.
- Block Category: the category that was blocked.
- Requestor Reason: the text the user typed into the request form. This is optional, so it may be blank.
Approving Unblock Requests
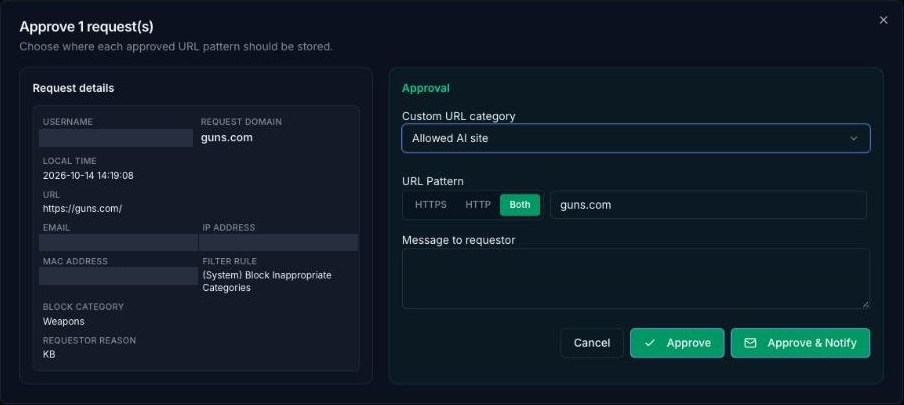
On the Pending tab, click Approve at the end of the request's row. To approve several requests at once, tick them (or use the checkbox at the top of the list) and click Approve Selected.
The approval window shows the Request details on the left. Under Approval, complete the following:
Custom URL category
Choose the Custom URL Category that the approved URL will be added to. The category is permanently updated to include the new pattern.
URL Pattern
Choose HTTPS, HTTP or Both, and check the pattern. It is filled in from the requested domain, in a format that is compatible with URL Categories.
Message to requestor
An optional message for the user.
Click Approve to add the pattern to the chosen URL Category, or Approve & Notify to also email the user.
Dismissing Unblock Requests
If a request needs no action, click Dismiss at the end of its row on the Pending tab (or tick several requests and click Dismiss Selected). Optionally type a Message to requestor, then click Dismiss, or Dismiss & Notify to also email the user. Dismissed requests move to the Processed tab.
Viewing processed Unblock Requests
Open the Processed tab to see every request that has already been approved or dismissed, with its outcome in the Actions column. Click Info to see the full details of any request.
Email notifications for new Unblock Requests
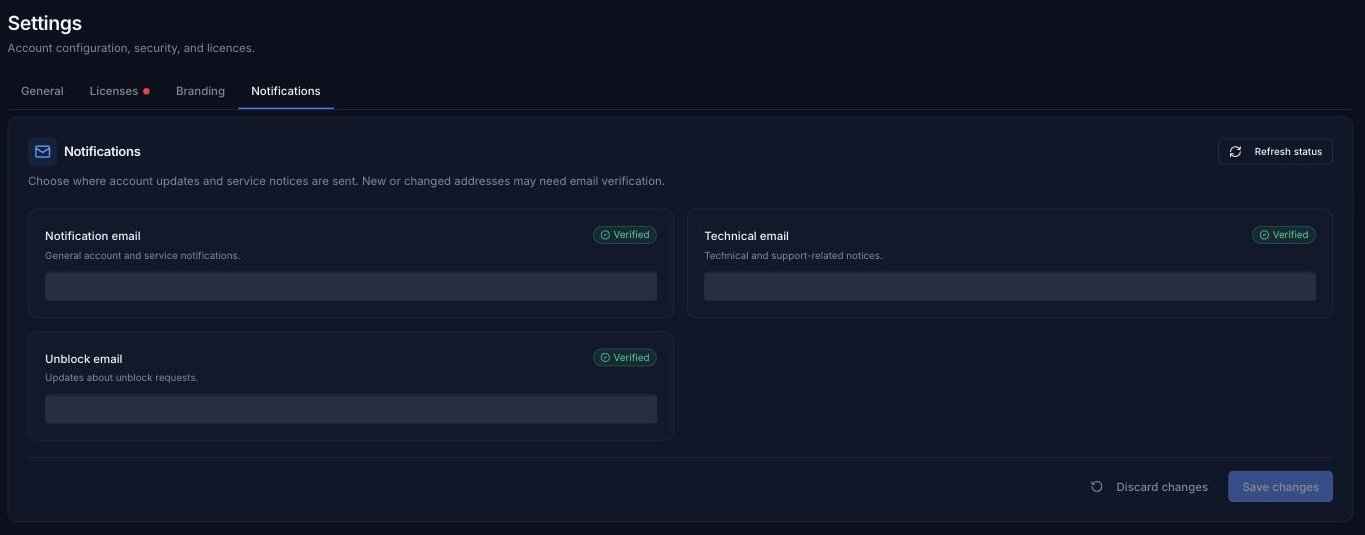
You can specify an email address that receives a message as soon as an end-user submits an Unblock Request. In the console, click Settings (the cog icon at the bottom of the left-hand menu), open the Notifications tab and enter the address in Unblock email, then click Save changes. New or changed addresses may need to be verified. See Notifications.