Administrators
 Updated 13 minutes ago
by
admin
Updated 13 minutes ago
by
admin
Administrators are users that are created within the TrustLayer console itself and are unrelated to any users belonging to an Active Directory or Entra ID connection.
Viewing administrators
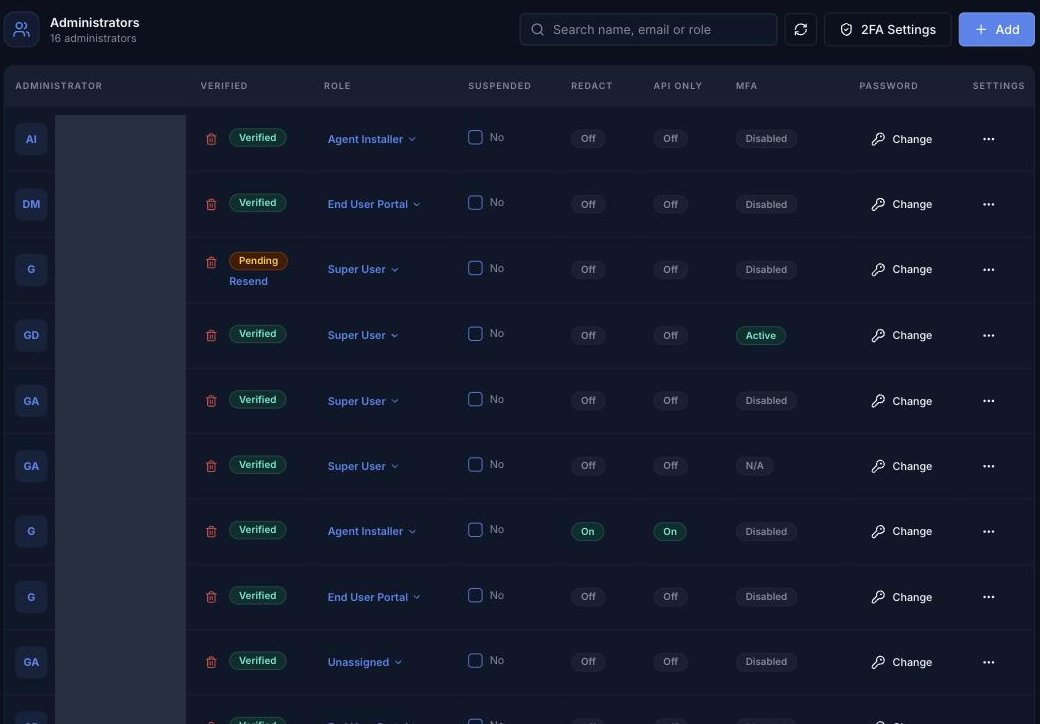
In the console, click Administrators in the left-hand menu (under Settings). The page lists every administrator on your account. Use the search box to find an administrator by name, email or role, and click the refresh button to reload the list.
Adding an administrator
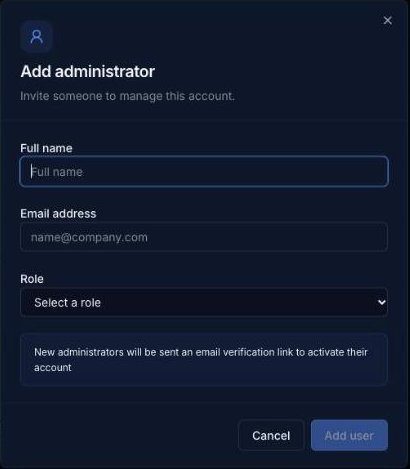
- Click Add.
- Enter the new administrator's Full name and Email address.
- Choose a Role (see Roles).
- Click Add user.
Managing administrators
Each row shows:
Administrator
The administrator's name and email address. Click the pencil icon to edit the name.
Verified
Whether the administrator has confirmed their email address (Verified or Pending).
Role
The administrator's role. Click it to choose a different role.
Suspended
Tick the box to suspend the administrator. A suspended administrator cannot perform any actions in the console.
Redact
Whether sensitive information in reports is hidden for this administrator.
API Only
Whether this administrator is restricted to API access only. API-only administrators cannot sign in to the console. Use them for scripts and agent registration, and limit them by role.
MFA
Whether the administrator has two-factor authentication Active or Disabled. N/A is shown for your own account; manage your own two-factor authentication in Security (see Account Security Guidelines).
Password
Click Change (the key icon) to change this administrator's password.
Settings
Click the ⋯ button in the Settings column to change Redact reports and API only access for the administrator. The dialog also shows when they last signed in. Enter your own current password and click Save settings.
Deleting an administrator
To permanently delete an administrator, click the bin icon next to their verification status.
Roles
An administrator must be assigned a Role. Roles apply role-based access control (RBAC) to your account. Each role (except Super User) restricts the administrator to specific functions in the console. See Roles.
Enforcing two-factor authentication
You can require all administrators on the account to set up two-factor authentication (2FA). Click 2FA Settings at the top of the Administrators page.
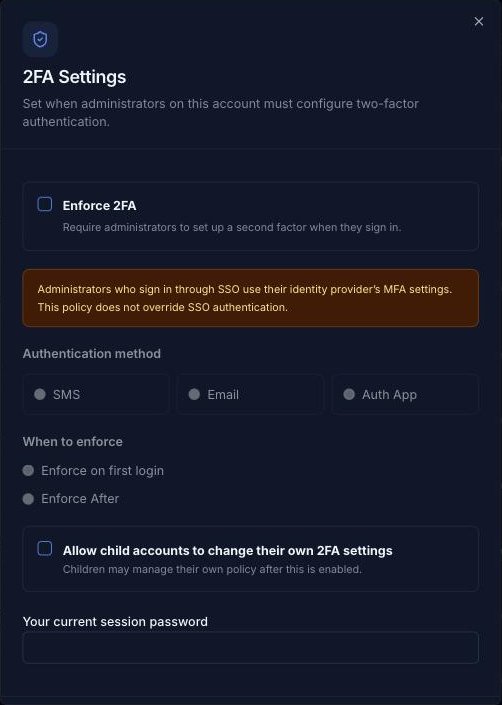
- Enforce 2FA: tick to require administrators to set up a second factor when they sign in.
- Authentication method: choose SMS, Email or Auth App.
- When to enforce: Enforce on first login, or Enforce After a period of time you choose.
- Allow child accounts to change their own 2FA settings: if your account can provision child accounts, tick this to let them manage their own policy.
- Your current session password: enter your own password to confirm the change.
Click Save, or Save & apply to child accounts to push the settings to your existing child accounts as well.
Enterprise SSO (single sign-on for administrators)
Enterprise SSO lets administrators sign in to the console with their Microsoft Entra ID account instead of a TrustLayer password. Click Enterprise SSO at the top of the Administrators page.

Setting up Enterprise SSO
- On the Enterprise SSO page, the Microsoft Entra ID card shows Disabled until SSO is set up. Click Configure.
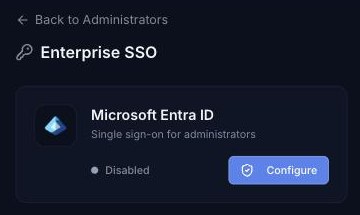
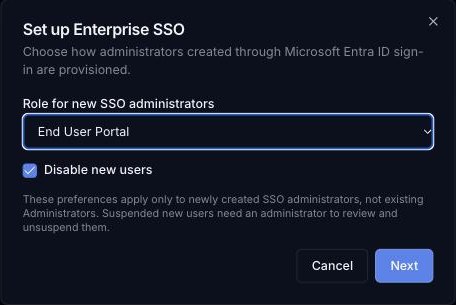
- In Set up Enterprise SSO, choose the Role for new SSO administrators (see Roles).
- Leave Disable new users ticked (the default) if new SSO administrators should be suspended until an existing administrator reviews them, or untick it to let them use the console straight away.
- Click Next. Your preferences are saved.
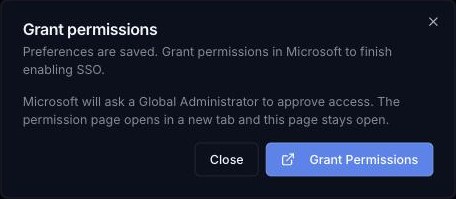
- Click Grant Permissions. Microsoft's permission page opens in a new tab (the console stays open).
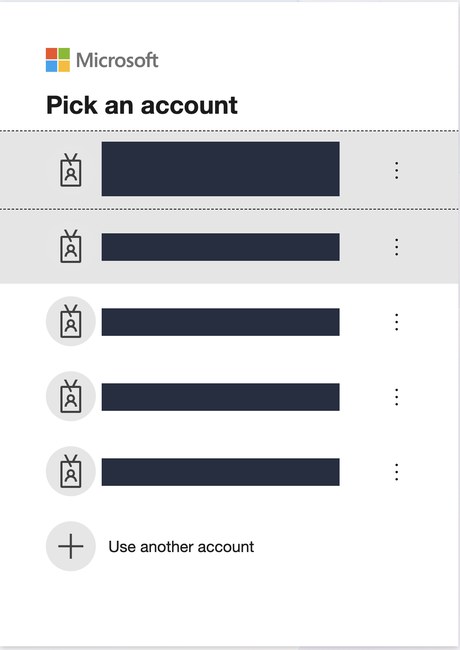
- Pick the Microsoft account of a Global Administrator for your tenant, or click Use another account.
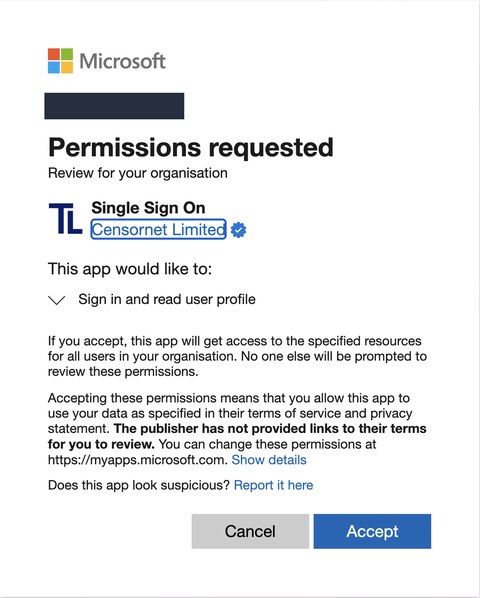
- Review the permissions requested by the Single Sign On app (published by Censornet Limited): Sign in and read user profile. Click Accept. This approves the app for everyone in your organisation, so other users won't be asked.
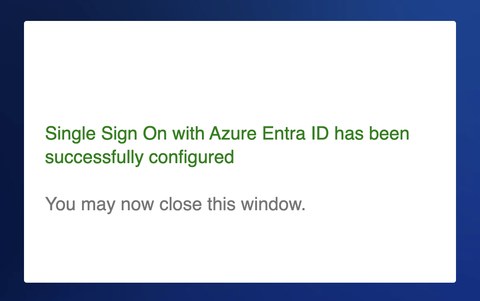
- A page confirms that Single Sign On with Azure Entra ID has been successfully configured. Close that tab.
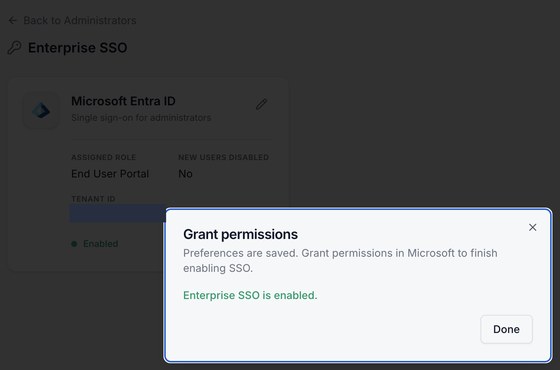
- Back in the console, the dialog shows Enterprise SSO is enabled. Click Done. The Microsoft Entra ID card now shows Enabled with your Tenant ID.
Viewing Enterprise SSO
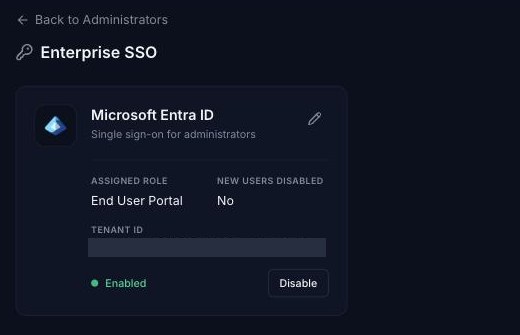
Once SSO is enabled, the Microsoft Entra ID card shows:
- Assigned role: the role given to new administrators created the first time they sign in through Entra ID.
- New users disabled: whether new SSO administrators are created suspended (Yes) or can use the console straight away (No).
- Tenant ID: the Microsoft Entra ID tenant that administrators sign in from.
- Status: Enabled when SSO sign-in is active. Click Disable to turn off Enterprise SSO for the account.
Changing how new SSO administrators are provisioned
- Click the pencil icon on the Microsoft Entra ID card.
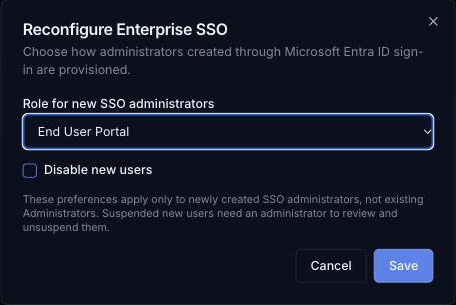
- In Reconfigure Enterprise SSO, choose the Role for new SSO administrators (see Roles).
- Tick Disable new users if you want new SSO administrators to be suspended until an existing administrator reviews them and clears Suspended on the Administrators page.
- Click Save.