WS - Rule Builder (Filter Rules)
 Updated 13 minutes ago
by
admin
Updated 13 minutes ago
by
admin
A Rule is a collection of Conditions, Matches and Actions. Rules apply web filtering, security and cloud application (CASB) controls to users and devices. They are managed centrally in the Rule Builder (previously called Filter Rules) and enforced by Agents on the network or on the user's device.
Managing Rules
Rules belong to the Policy of an account. To view, create or edit rules, log in to the console and go to Browse ⟶ Rule Builder.
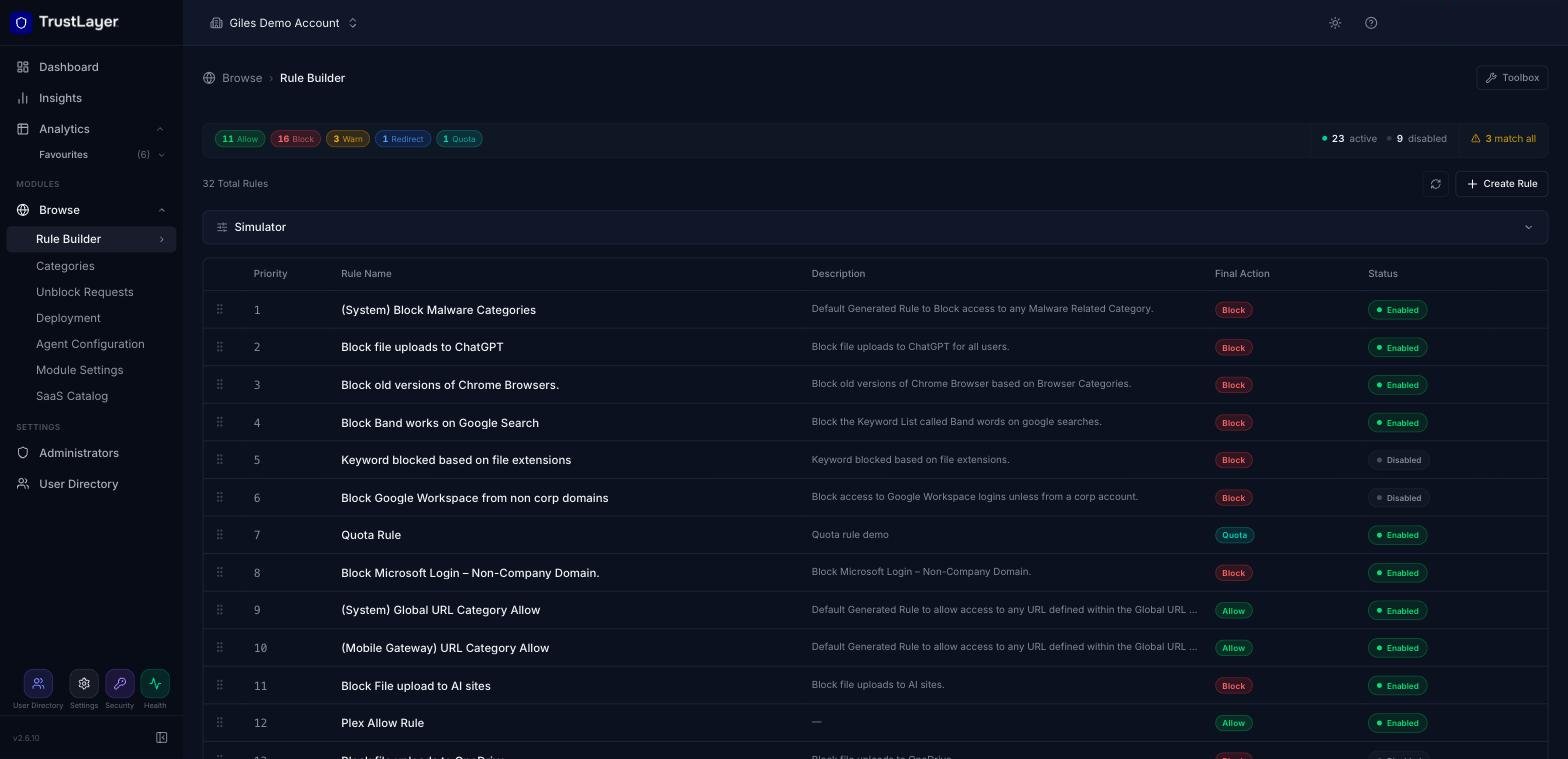
The Rule Builder lists every rule on your account, with its Priority, Rule Name, Description, Final Action and Status. The summary bar at the top shows how many rules you have of each final action (Allow, Block, Warn, Redirect, Quota), how many are active or inactive, and how many match all traffic. Click any of these to filter the list.
Rules are listed in the order they are processed, from top to bottom.
Changing priority order
To change the order in which rules are processed, drag a rule by its handle (⋮⋮, on the left of the row) and drop it in the new position.
Renaming and deleting rules
Click the ⋯ menu at the end of a rule's row and select Rename or Delete.
Creating a new Rule
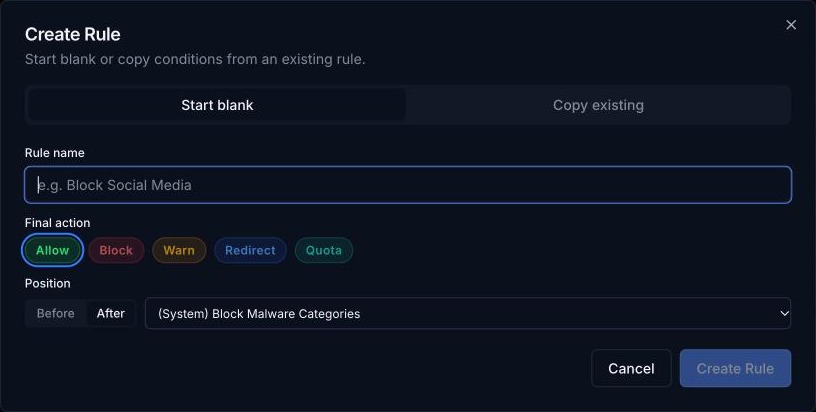
- Click Create Rule (top right of the list).
- Choose Start blank, or Copy existing to start from the conditions of an existing rule.
- Enter a friendly Rule name.
- Choose the Final action: Allow, Block, Warn, Redirect or Quota.
- Under Position, choose Before or After and pick an existing rule. This sets the new rule's priority.
- Click Create Rule. The rule editor opens.
Editing Rules
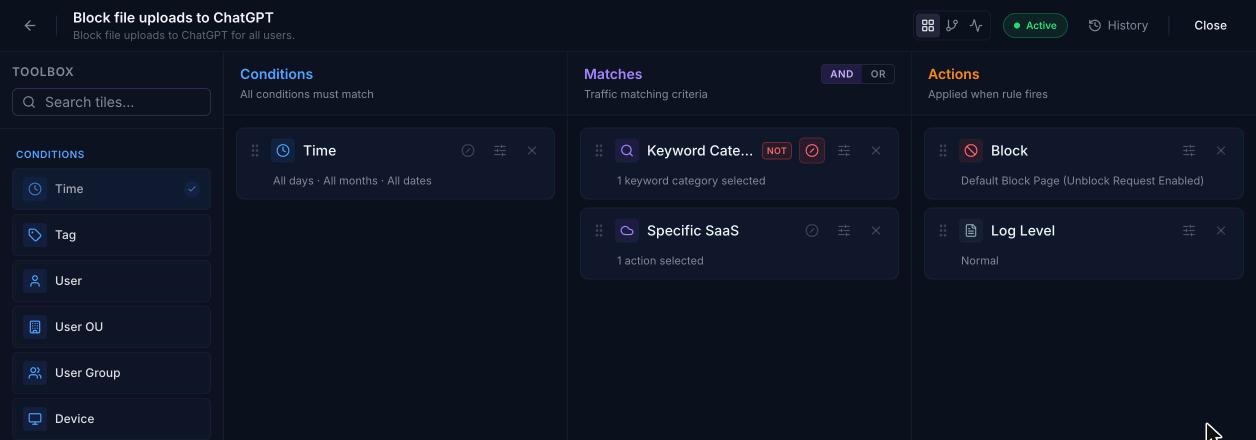
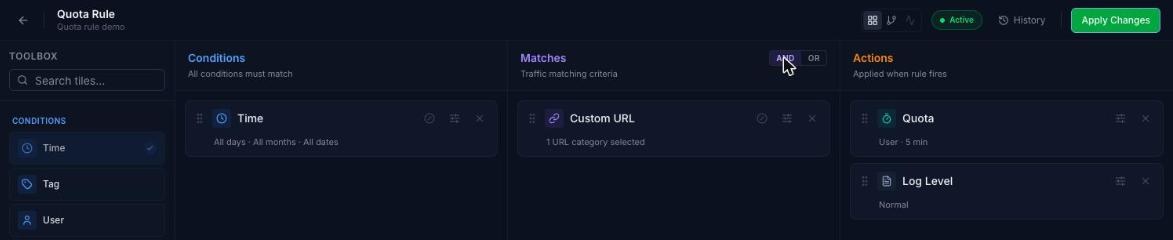
Click a rule's name in the list to open it in the rule editor. The editor has a Toolbox of tiles on the left and three columns: Conditions, Matches and Actions.
Rule name and status
The rule's name and description are shown at the top left of the editor.
The Active or Inactive badge at the top shows whether the rule is currently in effect. Inactive rules have no effect on web traffic but are still listed in the Rule Builder. When you open an inactive rule, a banner reminds you: This rule is inactive and its intended outcome will not apply.
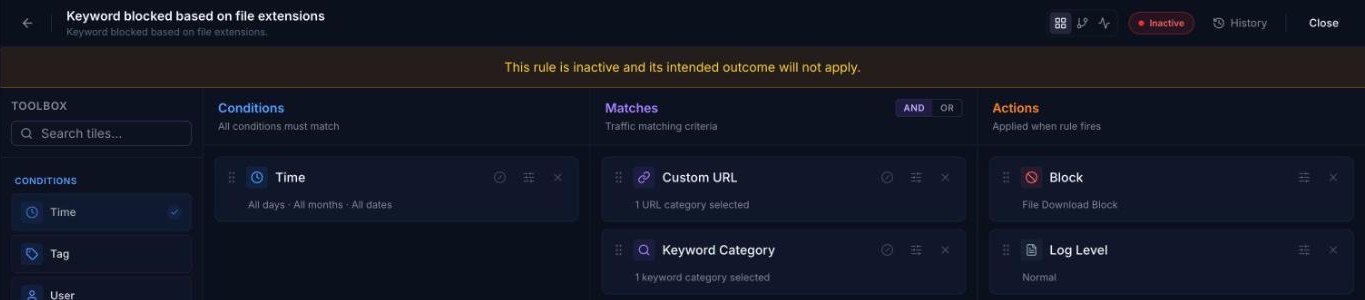
To rename the rule, click its name at the top of the editor and type the new name. Click the description below it to edit that too.
Click the Active badge to deactivate the rule, or the Inactive badge to activate it. You can also click the badge in the Status column of the Rule Builder list.
Adding tiles
To add a condition, match or action, double-click its tile in the Toolbox, or drag it onto the relevant column. Use the Search tiles box to find a tile quickly.
Each tile in a column has these controls:
- Configure (sliders icon): change the tile's settings, for example the hours for a Time condition or the categories for a Web Category match.
- Enable inverse match (NOT) (circle icon): the tile then matches when its setting is not true. A red NOT label shows on the tile. This replaces the Switch Logic button in the old dashboard.
- Remove (✕): removes the tile from the rule.
- Drag handle (⋮⋮): reorders tiles within a column.
Conditions
Conditions decide when and to whom the rule applies. Available conditions are Time, Tag, User, User OU, User Group, Device, Device Group, Device Type, Operating System, Browser and Sanctioned App.
Matches
Matches describe the traffic the rule looks for. Available matches are Web Category, Custom URL, Keyword Category, Site Geolocation, Specific SaaS, Generic SaaS Action and SaaS Action Risk. The options available depend on the products on your account.
Use the AND / OR toggle at the top of the Matches column to choose how matches combine:
- AND: all matches must be true for the rule to trigger.
- OR: the rule triggers if any match is true.
Actions
Actions decide what happens when the rule triggers. Available actions are Allow, Block, Warn, Quota, Redirect, Log Level and Content Scan. Configure the Block or Warn action to choose the page template users see.
Views: Builder, Flow and Web Activity preview
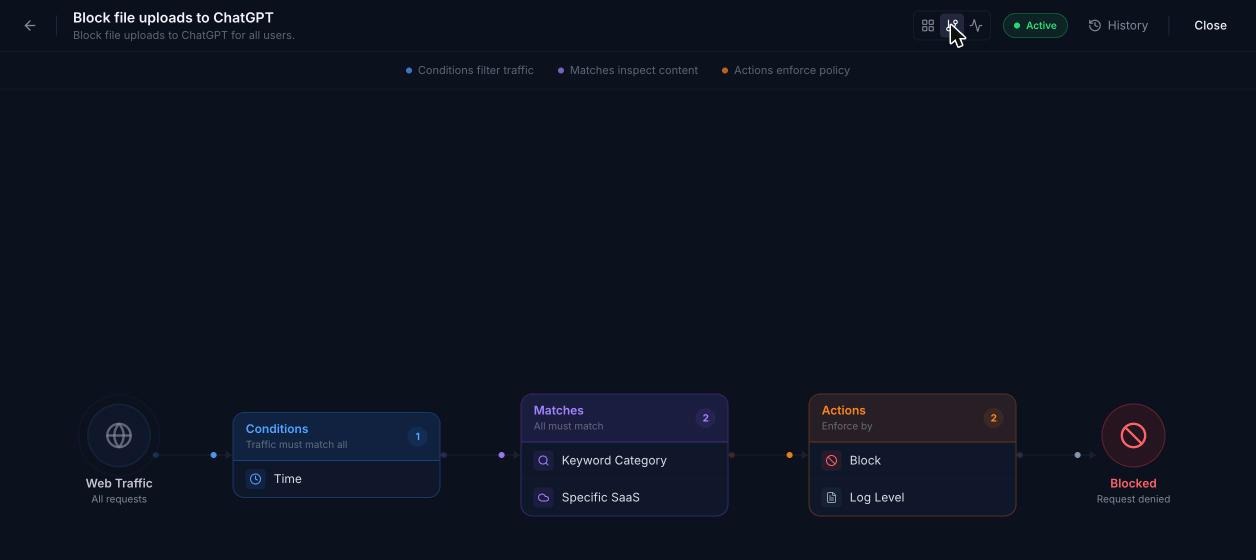
The three icons at the top of the editor switch between views:
- Builder view: the tile columns described above.
- Flow view: a diagram of how traffic passes through the rule's conditions, matches and actions to the final outcome.
- Web Activity preview: recent traffic relevant to the rule.
Saving changes and version history
As soon as you change a rule, a green Apply Changes button replaces Close at the top right of the editor. Click Apply Changes to save the rule. If you leave the editor without applying your changes, you're asked whether to Discard changes or Keep editing.
A snapshot of the rule is saved automatically each time you apply changes. Click History to see previous versions of the rule and revert to an earlier saved version if you need to.
Testing rules with the Simulator
Click Simulator above the rule list to expand it. Tick the conditions, matches and actions you're interested in, and click Apply to see which rules use them. Turn on Active rules only to ignore disabled rules.
Starting from an existing rule
Rule templates have been retired. When you click Create Rule you can instead:
- choose Copy existing to start from a copy of one of your rules, or
- choose Start blank, enter a Rule name, pick the Final action (Allow, Block, Warn, Redirect or Quota) and set the Position (before or after an existing rule).