Upgrading the USS Gateway from 20.04 LTS to 22.04 LTS.
Upgrade the USS Gateway from 20.04 to 22.04
This KB will take you through the process of upgrading the USS Gateway from Ubuntu 20.04 to 22.04
Pre-Upgrade steps
- Important! Follow the first part of the article, Migrating the SSL Intercept certificate to a new server and store the
.pemsomewhere safe. - If your USS Gateway is running on virtual infrastructure, ensure you take a snapshot in case you need to roll back.
- Backup Your Data:
- Use tools like
rsyncorDeja Dupto back up important files. - Backup critical system configurations if you have customised the system.
- Use tools like
- Ensure Disk Space:
- The upgrade process requires sufficient disk space (usually 1–2 GB additional for the upgrade files).
- Log in to the Command Line, then
sudo suto switch to the root account. - Check the current version of Ubuntu by typing
cat /etc/issue- you should see version 20.04 - Run these commands to ensure your system is fully updated before upgrading:
sudo apt-get update && apt-get upgradeSelectYif prompted. This will determine previous updates that need installing and install them.sudo apt dist-upgradeSelectYif prompted.sudo apt autoremoveSelectYif prompted.
- Upgrade to the latest version of the 20.04 USS Gateway. At the time of writing, this is 2.0.71 (see Download)
dpkg -l | grep ussgateway. This will confirm the current version of the USS Gateway software- If your version is not the latest, download the latest USS Gateway package by typing this command.
wget https://downloads.clouduss.com/gateway/packages/ussgateway_20.04_<VERSION>_amd64.debreplacing the<VERSION>with the latest release, e.g. 2.0.71 (see Download) - Update packages:
sudo apt updateAnd press Enter - Install new Gateway package:
sudo apt -f install ./ussgateway_20.04_<VERSION>_amd64.debreplacing the<VERSION>with the latest release, e.g. 2.0.71 (see Download) - Press
Ywhen prompted to install the new packages - Follow any further prompts and accept any defaults if asked
Perform the Upgrade
- Install the update manager:
sudo apt install update-manager-core and select Y if prompted.
- Edit the Update Manager file:
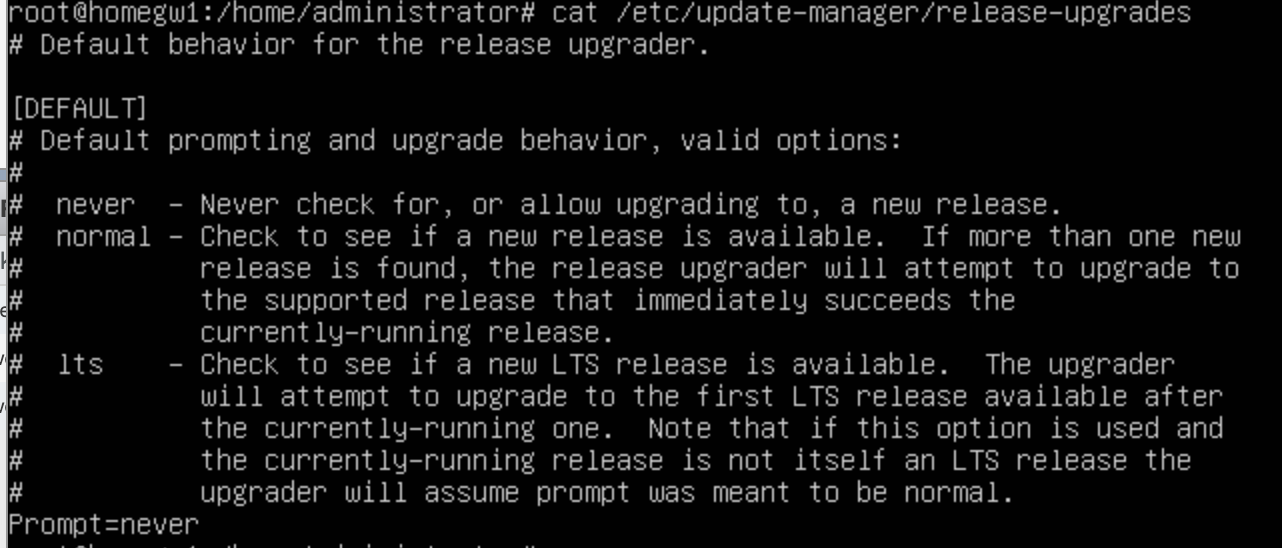
- Type to view the current default setting
cat /etc/update-manager/release-upgrades
- Type
nano /etc/update-manager/release-upgradesthis will allow the file to be edited. Use the arrow keys to move down to changePrompt=nevertoPrompt=lts - Press
control x, then Y to Save

- Select
enter, and then you will return to the command prompt.

- Begin the upgrade process.
- Type
sudo do-release-upgradeWhen prompted, press[ENTER]to continue. This will check what packages are available. - Press
Yto Continue. This will start the process of downloading files from Ubuntu.

- At this screen, select
Yes.

- At this screen, select
Yto keep the current version.
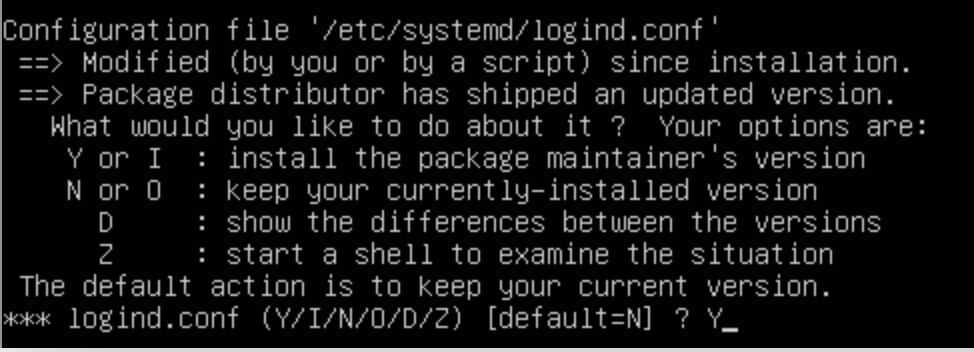
- At this screen, select
Yto keep the current version.
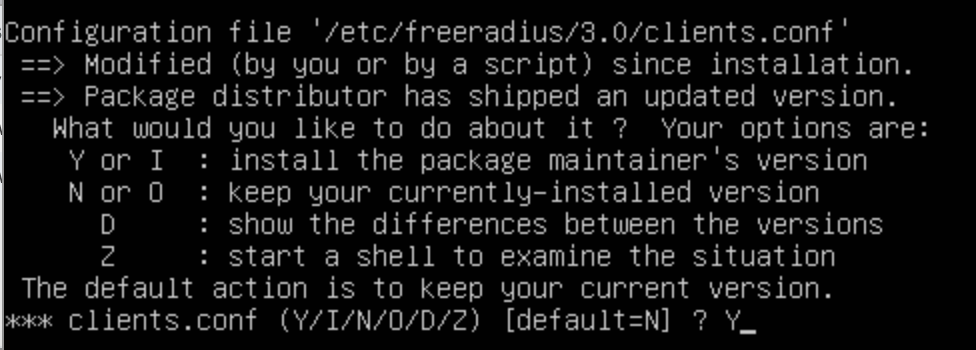
- At this screen, select
Yto keep the current version.
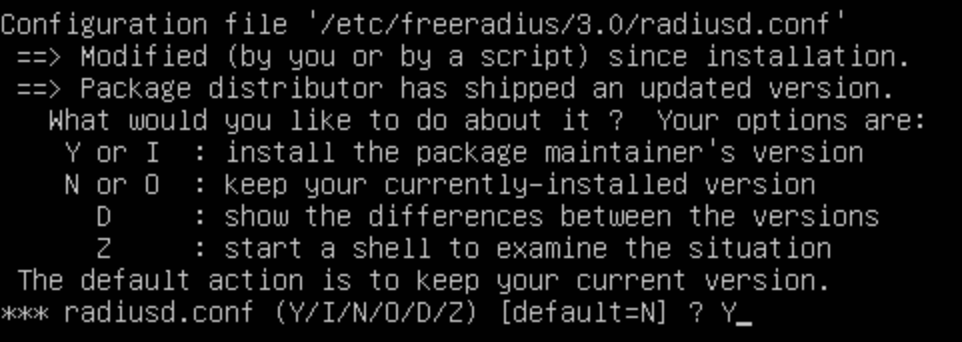
- At this screen, select
OKto keep the current version.
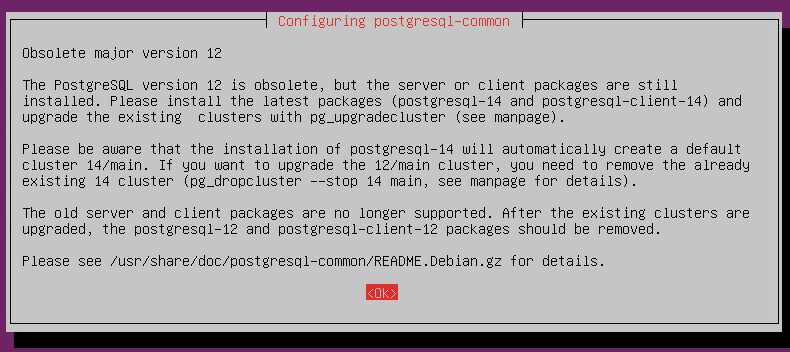
- At this screen, select
Yto remove the obsolete packages.
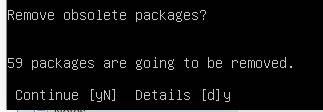
- At this screen, select
Yto Restart the USS Gateway and load the new version of Ubuntu.
- Log in to the Command Line, then
sudo suto switch to the root account. - Install the latest version of the 22.04 USS Gateway by running these commands. At the time of writing this is 2.0.71 (see Download)
- Download the latest USS Gateway package by typing this command.
wget https://downloads.clouduss.com/gateway/packages/ussgateway_22.04_<VERSION>_amd64.debreplacing the<VERSION>with the latest release, e.g. 2.0.71 (see Download) - Update packages:
sudo apt updateAnd press Enter - Install new Gateway package:
sudo apt -f install ./ussgateway_22.04_<VERSION>_amd64.debreplacing the<VERSION>with the latest release, e.g. 2.0.71 (see Download) - Press
Ywhen prompted to install the new packages - Follow any further prompts and accept any defaults if asked
- Check if the USS Gateway is now running the latest version. Type
dpkg -l | grep ussgateway - Log in to the Gateway User Interface to check the status of the system
- If the proxy service does not show as started, install the newest
libltdl7.
- Type
apt-get install libltdl7Then selectY - Once installed type:
systemctl start uss-squid5to start the proxy service.
Post-Upgrade steps.
Once the USS Gateway has upgraded, complete the steps below.
- Check the version of Ubuntu by typing.
cat /etc/issue- it should now show 22.04

- Check the Update Manager file.
- Type to view the current default setting
cat /etc/update-manager/release-upgrades,if it still shows thePrompt=ltsthen follow the steps below. - Type
nano /etc/update-manager/release-upgradesthis will allow the file to be edited. Use the arrow keys to move down to changePrompt=ltstoPrompt=never
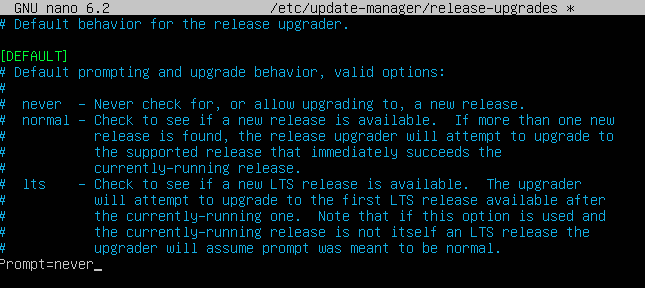
- Press
control x, then Y to Save,

- Select
enter, and then you will return to the command prompt.

- Type,
cat /etc/update-manager/release-upgradesto confirm the save has been completed and the Prompt=never
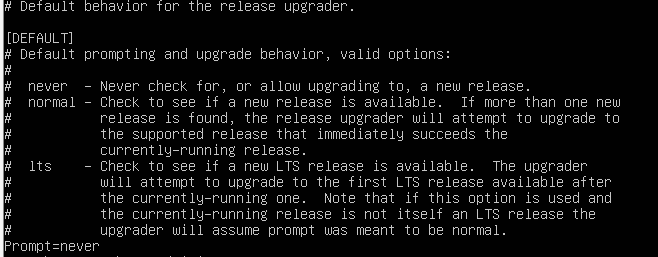
The USS Gateway has now completed the upgraded process to Ubunti 22.04 LTS.